 Link is copied
Actors
Actors, also called Outputs, are relays mounted on the TNA. They are usually connected to alarm panels to notify about alarm transmission statuses (e.g. if an alarm is confirmed, if an alarm cannot be sent, etc.).
Configure Outputs
Access level 3 or above is required to configure outputs.
To configure outputs, do the following:
- On the TNA Web Server, navigate to Alarming >
 Actors
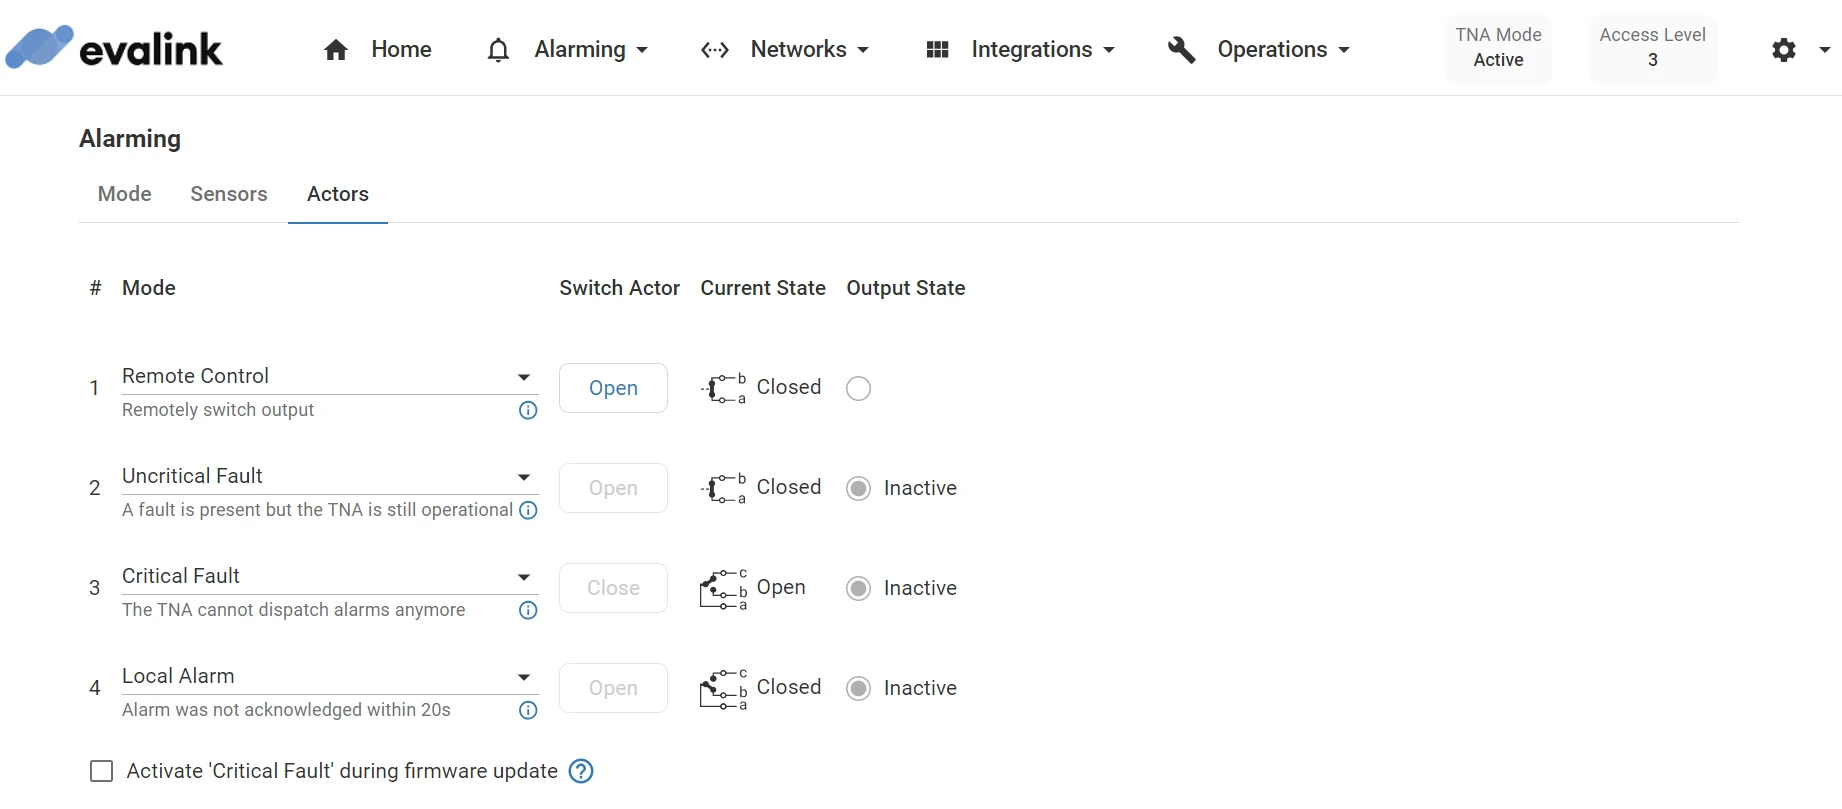
- Under # Mode, choose one of the following modes for each output:
| Remote Control | - | When an actor is configured as Remote Control, it is not affected by TNA operation or alarm transmission. It can be manually triggered by a user. | A user sends a command to open or close the relay from evalink talos or using the TNA Web Server. |
| Uncritical Fault | Open | This actor is activated when a fault occurs but the TNA is still able to operate and send alarms. | This is triggered when:
|
| Critical Fault | Closed | This actor is activated when a critical fault occurs on the TNA and it is not able to send alarms. Note: This functionality can only be configured on Actor #3 because of hardware differences for the critical fault actor. | This is triggered in case of:
|
| Local Alarm | Open | This actor is activated if an alarm is not acknowledged by evalink talos after 20 seconds1. It is deactivated after receiving acknowledgment from evalink talos. Note: Local Alarm and Negative Acknowledge cannot be used at the same time. | This is triggered when an alarm is not acknowledged after 20 seconds. |
| Positive Acknowledge | Open | This actor is activated for 2 seconds in response to each sensor activation. It serves as an acknowledge machine for sensors – it indicates the sensor change has been detected by the TNA. | This is triggered when there is a change in sensor alarm state. |
| Negative Acknowledge | Open | This actor is activated for 2 seconds if an alarm is not acknowledged by evalink talos after 100 seconds. If there is no connection available but an alarm is generated, the actor is activated without delay and repetitions are not performed. All generated alarms are handled by Negative Acknowledge actor separately. This means that 100 seconds delay is tracked for each alarm and an indication is triggered (if necessary) for each alarm separately. Note: Local Alarm and Negative Acknowledge cannot be used at the same time. | This is triggered when:
|
1 With configurable delay time. The actor only switches to fault when the cause still persists after the delay time has expired.
-
For Remote Control mode, click on Open or Close under Switch Actor
The information about the state of each actor is displayed under Current State and Output State.
-
(Optional) The critical fault is triggered in case of a sudden TNA power off or a planned reboot. By default, it is not activated during a TNA reboot caused by a firmware upgrade.
Select the checkbox to trigger the Critical Fault contact during the TNA reboot after a firmware upgrade.

-
In some cases, it is not necessary to activate the actors immediately.
Define a buffer duration to delay the activation under Delay for the following:

| Local alarm | 0 seconds | If an alarm is not acknowledged within this additional delay, the actor is activated. As an example, if the delay is set to 5 seconds, the actor will be activated if an alarm is not acknowledged by evalink talos after 20 + 5 seconds. |
| Critical fault | 10 seconds | If the issue is not resolved within this delay, the actor is activated. |
| Ethernet disturbance | 10 seconds | If the connection is disturbed and not restored within this delay, either Uncritical Fault output or Critical Fault output is activated dependent on the configuration. |
| Mobile disturbance | 10 seconds | If the connection is disturbed and not restored within this delay, either Uncritical Fault output or Critical Fault output is activated dependent on the configuration. |
-
Click on Save
-
(Optional) Click on Undo to reset the parameters to their previous values
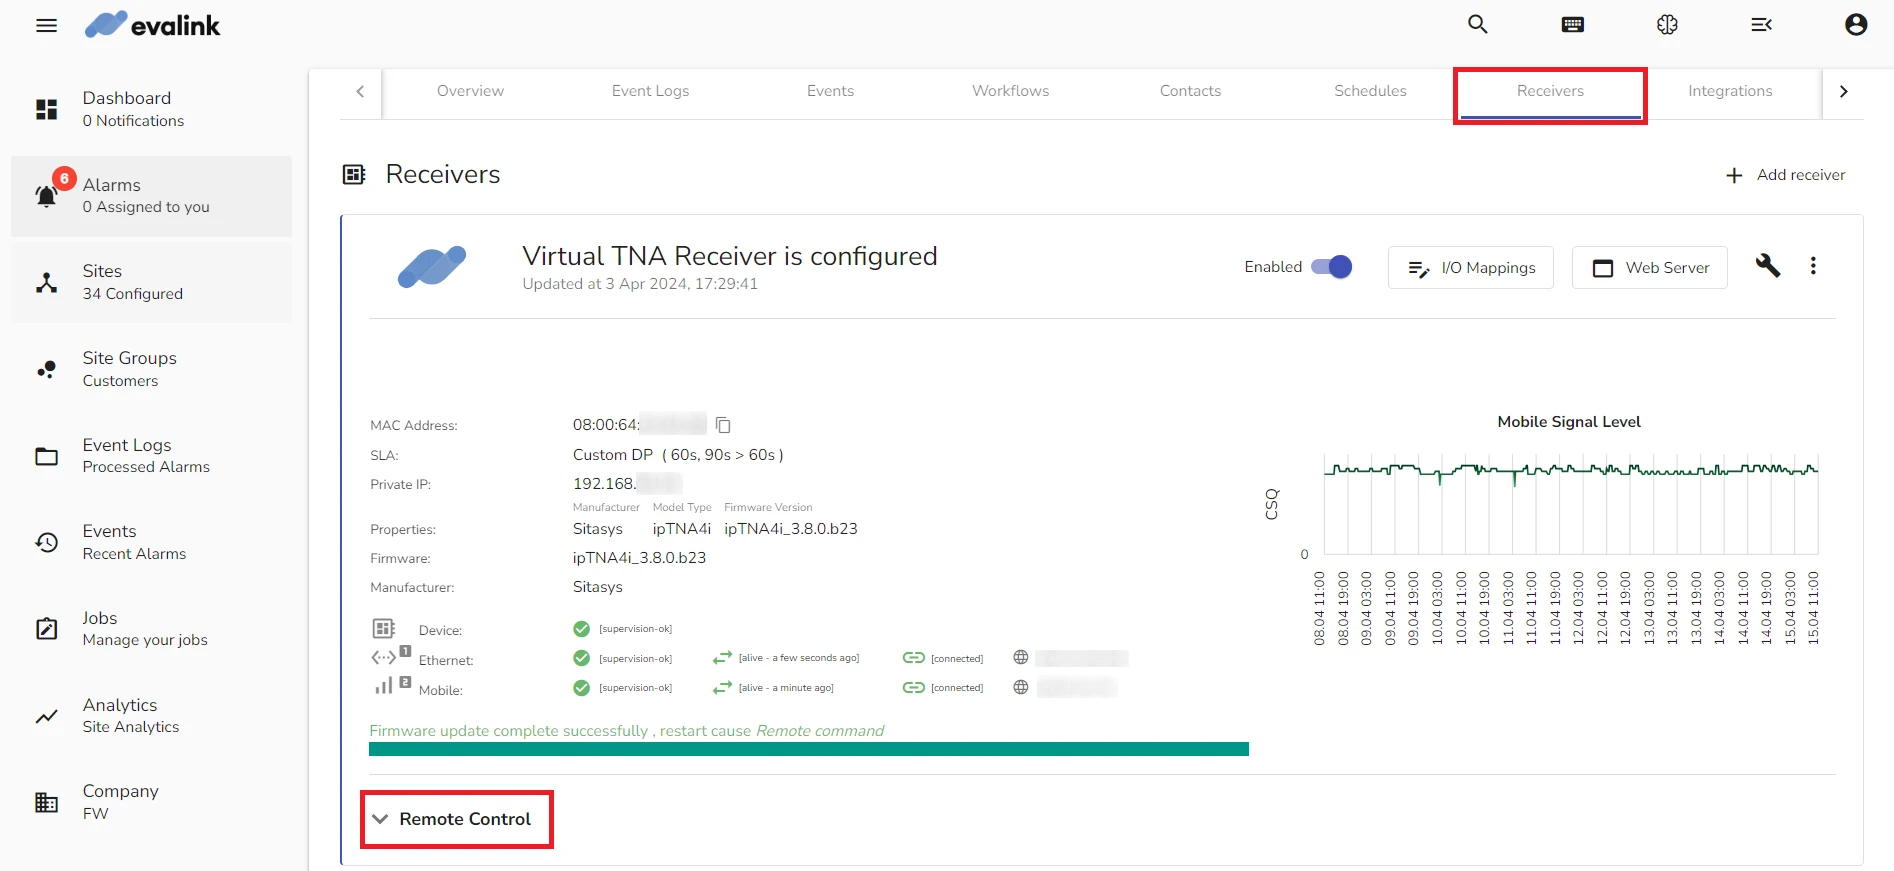
To view or modify the current configuration for outputs from evalink talos, do the following:
-
On your evalink talos account, go to Sites > [site] > Receivers > tab
-
Click on Remote Control at the bottom of the tab
- Under Outputs Components, you can view the Output Mode and Output State for each of the 4 outputs
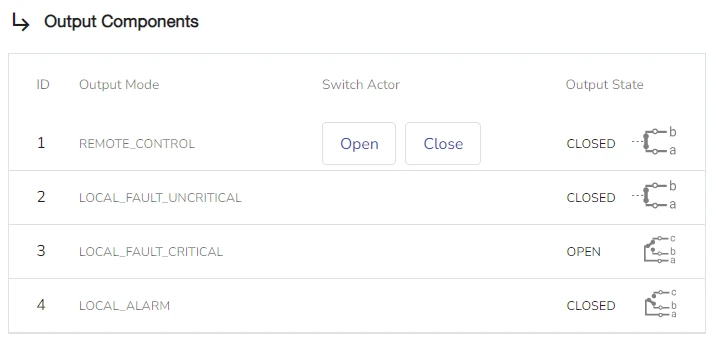
- To change the state for an output, click on Open or Close under Switch Actor