 Link is copied
Configure Ethernet
Configure Ethernet 0
Eth0 is the primary Ethernet interface that is present on all TNA devices. It is used to connect to evalink talos and to configure integrations.
The DHCP client is enabled by default. So, the IP address and all related network parameters are automatically set and you can view them on the TNA Web Server under Networks > Ethernet 0
Access level 3 or above is required to configure Eth0.
If you need to set specific parameters for Eth0, do the following:
-
On the TNA Web Server, navigate to Networks > Ethernet 0
-
If it is enabled, disable Automatic (DHCP)
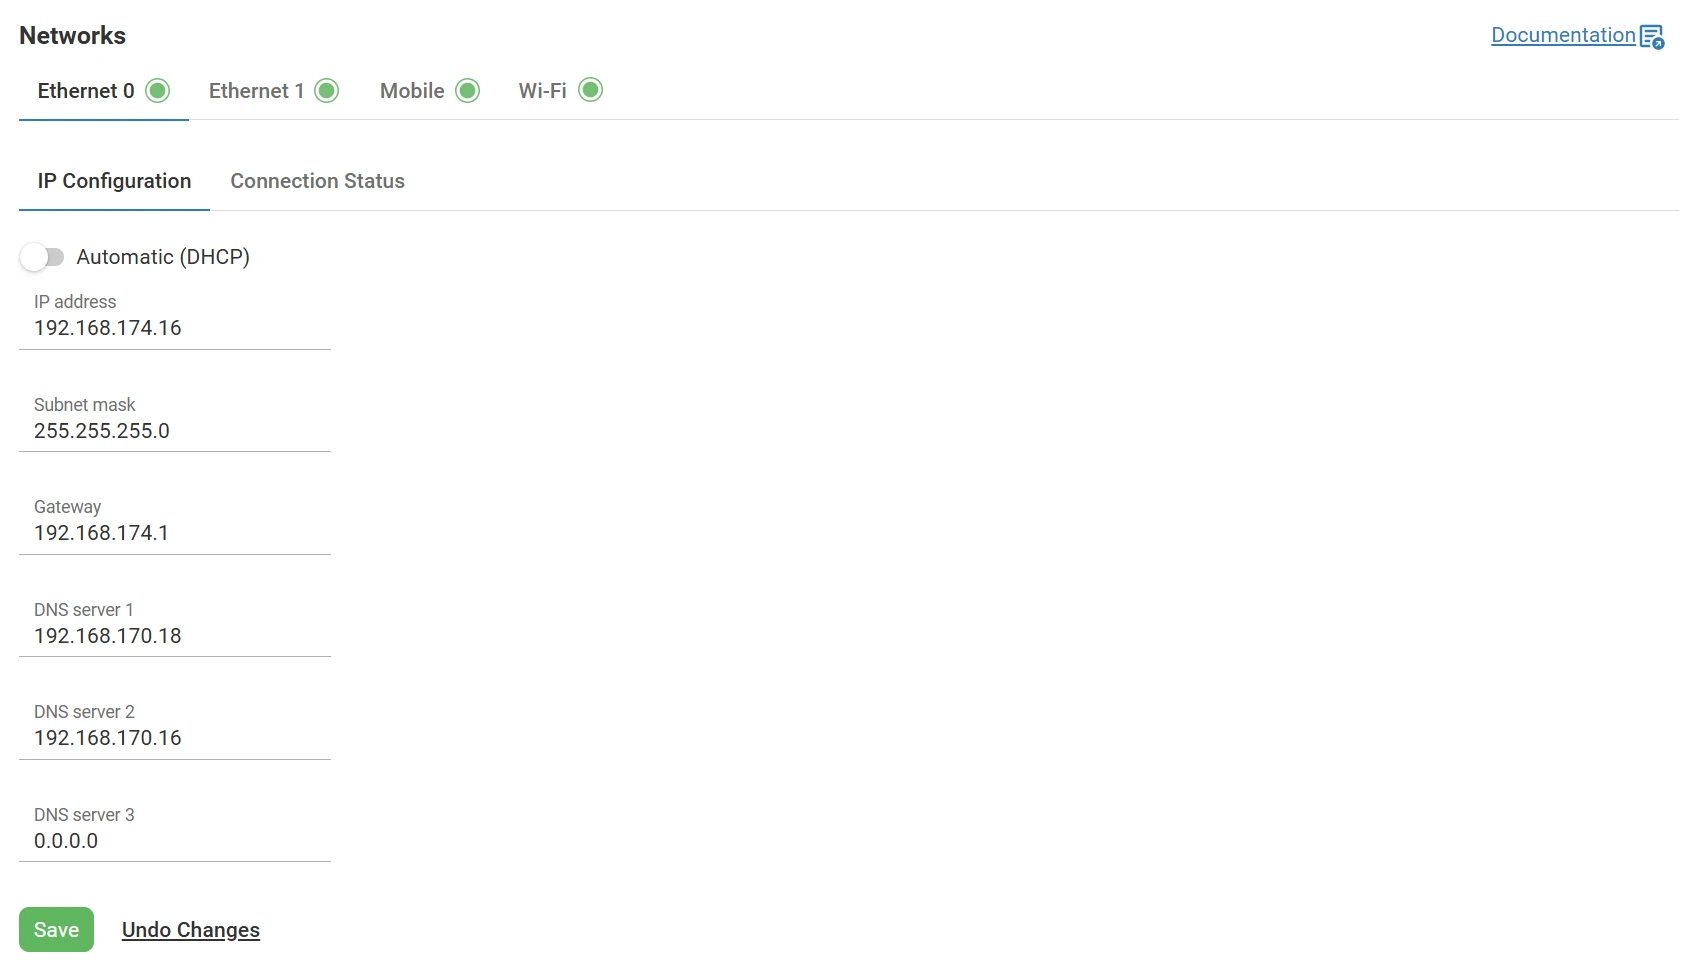
- Fill in the required parameters in the corresponding fields:
- IP address
- Subnet mask
- Gateway
- DNS server 1
- DNS server 2 (Optional)
- DNS server 3 (Optional)
-
Click on Save
-
(Optional) Click Undo changes to reset the parameters to their previous values
Connection Status
The connection status tab is used to check the status of Eth0 by going through 4 checklist steps:
| Ethernet cable | In progress: Checking if an Ethernet cable is connected... Failed: No Ethernet cable is connected Success: The Ethernet cable is connected | ||
| Automatic IP configuration | In progress: Getting an IP address... Failed: Failed to get an IP address Success: The IP address is set Note: If no DHCP server is present when DHCP is enabled, this step will stay In progress because the TNA still tries to set an IP address | ||
| Static IP configuration | In progress: Setting the IP address... Failed: Failed to set the IP address Success: The IP address is set | ||
| Connection availability to evalink | In progress: Connecting... Failed: Failed to connect to evalink (e.g. ports are blocked, the gateway is wrong...) Success: Connection to evalink is available | ||
| Connection to evalink | In progress: Connecting to evalink... Failed: Failed to establish connection to evalink (e.g. the connection is closed by evalink talos, the TNA is disabled or the instance is not created on evalink talos...) Success: Connection established | ||
Configure Ethernet 1
Access level 3 or above is required to configure Eth1.
Eth1 is the secondary Ethernet interface present on ipTNA4i and possible to add using a USB to Ethernet adapter on TNA Connect and TNA connect V2 devices.
Eth1 is used to establish wired connections to isolated private networks without internet access. It can be configured under Networks > Ethernet 1 on the TNA Web Server.
All connected devices through Eth1 are completely isolated and can only transmit signals to evalink talos unless Port Forwarding is enabled in the Integrations.
IP Configuration
Ethernet 1 must have an assigned IP address and a subnet mask. The default values are 192.168.20.136 for the static IP address and 255.255.255.0 for the subnet mask.
To change the default values, do the following:
- On the TNA Web Server, navigate to Networks > Ethernet 1
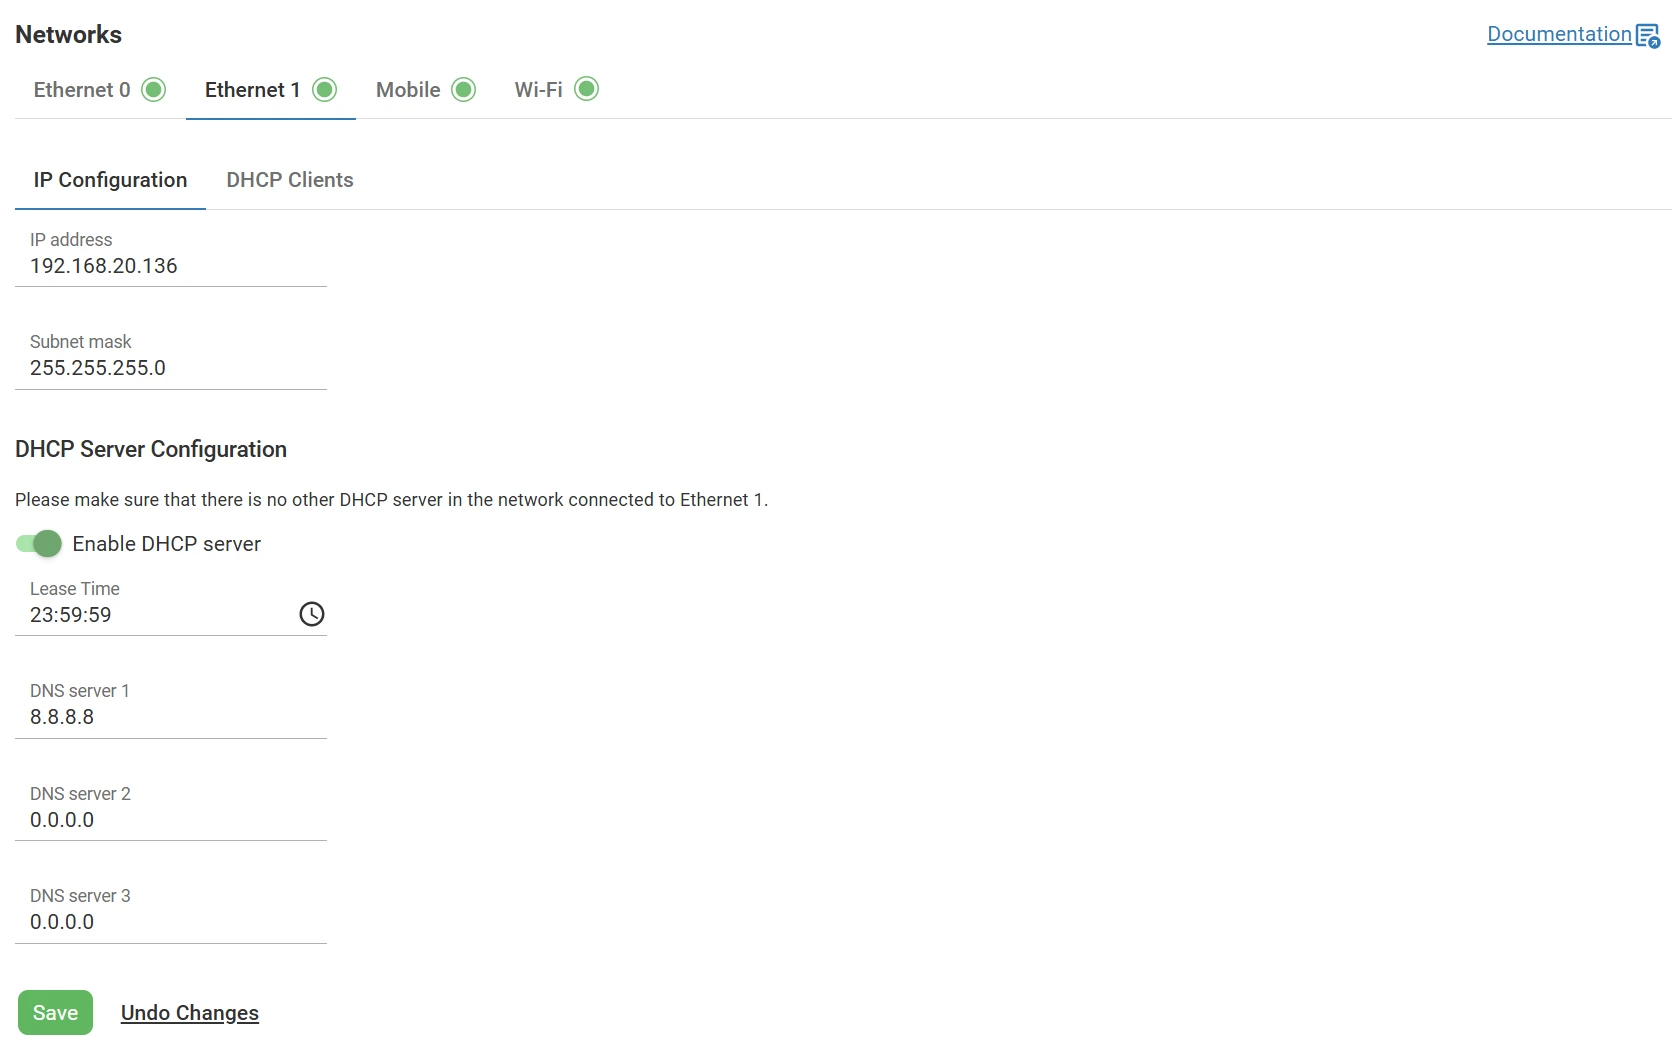
- On the IP Configuration tab, enter an IP Address and a Subnet mask in the corresponding fields
Ethernet 1 must be assigned an IP address that is outside the subnet range of Ethernet 0.
All TNA devices connected to the private network must use IP addresses within the subnet of Ethernet 1 and have the static IP address of Ethernet 1 as a gateway.
As an alternative to static IP address configuration, it is possible to enable the DHCP server for Ethernet 1:
Before you enable the DHCP server on Ethernet 1, make sure there is no other DHCP server enabled in the private network.
-
On the IP Configuration tab, toggle Enable DHCP server
-
Under Lease Time, you can change the duration the IP address is assigned by the DHCP server by clicking on and entering the value for the hours, minutes, and seconds. The default value is 23:59:59
-
Configure up to 3 DNS server addresses (e.g., 8.8.8.8 for Google DNS). Use 0.0.0.0 if not needed.
-
Click on Save
-
(Optional) Click on Undo changes to reset the parameters to their previous values
DHCP Clients
If the DHCP server is enabled on Eth1, the DHCP Clients tab becomes available. This section provides an overview about clients that received DHCP parameters. If the lease time of a client expires, it is removed automatically from the list.
The following information is shown for each DHCP client:
-
The assigned IP address
-
The client MAC address
-
The client name if it is provided
-
The lease expiration time
There is an option to assign a static IP address to a particular DHCP client by reserving an IP address for this client. This means that each time the client requests an IP address from the DHCP server, it will provide this reserved IP address. This is useful when a client needs to always have a known IP address.
To reserve a static IP address for a client, do the following:
-
On the TNA Web Server, navigate to Networks > Ethernet 1
-
Click on DHCP Clients
-
Under Reservations, click on

-
Enter the IP address, the Mac address, and a Description in the corresponding fields
-
Click on Save
You can use the arrow ![]() next to any record from the Clients table to copy it to the Reservations table.
next to any record from the Clients table to copy it to the Reservations table.