More Operations with Schedules
The operations described in the sections below are performed on the schedule page (see section View a Schedule > Navigate to the Schedule Page).
The steps are the same for global, site group- and site-level schedules.
Export a Schedule
To export a schedule:
-
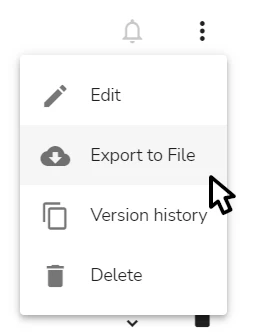
Click on the three dots icon at the right side of the schedule page
-
Select Export to File to start the download
The schedule is downloaded as a JSON file with a name Talos-Schedule-[schedule_name].
You can later import the downloaded schedule to one of your new evalink talos schedules using the import icon , see section Manage Schedules > Create a Schedule for details.
View Version History of a Schedule
You can view the schedule version history and restore one of the previous schedule versions – for example, in order to undo the unwanted changes.
To view the schedule version history:
-
Click on the three dots icon at the right side of the schedule page
-
Select Version history
-
On the version history page that opens, you can:
- scroll the list of the previous versions of the current schedule
- assign a name to a version. To do so
- click on the three dots icon that appears to the right of the version on mouse hover
- specify the version name in the field that expands
- press Enter
- restore one of the previous schedule versions. To do so, select the version you wish to restore and click Restore chosen version
Clicking the Restore chosen version button closes the dialog. Note that the button is active only when a version different from the current one is selected.
-
To return to the schedule page without restoring a version, click on the <- Back link in the upper-left part of the dialog
After applying changes to version history, you do not need to click Save Schedule.
Check and Edit the Schedule Time Zone
The time zone that the schedule uses is displayed above the schedule on the schedule page (see the figure below).

By default, a schedule is created for the following time zones:
- for site group-level and global schedules – the browser time zone at the moment of the schedule creation
- for site-level schedules – the time zone specified in the site settings. If not specified, the browser time zone is used (same as above)
The figure below shows how to edit the schedule time zone:
To edit the time zone of a schedule:
-
On the schedule page, click on the three dots icon at the right side of the page and select Edit
-
In the editing dialog that opens, in the Time Zone field, select the desired value from the drop-down list
You may speed up the time zone search by typing the first letters of the city/area in the search field.
-
Click OK to close the dialog
-
Back on the schedule page, click Save Schedule to apply the changes
The time zone doesn't change after you edit it and click OK, changes are applied only after you click Save Schedule.
Check and Edit the Schedule Buffer Times
If buffer times (see section Schedules Overview > Buffer Times) are set for a schedule, they are displayed on the schedule page as follows:
-
in the Calendar view – as margins around each schedule entry
A blue margin indicates a positive buffer time, a red margin – a negative buffer time applied
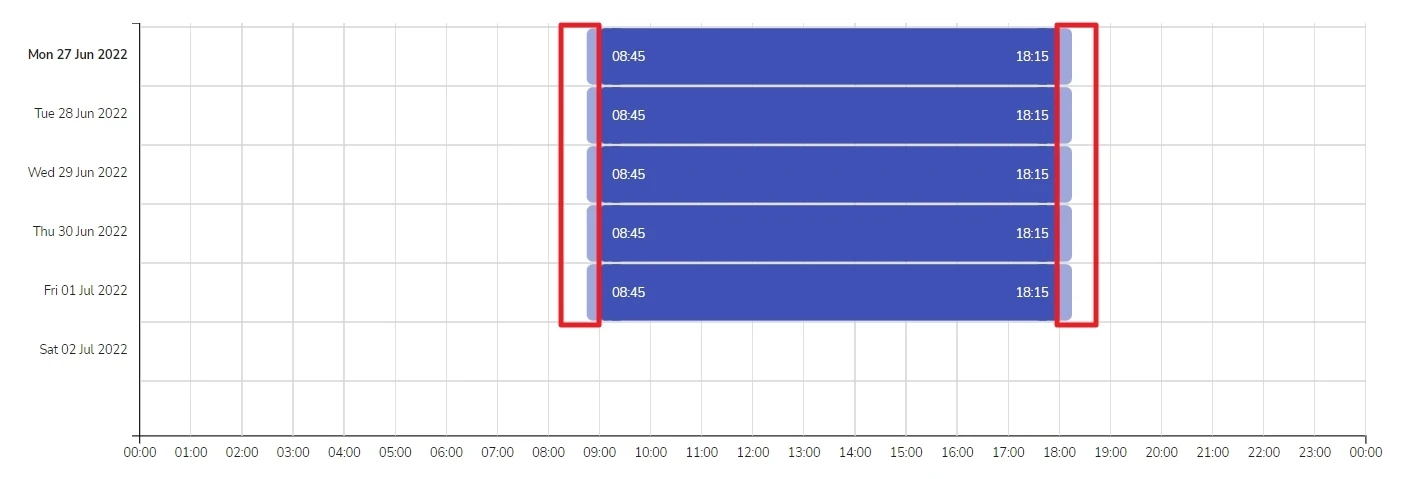
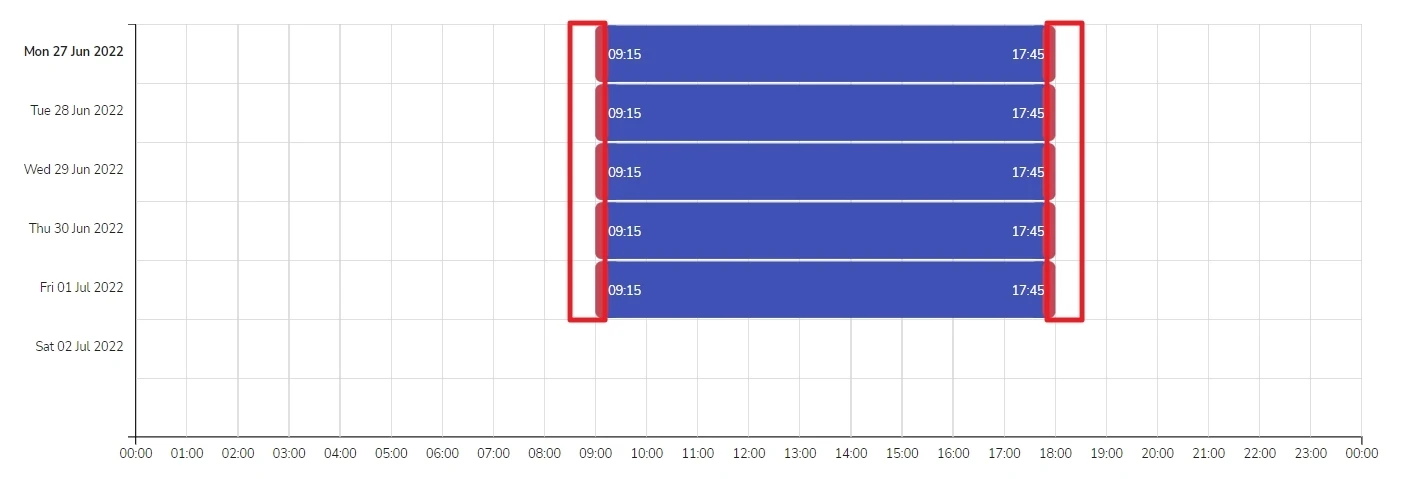
No margin indicates zero buffer time (the default option).
-
in the List view – the buffers applied to the start and end times of the schedule are indicated separately under the list of entries, see the figure below
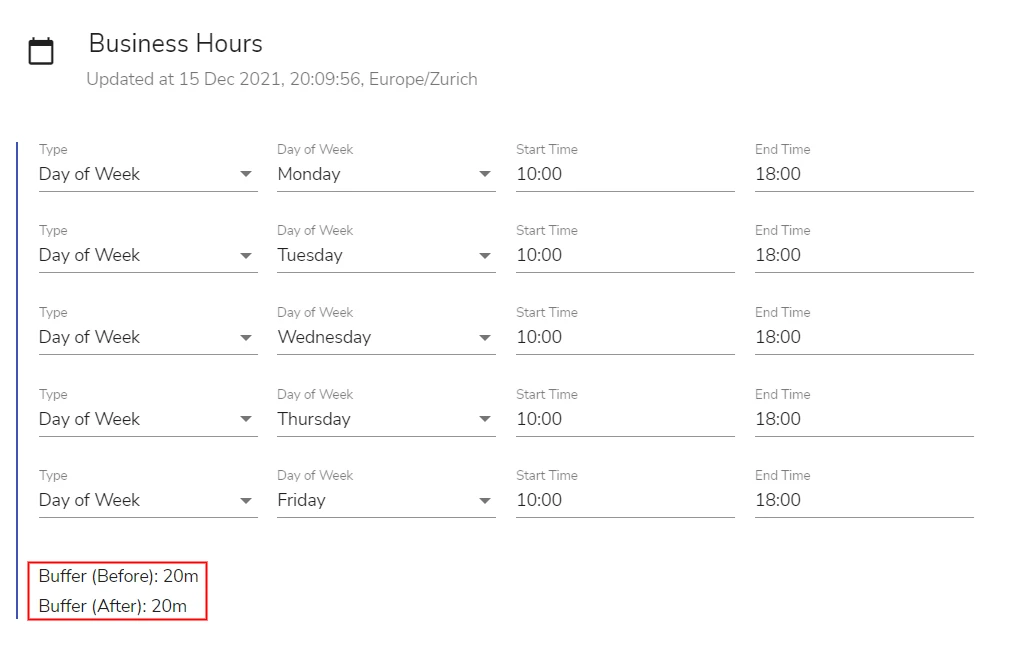
To add, edit, or remove the buffer times for an existing schedule:
- On the schedule page, click on the three dots icon at the right side of the page and select Edit
- In the dialog that opens, edit the Buffer Minutes (Before) and Buffer Minutes (After) fields
- Click OK to close the dialog
- Back on the schedule page, click Save Schedule to apply the changes
Specify Schedule-Generated Alarms
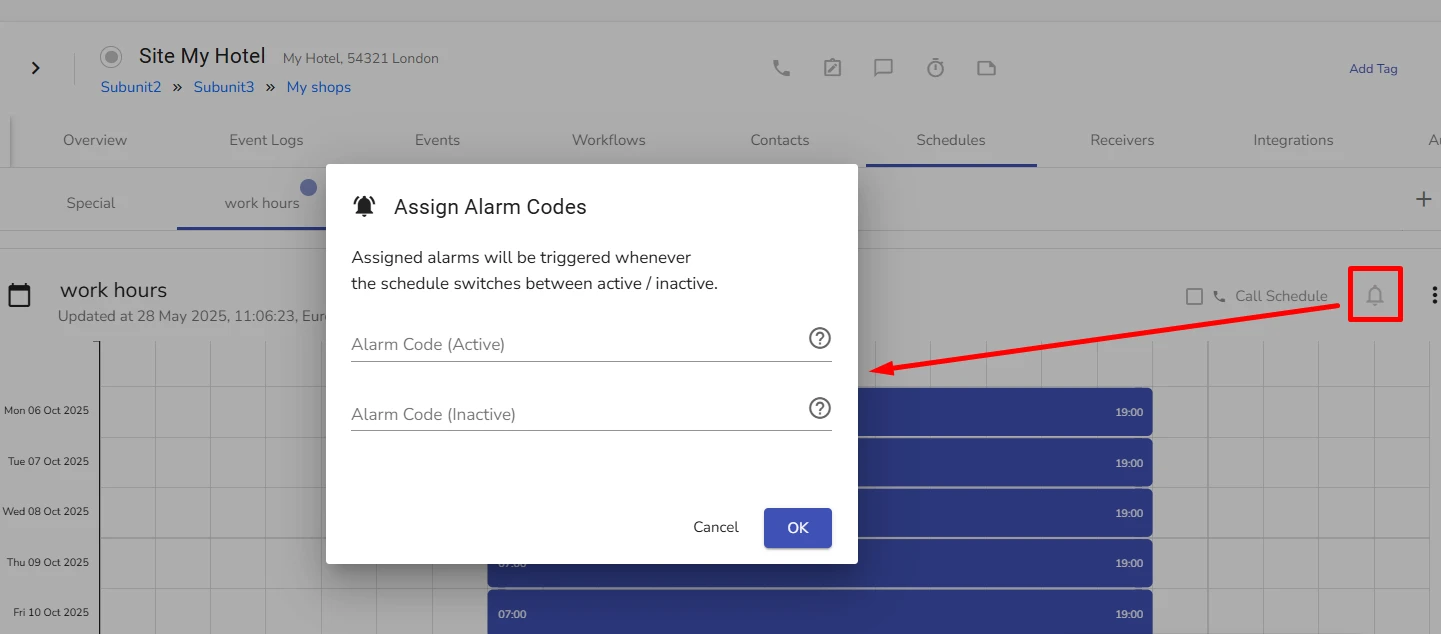
For each schedule, you can configure alarms which evalink talos generate when a schedule switched from Active to Inactive and vice versa.
To specify such an alarm:
- Click the icon next to a schedule record
The schedule alarm configuration dialog opens.
-
Specify alarm codes for Active and Inactive schedule statements
-
Click OK
Using Alarm Expression Syntax to Specify Schedule-Generated Alarms
For details about Alarm Expression Syntax, see Alarm Expression Syntax.
Below are examples of using Alarm Expression Syntax to specify schedule-generated alarms.
Using parameters with schedule-triggered alarms
rigger an FA for zone 3 on schedule activation, and a restore from partition 5 on deactivation:
FA {zone = 3}
130 {partition = 5}
Sending alarms to a specific receiver
You can trigger an FA with a specific virtual receiver account number on schedule activation, and a corresponding restore on schedule inactivation.
+601 {headers.x-receiver=flexc:12345678}
-601 {headers.x-receiver=flexc:12345678}
 Link is copied