View a Schedule
The schedule page displays the details of a particular schedule.
Navigate to the Schedule Page
To view the schedule page:
-
Open the list of the schedules created for the appropriate entity (site, site group, or Company)
- for a site – in the main menu, go to Sites > [site] > Schedules
- for a site group – go to Site Groups > [site group] > Group Schedules
- for a list of global schedules, go to Company > Global Schedules
You can see the list of schedules in the upper part of the page. Each schedule is displayed on a separate subtab. Use the arrows to navigate across the list.
-
To open a particular schedule, click on the subtab with the schedule name
Schedule Page
A typical schedule configuration is shown on the figures below.
Two schedule views are available:
- the Calendar view (the default view if a schedule contains Day of Week entries)
- the List view (the default view otherwise)
Calendar View
In the central part of the page, the configured schedule is displayed in a calendar widget, scrollable and searchable by date.
By default, the schedule for the current week is displayed.
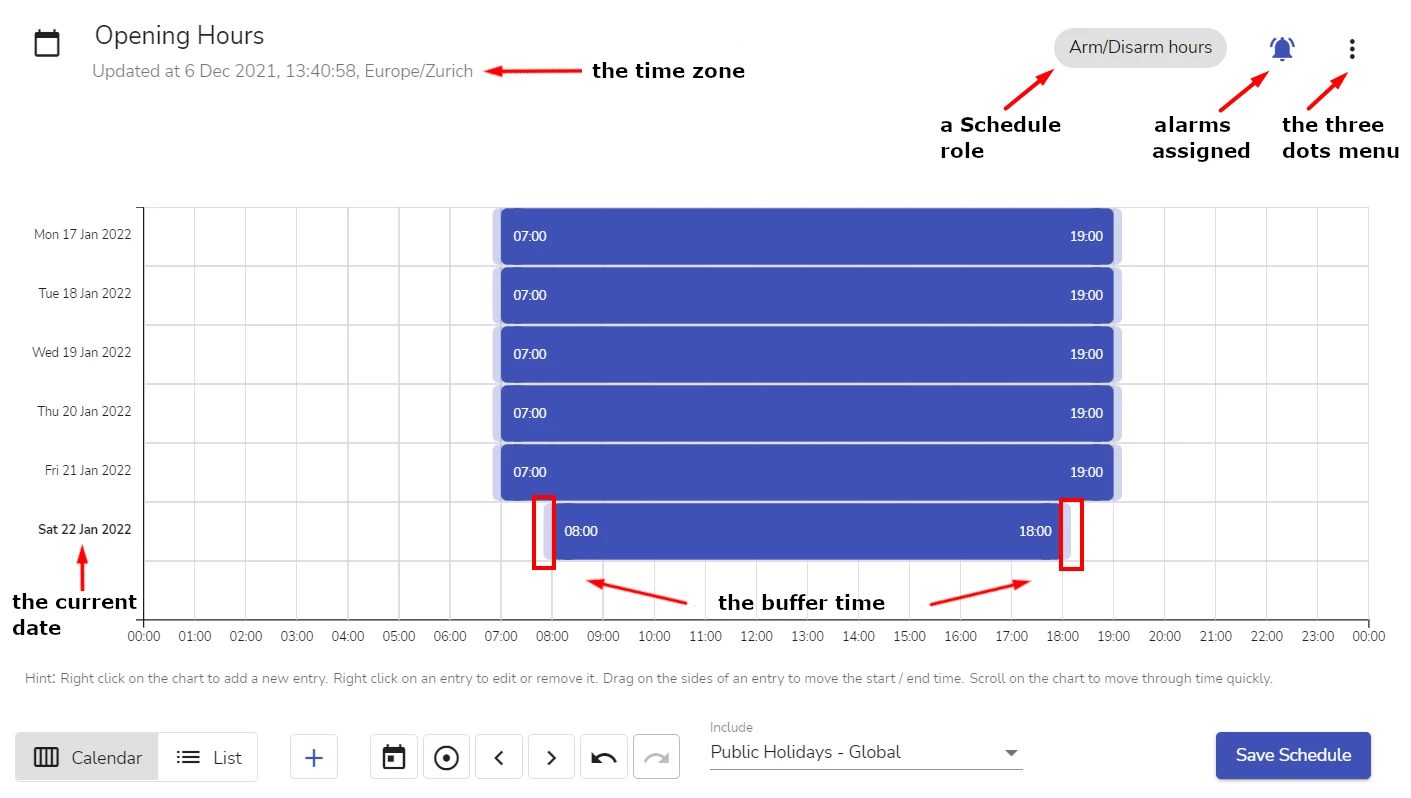
Each line corresponds to one day, the current date is highlighted in bold in the grid. Each schedule entry is shown as a separate bar, with start and end date specified.
The buffer times, if set, are displayed around the entry as margins. A blue margin indicates a positive buffer time (set outside the schedule hours), a red margin indicates a negative buffer time (set inside the schedule hours). The start and end time displayed on each entry bar takes buffer times into account and shows the actual time when the schedule activation and deactivation alarms (if set) will be triggered.
The following operations are available from the widget (see the figure above):
-
edit a schedule entry by dragging the edge of the bar with your mouse
-
edit or delete a schedule entry
-
by clicking on the entry and performing the appropriate operations in the schedule editing dialog that opens
OR
-
by right-clicking on the entry and selecting Edit Entry or Remove Entry from the context menu
-
-
add an entry by right-clicking on an empty space for the corresponding day and selecting Add Entry
-
copy an entry and paste it to another day via a standard copy / paste context menu operation, available upon a right click
You can navigate across the calendar using the navigation buttons described below.
Control elements and indications above the list:
-
an indication of a time zone for which the schedule is valid
-
an indication of a Schedule Role assigned to the schedule (if assigned)
For information on Schedule Roles, see section Schedules Overview > Schedule Roles.
-
the alarm button , available for site-level schedules only
The button opens the dialog where Administrator and Manager can configure the alarms to be triggered when the schedule changes its state from Active to Inactive or vice versa.
An active alarm button means that an alarm is assigned to the start, end time of the schedule, or both. If no alarms are assigned, the button is inactive .
-
the three dots icon provides access to the supplementary operations described in section More Operations with Schedules
Control elements and indications below the list:
- the List button – switches the schedule to the List view
- the calendar navigation buttons
- the Today button – scrolls the calendar to the current week, the current day is highlighted in bold
- the Select date button – opens the calendar dialog (by default, for the current month), in which you can select a desired date. The calendar in the widget is displayed starting from the specified date
- the Back and Next buttons – scroll the calendar in the widget one week forward or backward
- the Add Entry button allows to create a new schedule entry, see details in section Manage Schedules > Add a Schedule Entry
- the Undo and Redo buttons
- the Save Schedule button
- the Include option allows to include or exclude schedules to/from the current schedule by selecting or deselecting the schedules in the list
List View
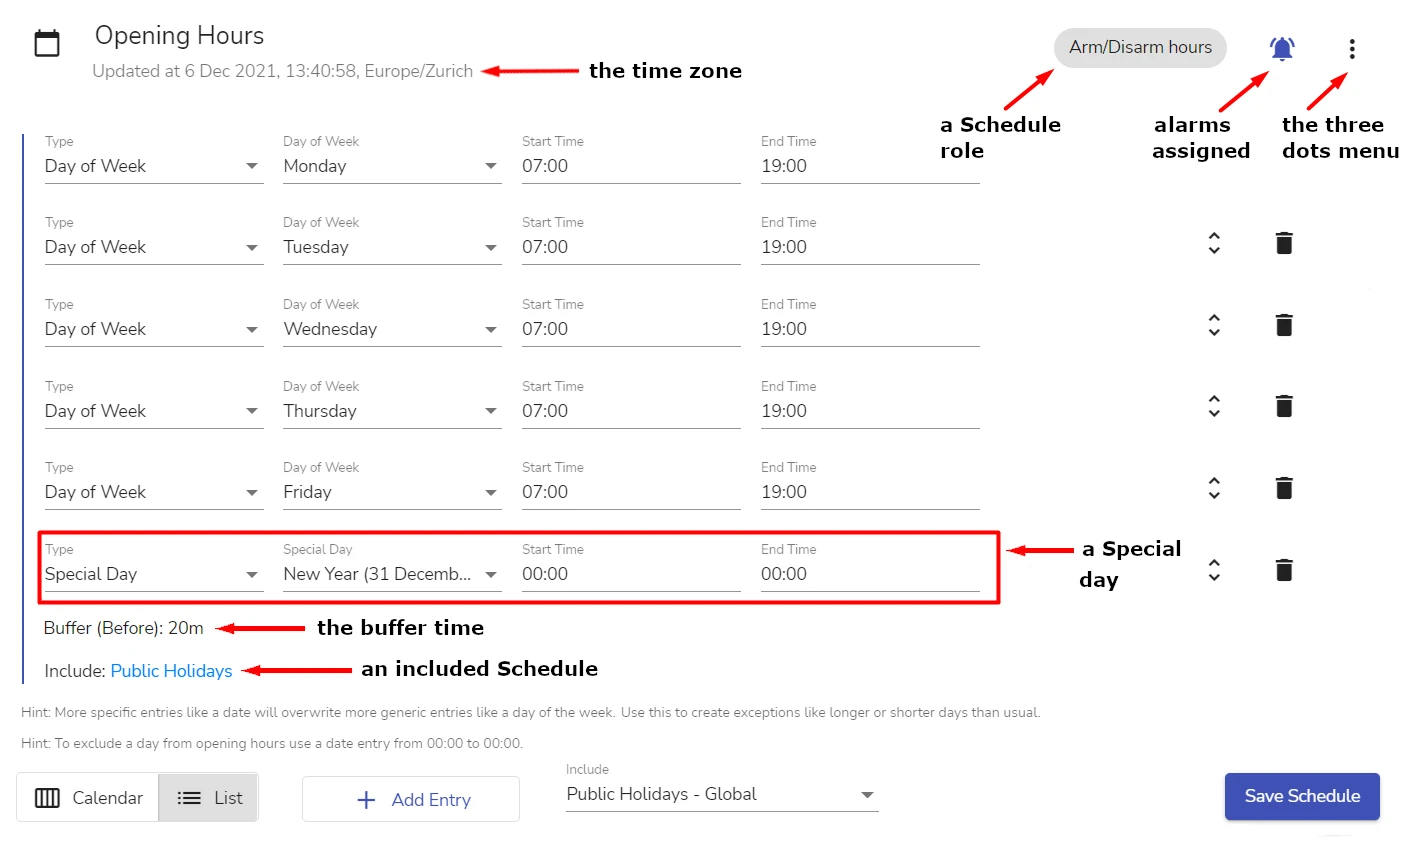
In the central part of the page, the schedule for the current week is displayed in the form of a list.
A Special Day (see section Work with Schedules > Special Days), if added, is displayed as one of the schedule entries.
Control elements and indications above the list:
-
an indication of a time zone for which the schedule is valid
-
an indication of a Schedule Role assigned to the schedule (if assigned)
For information on Schedule Roles, see section Schedules Overview > Schedule Roles.
-
the Alarm button
See the button description in section Calendar View above.
-
the three dots icon provides access to the supplementary operations described in section More Operations with Schedules
Control elements and indications below the list:
-
the Calendar button – switches the schedule to the Calendar view
-
an indication of the schedule buffer time, if set
A negative buffer time is indicated by a minus, for example: Buffer (Before): -15m.
-
links to the included schedules (if any)
You can view the hours of an included schedule by clicking on its link.
-
the Add Entry button allows to create a new schedule entry, see details in section Manage Schedules > Add a Schedule Entry
-
the Include option allows to include or exclude another schedules to/from the current schedule by selecting or deselecting the schedules in the list
-
the Save Schedule button
For more information about the operations available on the schedule page, see sections View a Schedule > Schedule Page, Manage Schedules, and More operations with Schedules.
View Schedule Details when Processing an Alarm
The details below can be viewed while processing a Manual Workflow that includes an Add Schedule Entry step.
By default, the schedule displayed in a workflow is opened in the Calendar view (the Calendar tab).
View Buffer Times
For details about buffer times, see section Schedules Overview > Buffer Times.
The figure below shows buffer times, as displayed in the default Calendar view of a schedule:
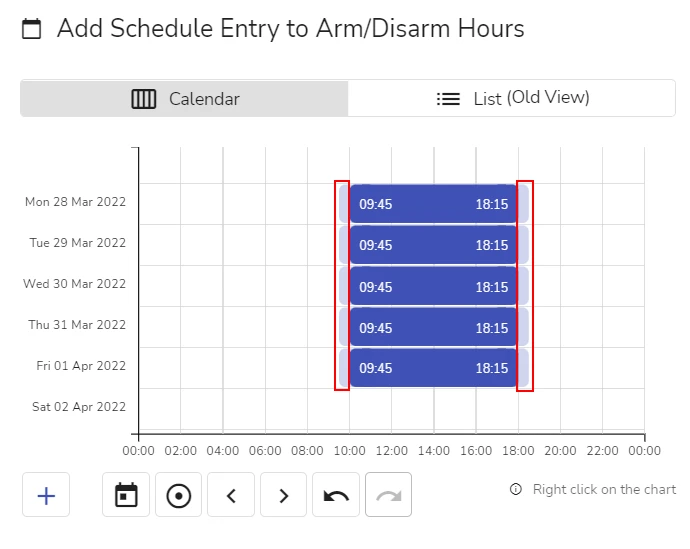
In the figure above, positive buffer times (15 minutes for both start and end) are set.
Negative buffer times (for example, -15 minutes) would be displayed as red margins. No margins indicate zero buffer times set.
The figure below shows buffer times, as displayed in the List view of a schedule (the List (Old View) tab):
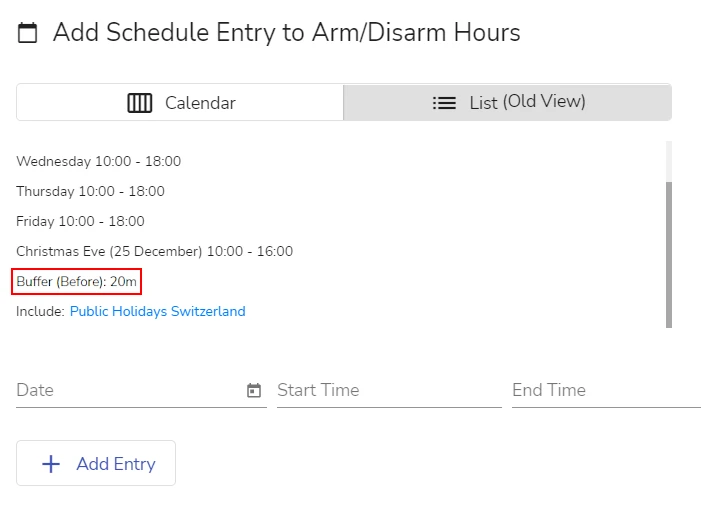
In the figure above, a buffer (a positive value, 20 minutes) is set for the schedule start time only.
View Exceptions from Regular Hours
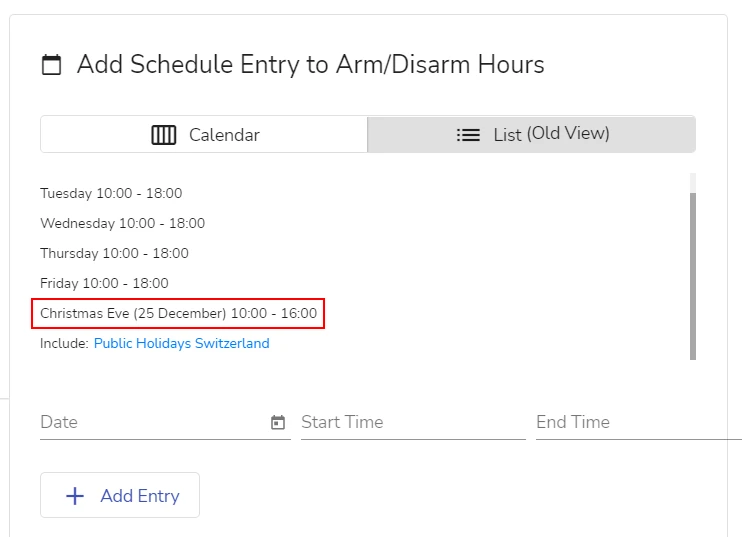
Exceptions from the regular schedule are better viewed in the List view (the List (Old View) tab).
The exceptions included directly into the schedule are shown as separate records in the list, see the figure below:
An included schedule looks as follows:
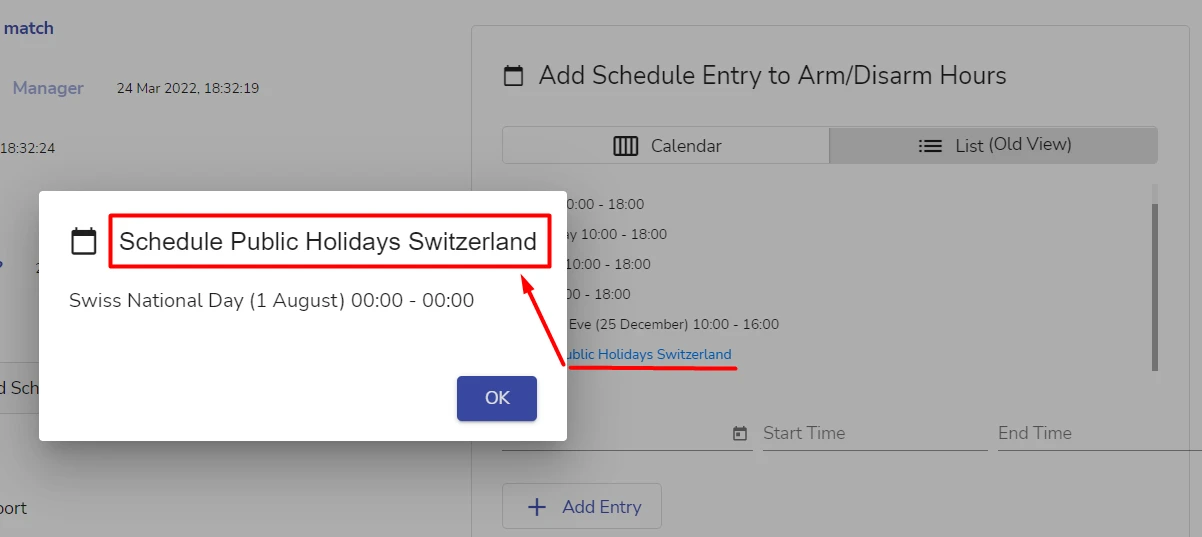
The dialog with the included schedule details is opened when you click on the included schedule link. The dialog can be opened from the List (Old View) tab only.
00:00-00:00 indicates a day off. For details on the time notation, see section Advanced Topics > Schedule Entries Time Format.
 Link is copied