Work with Webhooks
Webhooks Overview
In evalink talos, Incoming Webhook integration allows you to create, configure and trigger incoming webhooks.
Webhooks act like a callback or push mechanism that sends HTTP requests to a specified URL when a certain event occurs. This allows you to automatically trigger alarms through a device or an endpoint, make API calls to evalink talos or third-party apps.
Using Incoming Webhook integration you can:
- Configure and receive real-time notifications for various events: user actions, status changes, alarm activations
- Use these notifications to automate certain workflow tasks in your external systems and devices
- Introduce improved communication between evalink talos and your IT infrastructure and ecosystem
Webhooks Integration allows you to perform actions that are also available in evalink talos API. However, you don't need experience of working with API to use Webhooks Integration. This makes API features available to users who don't have a background of working with APIs, in WYSIWYG mode.
Only Company Admins can configure Webhooks in evalink talos globally. On the site level, Company Admins and Managers can cofigure webhooks.
Configure Webhooks Integration Globally
To enable Webhooks Integration for each particular evalink talos site, you need to configure it on a global level.
To enable and configure webhooks globally:
-
Navigate to Company > Integrations
-
Scroll to Webhooks and click Add Integration
The configuration dialog opens.
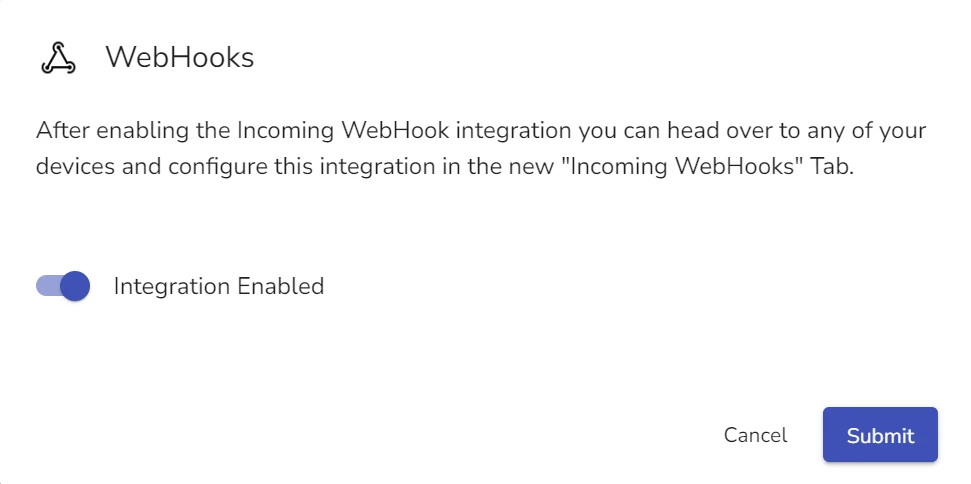
By default, when the configuration dialog opens, the integration is enabled.
-
Click Submit
The connection status of the integration becomes Enabled.

Edit Webhooks Integration
Editing Webhooks Integration on a global level means enabling or disabling it.
To edit Webhooks Integration:
-
In the Company > Integrations tab, scroll to Webhooks and click Edit Integration
-
Toggle the Enable / Disable slider to the desired position.
-
Click Submit
infoYou can also disable the Webhooks Integration by selecting the Disable option in the corresponding three dots menu.
When you disable Webhooks integration, its global connection status becomes Disabled.
Delete Webhooks Integration Globally
Use this option if you want to delete the integration and all its corresponding data from evalink talos completely. If you don't want to delete the data, use the disable option. It keeps the integration data, but the integration is no longer available at particular evalink talos sites in your tenant.
To delete Webhooks Integration:
-
In the Company > Integrations tab, click three dots menu next to the Webhooks Integration record
-
In the dialog that opens, type the delete confirmation
-
Click Delete
Configure Webhooks Integration for a Site
After you have enabled Webhooks Integration in a global level, it becomes available for all sites in your tenant under the Sites > (Site Name) > Integrations tab.
To add a Webhooks Integration for a site:
-
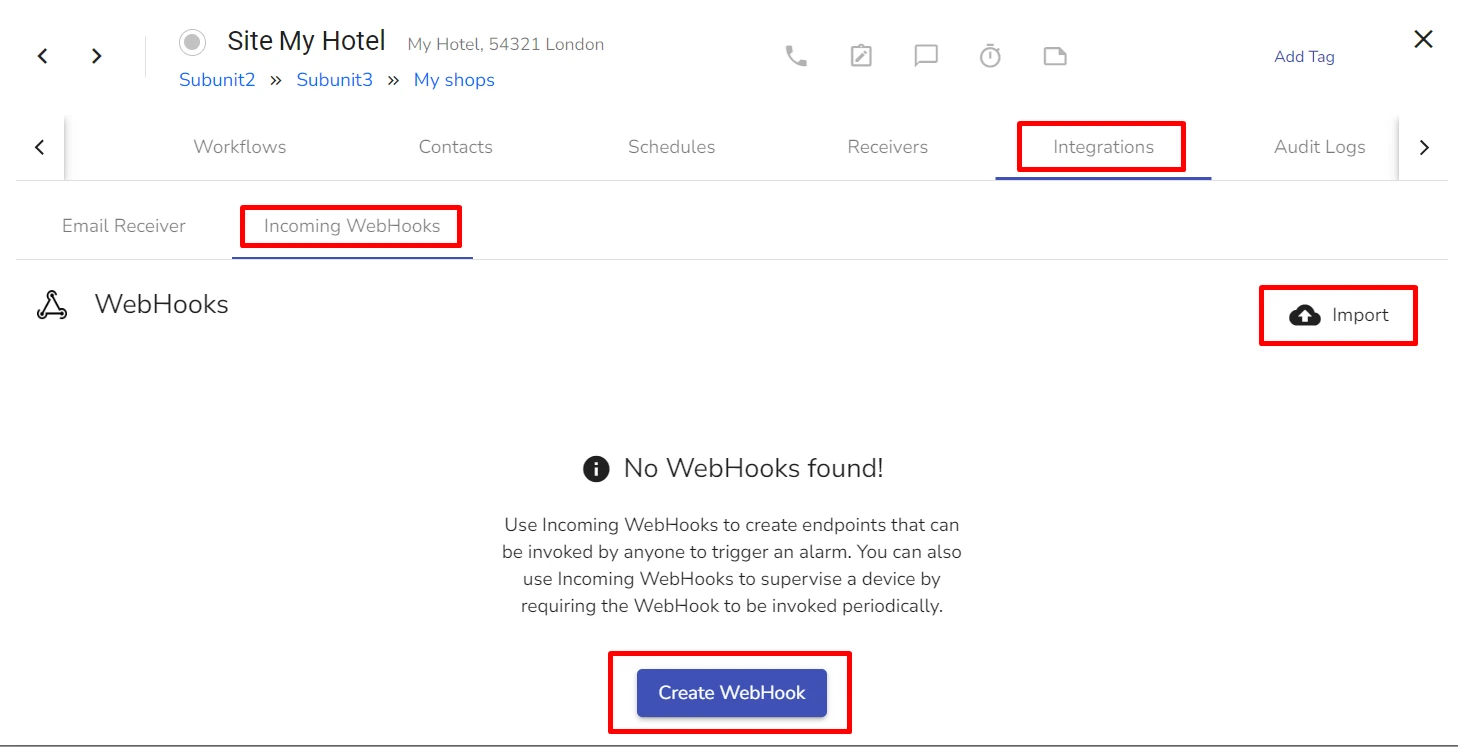
Navigate to Sites > (Site Name) > Integrations tab
-
Switch to the Webhooks subtab
-
Click Create Webhook
The Create Webhook dialog opens.
infoThe Create Webhook dialog has two tabs. The Base tab allows you to configure general webhook settings. The Dynamic Templates tab allows you to configure mapping for headers that you want an alarm triggered by the webhook to contain.
-
In the Name Field, type the name of the webhook
-
In the Alarm Code field, select the alarm code for the alarm which the webhook will trigger
-
(Optional) In the Zone field, specify the zone on the site for which the alarm is to be triggered
-
(Optional) Check the following flags the alarm needs to have:
- Technical
- Test Message
- Restore
-
(Optional) Enable Periodic Invocation if you want to receive alarms if the webhook is not triggered for a period of time
-
(Optional) Enable Authentication if you want to limit who can use this webhook to authorized users only
-
If you used the previous step, specify username and password in the two corresponding additional fields that appear
-
Click Submit
For an example of working with webhooks on a site level, see the evalink.io blog article Tutorial: Periodic WebHooks - Automatic guard status verification.
Viewing Webhook Details
Once you create a webhook, its record becomes available in the Integrations > Webhooks tab for the site.
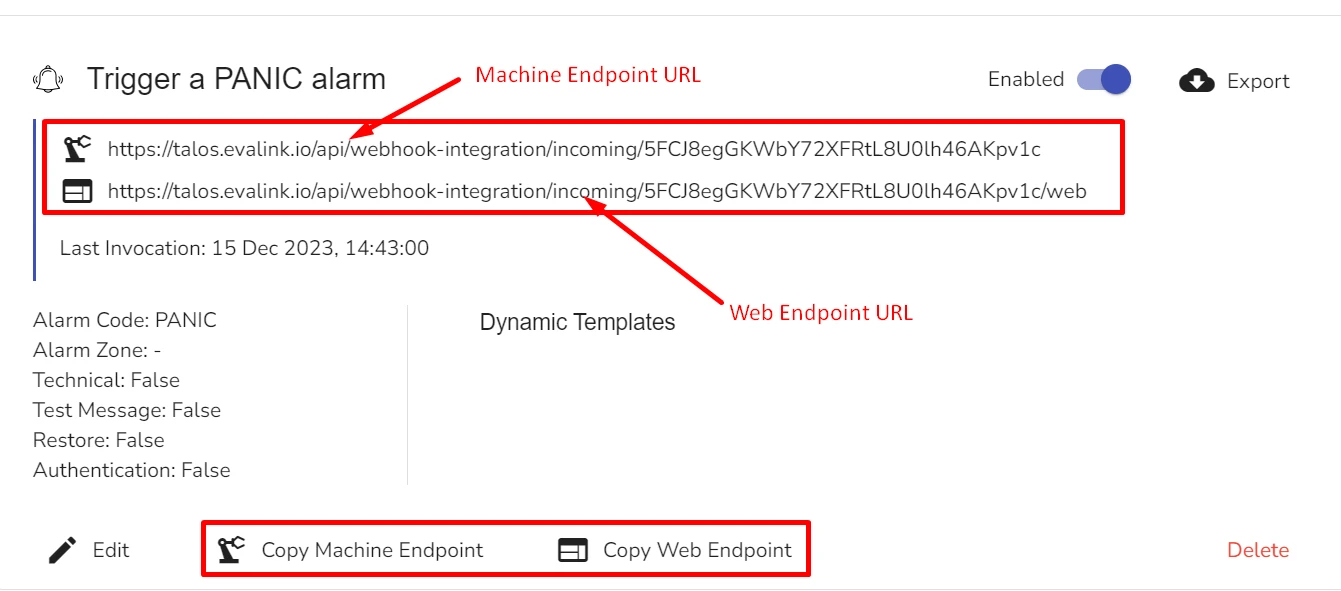
There are 2 URLS evalink talos creates for each webhook:
-
Machine Endpoint URL
Use this URL to call the webhook from third-party applications or in evalink talos workflows. evalink talos sends back the outcome of the call in JSON format.
-
Web Endpoint URL
Use this URL to call the webhook manually through a user-friendly web user interface.
You can use the corresponding copy options to copy the webhook URLs to clipboard.
Each webhook record also has an Enable / Disable toggler which you can use.
Each webhook record also contains data about the last time it was invoked.
Add Headers to Webhooks
You can configure which additional information an alarm triggered by a webhook contains. To do this:
-
In the Create Webhook / Edit Webhook dialog, switch to the Dynamic Templates tab
-
Specify the following values if necessary:
- Alarm Code
- Alarm Zone
- Alarm Zone Name
- Partition ID
- Partition Name
- User ID
- User Name
- Alarm Message
- Technical (True or False)
- Test message (True or False)
- Alarm Value (True or False)
- Payload
-
Specify additional headers by clicking New Header
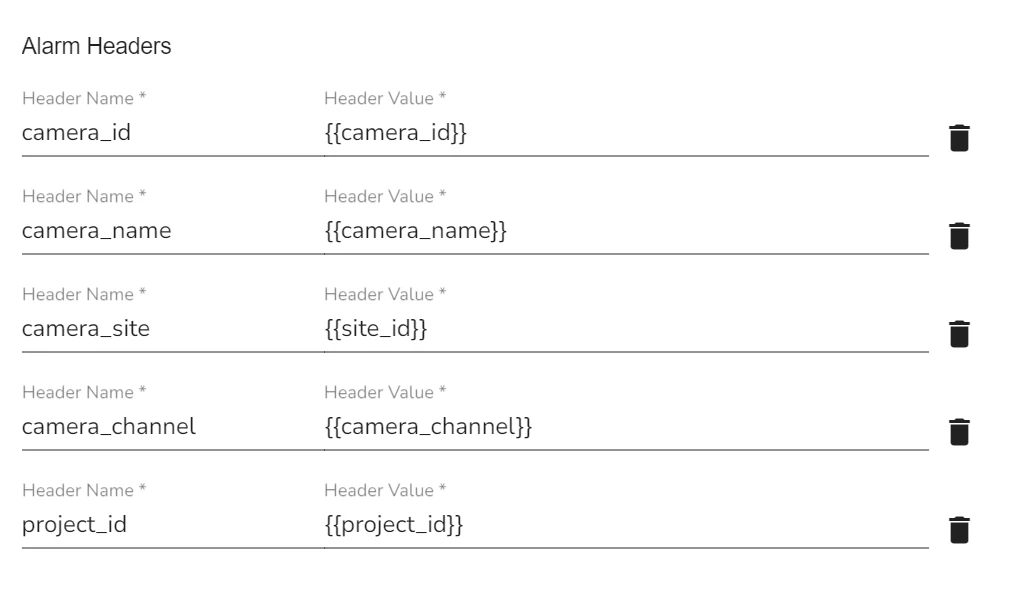
Use pebble language to specify header values.
Here is an example of specific headers added to a webhook created for various camera events:
-
Click Submit
Edit a Webhook
To edit a webhook:
-
In the Integrations > Webhooks subtab of a site, find the webhook record you want to edit
-
Click the corresponding Edit button
-
Edit the webhook details as desired
-
Click Submit
Export Webhooks
You can export webhook information as a JSON file and use it on another site.
To export a webhook:
-
- In the Integrations > Webhooks subtab of a site, find the webhook record you want to edit
-
Click the corresponding Export icon
-
In the File Explorer window that opens, specify the exported file name and location
-
Click Save
Import Webhooks
You can import a JSON file with webhook data to any site. It is best practices to use webhook files previously exported from evalink talos to make sure the JSON formatting is correct.
To import a webhook:
-
In the Integrations > Webhooks subtab of a site, click the Import icon at the top of the list of webhook records
-
In the File Explorer window that opens, navigate to the JSON webhook file you want to import
-
Select the file and click Open
The new webhook record is added to your site. By default, it is disabled.
Delete a Webhook
When you delete a webhook from a site, all its configurations are deleted as well. If you want to keep the webhook settings, but don't want to use it, use the Disable option instead.
To delete a webhook:
-
In the Integrations > Webhooks subtab of a site, locate the webhook record that you want to delete
-
Click the corresponding Delete button for the webhook record
-
In the dialog that opens, type delete confirmation
-
Press Confirm Delete
Triggering Webhooks
Once you have configured a webhook, you can trigger it from a web browser, a third-party device or application, or use it as part of a workflow for this site.
For more information about Trigger Webhooks workflow step, see section Trigger Webhooks as Part of a Workflow.
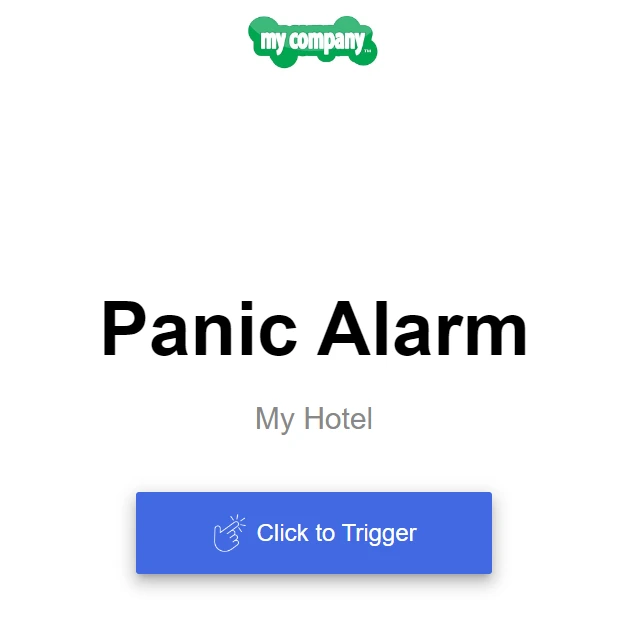
You can use the Web Endpoint URL from any device to trigger the webhook.
The figure below shows and example what you see in a browser if you follow the Web Endpoint URL. You can trigger the webhook by clicking Trigger button. When you do this, an alarm configured for this webhook, arrives.
You can also use the Machine Endpoint URL for various third-party devices and applications: connected alarm management systems or devices, for example, smart doorbells, such as 2N Intercom.
 Link is copied