Automated Actions
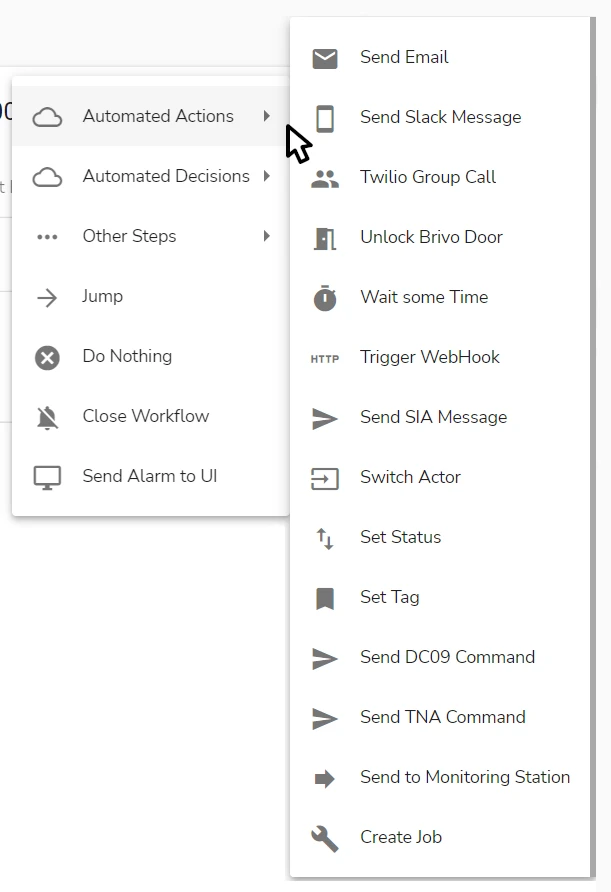
The steps available in the Automated Actions category are displayed on the figures below:

The picture may not show the full scope of workflow steps available in this menu. Some steps become available only after the corresponding integration is configured in evalink talos.
Set Status
The Set Status step can be used to set a site status to one of its configured states.
This is an option for statuses that have their state changes triggered not by the connected equipment, but by other sources – for example, by SMS received through Virtual SMS Receiver.
For statuses that listen to physical devices (such as alarm panels), setting status states via a workflow is not recommended. If a state change is triggered from a workflow, the evalink talos state of the status and its real state on the alarm panel may diverge.
For example, you can have a workflow that sets the Arm status of the connected alarm panel to Armed. After the workflow runs, the evalink talos status state switches to Armed, while the status state on the panel does not change.
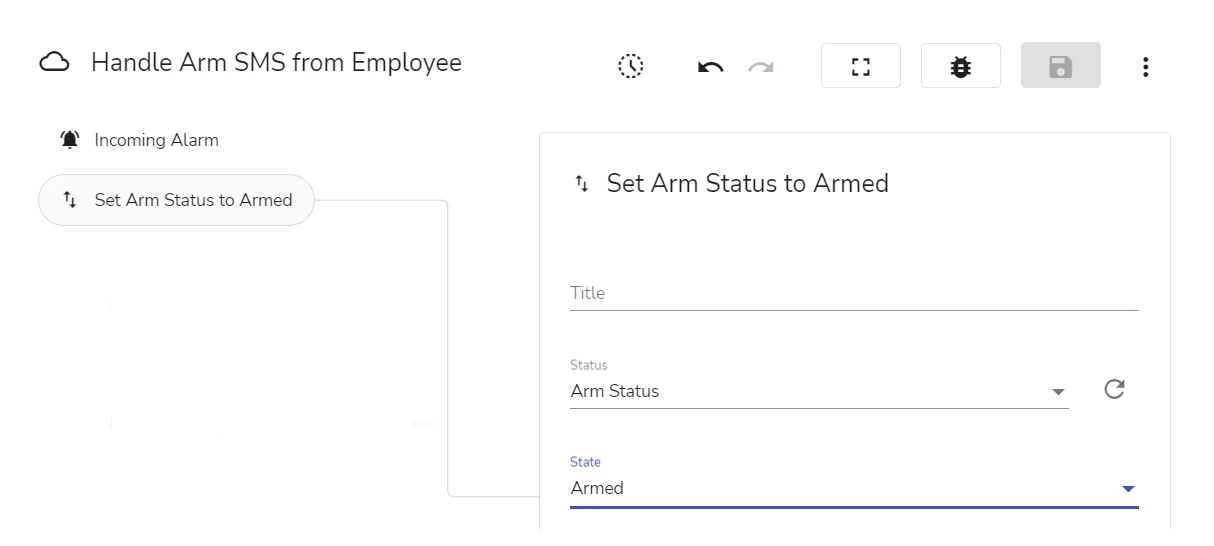
An example of a configured Set Status step in the workflow editor (see section Operations with a Workflow > Work with Workflow Steps > Workflow Editor) is shown on the figure below:

To configure the step, add it to the workflow and fill out these fields in the step details:
-
(Optional) In the Title field, specify the step title
-
In the Status field, select one of the configured site statuses from the list
The list displays the statuses configured for the current site and the Status Roles.
When configuring a site-level workflow, select a regular status. When configuring a higher-level workflow (a site group or a global workflow), consider selecting a Status Role. The rationales for using Status Roles are described in section Advanced Features in evalink talos > Use of Roles.
warningMake sure to assign a Status Role to a status on the site level. If the role is not assigned, when the workflow runs, an execution error will occur. For details on how roles are used and configured, see section Advanced Feature in evalink talos > Use of Roles > Using Roles in Workflows: Required Setup.
-
In the State field, select the state of the status that needs to be set
Trigger Webhooks as Part of a Workflow
The Trigger Webhook automated action allows you to work with evalink talos API or third-party APIs in WYSIWYG mode and without profound API knowledge. Using this action, you can call different APIs in order to retreive, edit, add and delete data for their endpoints.
You can use this step in manual and automated workflows.
To trigger a webhook as part of a workflow:
-
Create a workflow or open an existing one to edit
infoFor more information about creating workflows, see section Add a Workflow.
-
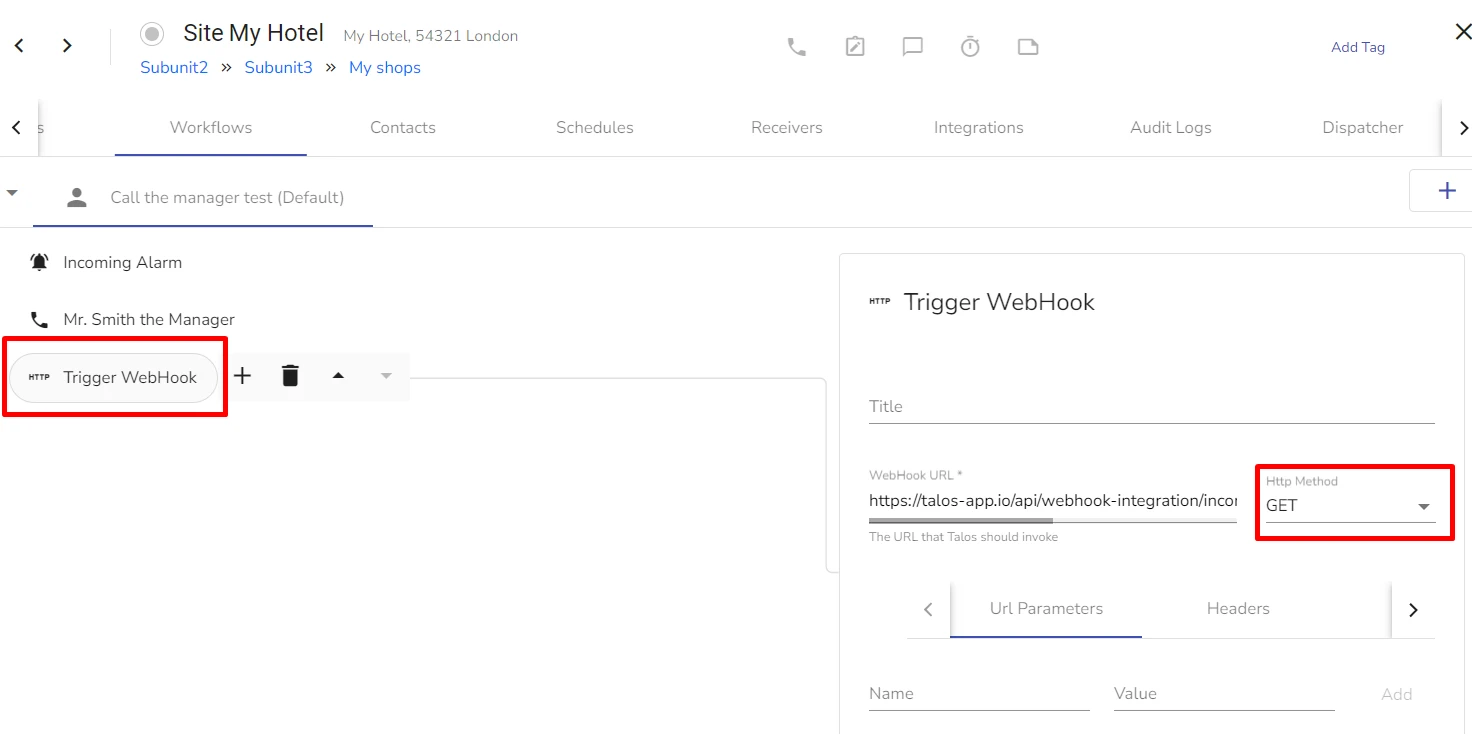
When adding steps, select Trigger Webhook from Automated Actions

-
(Optional) Add the Webhook Trigger name
-
In the Webhook URL field, add the machine URL of the webhook you want to trigger
infoFor example, you can use this webhook URL
https://api.open-meteo.com/v1/forecast?latitude=37.9792&longitude=23.7166¤t_weather=trueto retreive a weather forcast for Athens. -
Select one of the following API Methods:
- GET - To retreive endpoint resource data from a remote API. When you use this method, you can post-process the data you receive with a workflow
- DELETE - To delete endpoint resource data from a remote API
- POST - To add data to an endpoint resource on a remote API
- PUT - To update data in an endpoint resource on a remote API
- PATCH - To partly update data in an endpoint resource on a remote API
-
(Optional) If the API you are calling requires entering an API key, enter key name into Name and value into Value
infoIf you are calling an evalink talos API endpoint, your API keys can be accessed in Company > Integrations > API Tokens
-
(Optional) In the Headers tab, specify necessary headers
-
Save the workflow
More workflow steps will be described in future documentation releases.
 Link is copied