 Link is copied
Remote Access
Remote Access integration enables to use the TNA as a secure gateway to allow access and troubleshooting of devices that are connected to the same network as your TNA from evalink talos or by evalink talos support team.
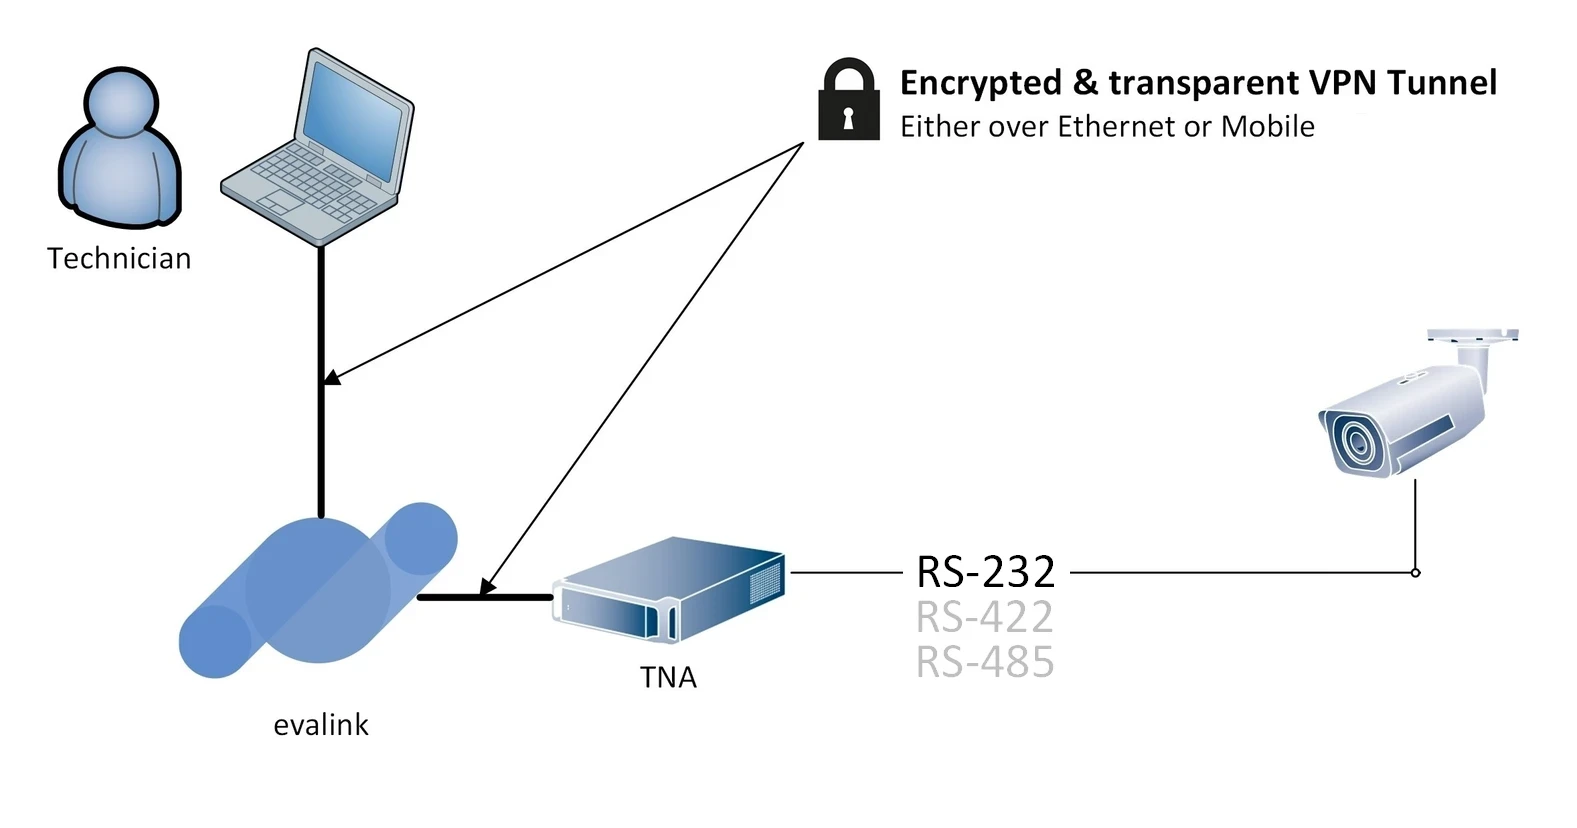
A VPN connection is established between your PC and the TNA. The TNA acts as a secure point-to-point router and data is transparently transferred between the PC and the connected device. This means you can keep using your tools with no additional configurations.
The devices are connected to the TNA using an Ethernet cable to Eth0 or Eth1 interface on ipTNA4i or using Eth0 or USB to Ethernet Adapters on TNA Connect devices.
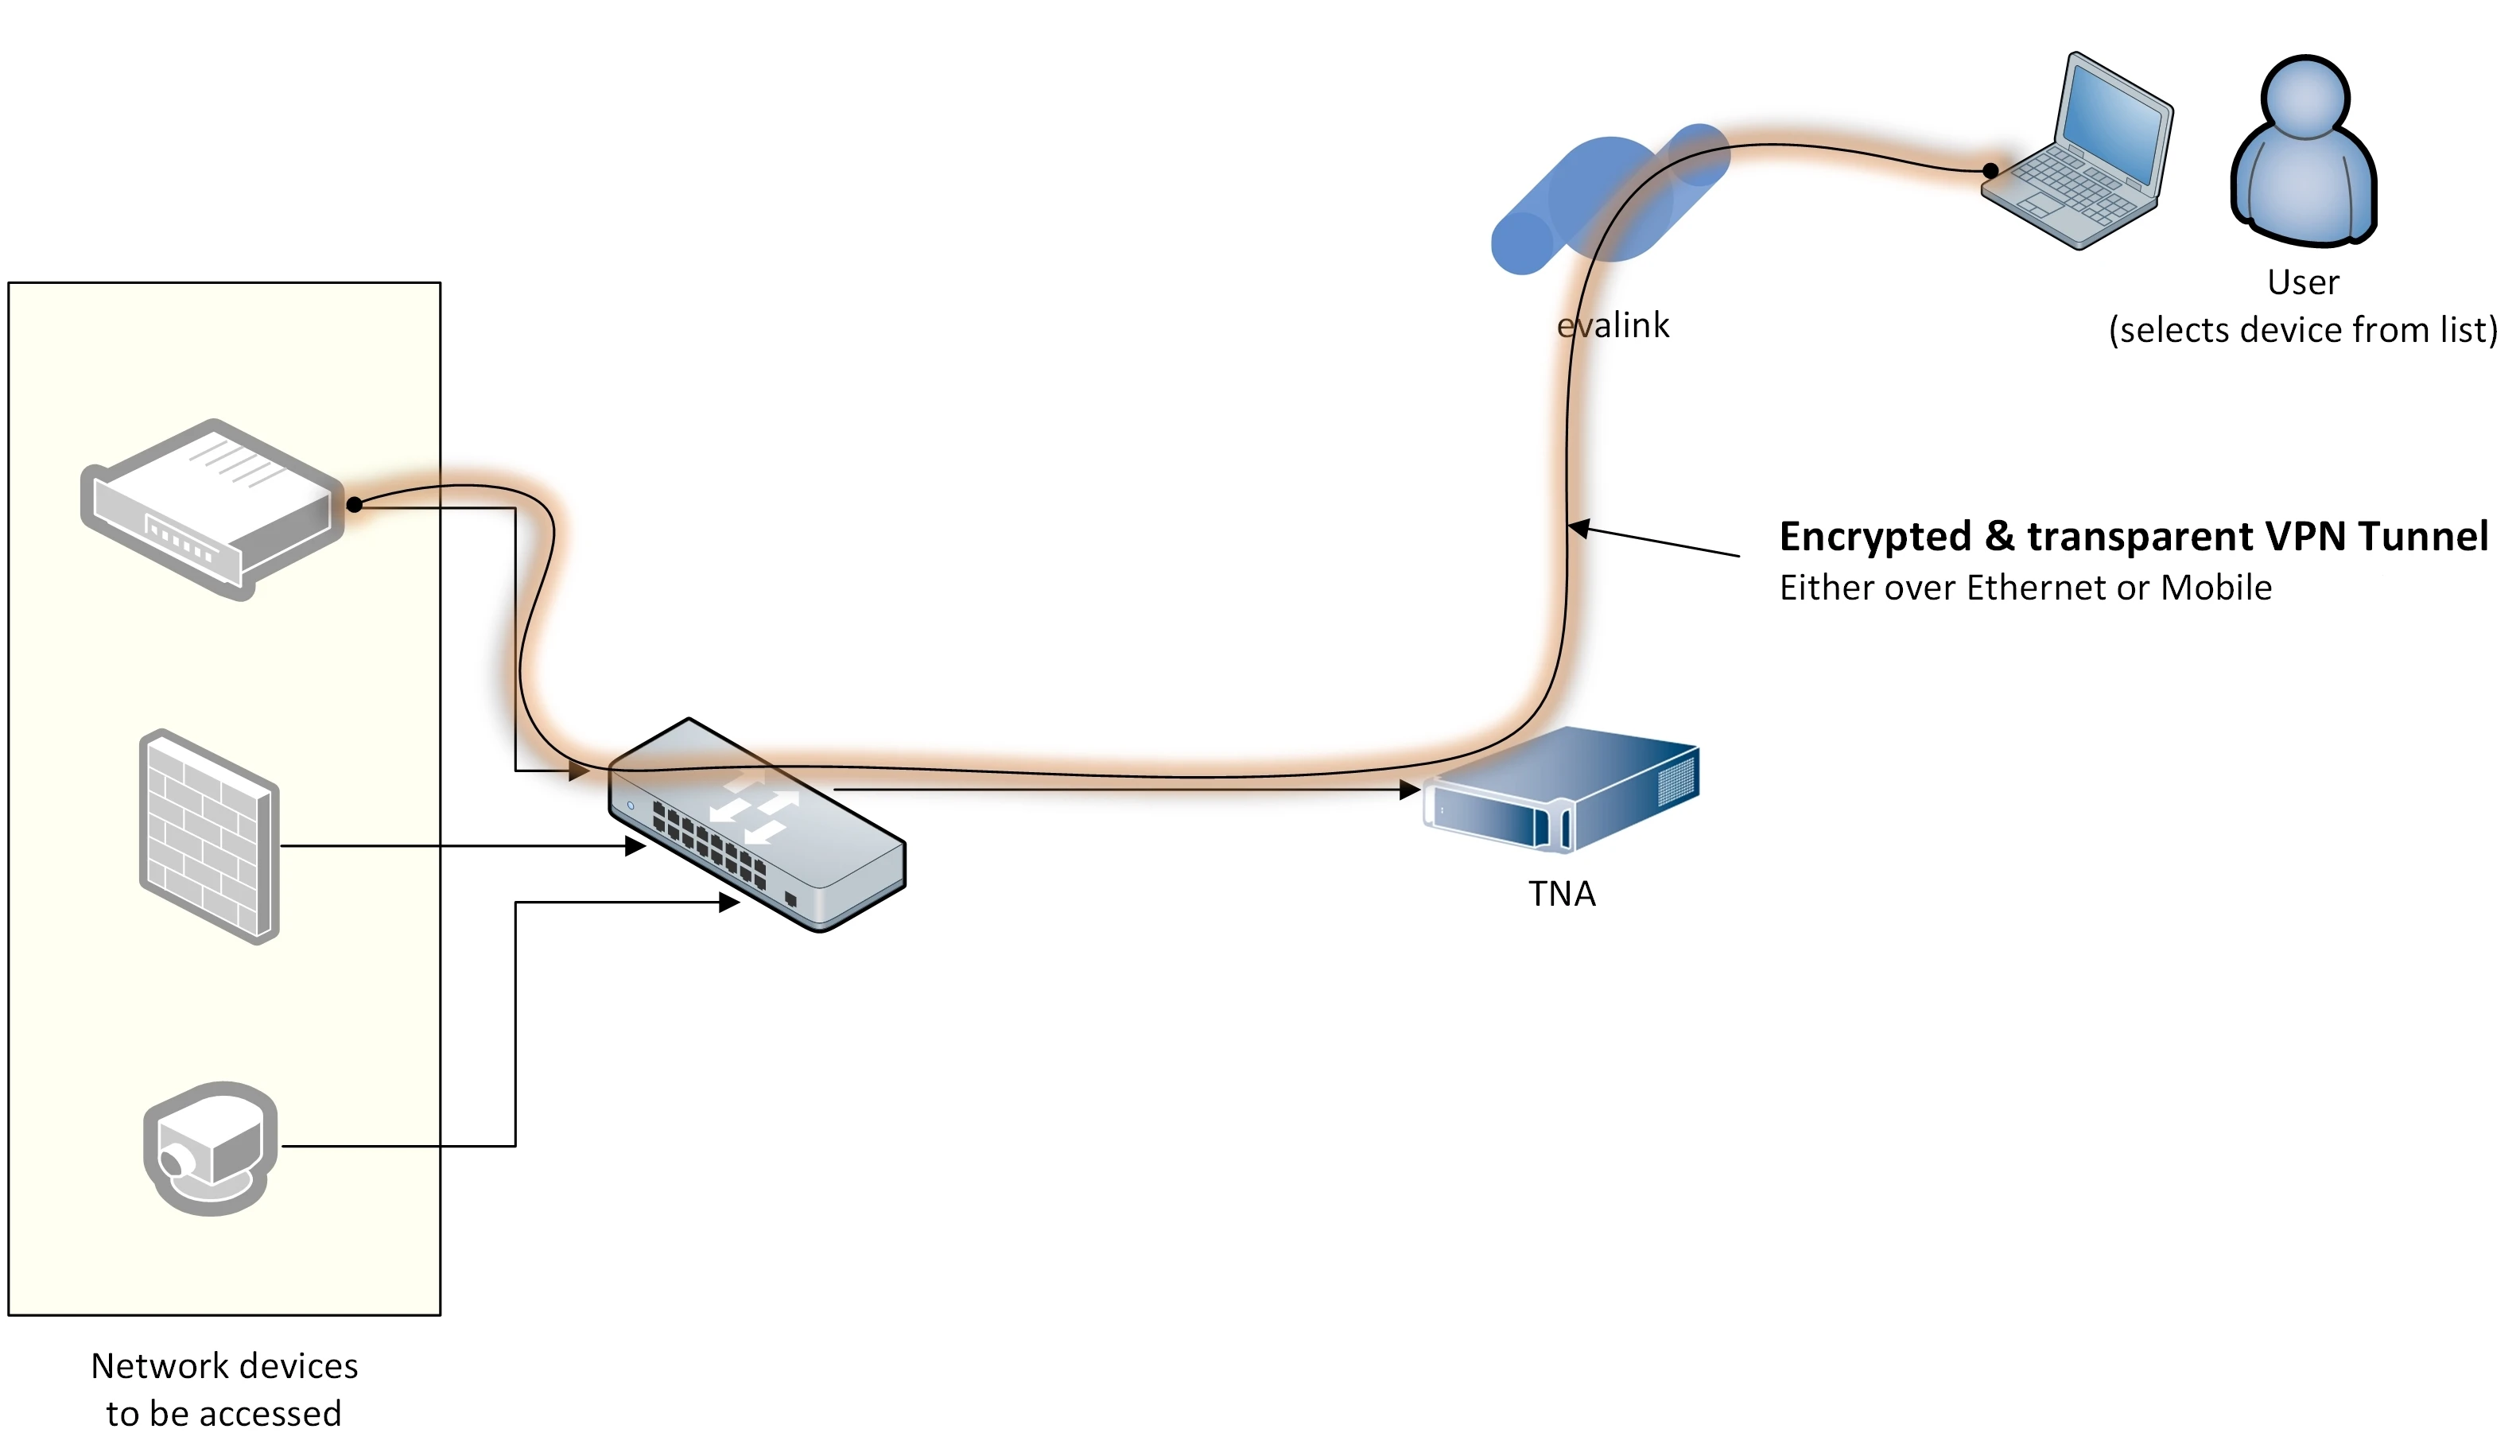
The serial devices are connected to TNAs using Serial Adapters or using the on-board RS-232 on TNA Connect devices.
A TNA can only support one serial port at a time.
Download and Install evalink talos Driver
In order to use Remote Access, you need to download and install the evalink talos driver from your evalink talos account.
To download and install the driver, do the following:
-
On your evalink talos account, click on in the upper right corner
-
From the dropdown menu, hover your mouse over Install
-
Click on evalink talos driver
-
After the download is done, install the driver and make sure the installation path is pointing to the windows Program Files
The setup wizard will also install OpenVPN and Virtual Serial Port Emulator (VSPE) which are necessary for Remote Access functionality.
-
Restart your PC
-
Stop any other VPN connection before launching evalink talos driver
-
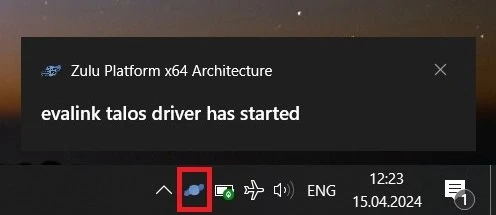
Navigate to your desktop and click on evalink talos driver to launch it
The driver is started in the background and you can access it from the system tray at the bottom right corner next to the clock.
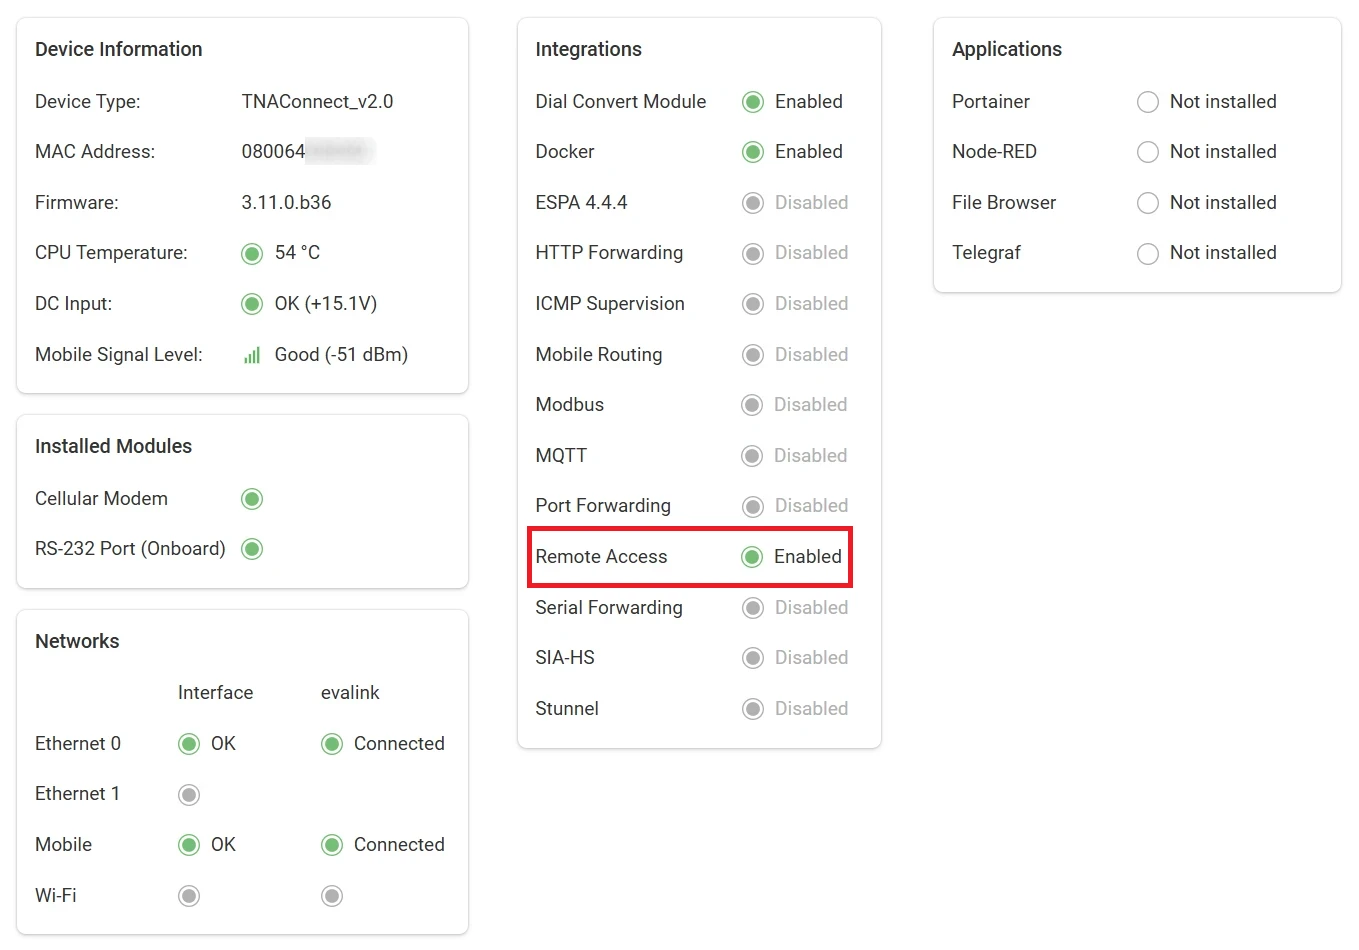
Enable Remote Access on the TNA Web Server
Access level 4 is required to enable or disable Remote Access integration.
To enable Remote Access integration in the TNA Web Server, do the following:
-
On the TNA Web Server, navigate to Settings > Integrations from the top right corner of the page
-
From the list of integrations, search for Remote Access and toggle it
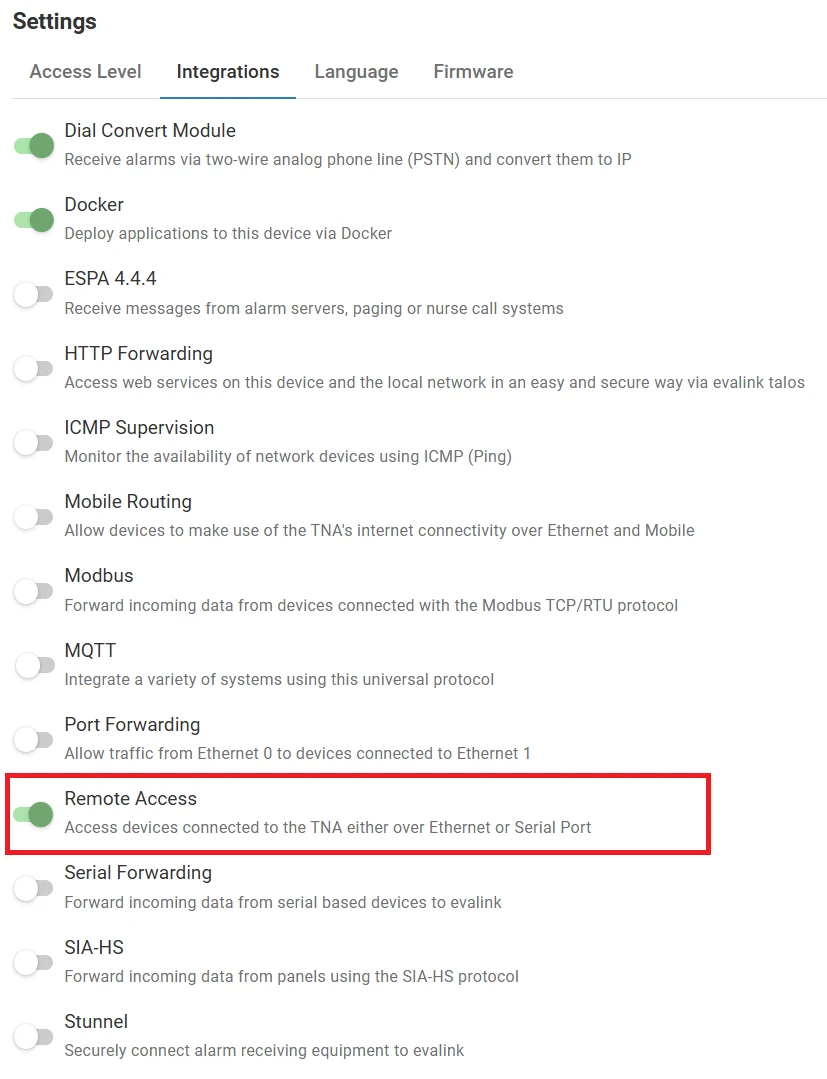
Once Remote Access integration is enabled, you can find it under Integrations on the top navigation menu.
The status is also reflected on the Integrations section of the Home page.
Configure Remote Access
Access level 4 is required to configure Remote Access.
Before you proceed with the configuration, ensure that you have successfully completed the steps outlined in both Download and Install evalink talos Driver and Enable Remote Access on the TNA Web Server.
To configure Remote Access parameters, do the following:
- On the TNA Web Server, click on Integrations from the top navigation menu and choose
 Remote Access
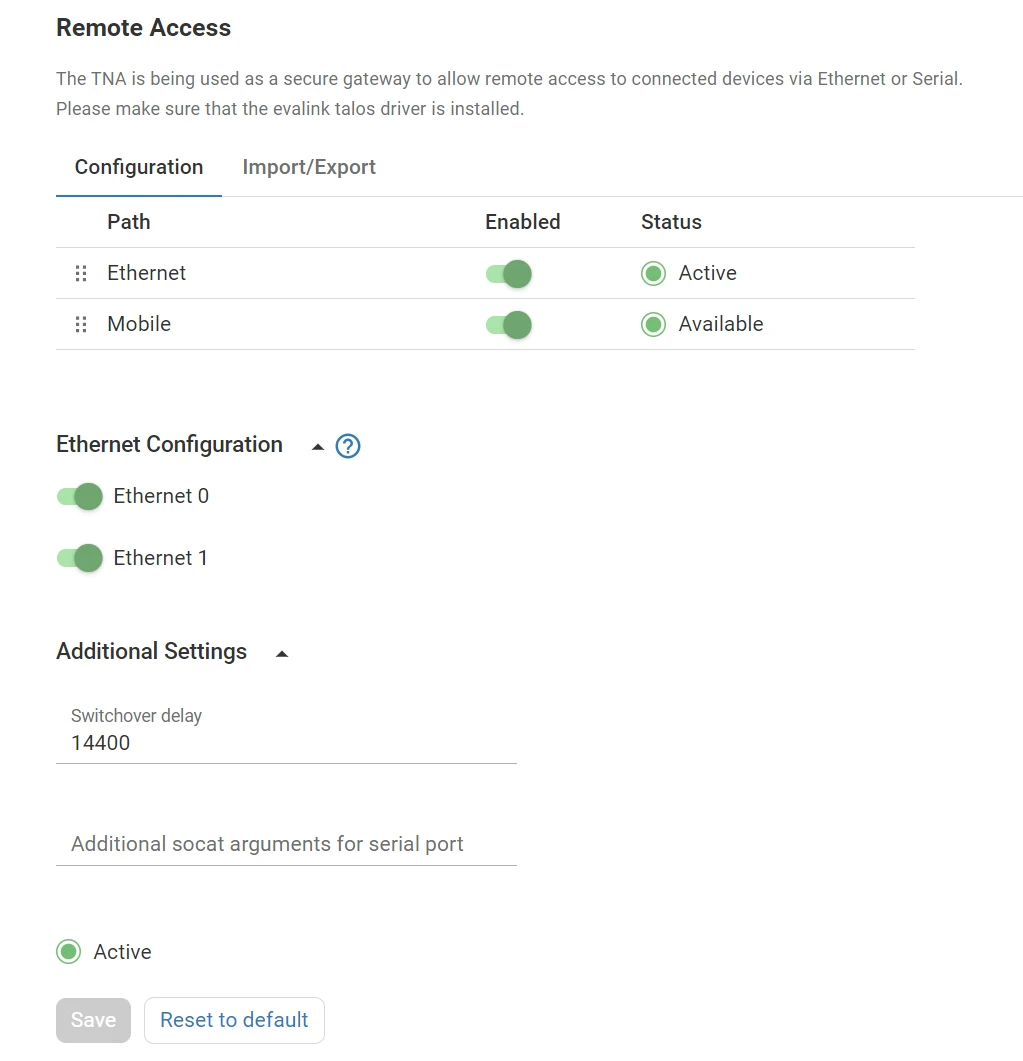
- On the configuration page, configure the following settings:
| Path | This defines the paths (Ethernet and/or Mobile) to be used for remote access. Paths can be prioritized, which means that the prioritized path is used by default and the other path is used as a backup depending on their order. The path order can be changed by dragging a given path and dropping it in the necessary position using the drag icon next to the path. Disabled paths are not used for remote access. |
| Ethernet Configuration | This section offers options to activate or deactivate remote access to specific Ethernet interfaces: Ethernet 0 and/or Ethernet 1. Once the connection is established, the TNA will attempt to reach the target device based on its subnet. |
| Switchover Delay | This parameter specifies the time delay, measured in seconds, before attempting to switch from the backup path to the primary path. Default value: 14400 Minimum value: 1 second Maximum value: 86400 seconds |
| Additional socat arguments | These are extra parameters appended to socat commands, specifically intended for remote access over serial. Maximum: 256 characters Example: vmin=32,vtime=1 |
-
Click on Save
-
(Optional) Click on Undo changes to reset the parameters to their previous values
-
(Optional) Click on Reset to default to reset the parameters to their default values
VPN connections require certain security certificates. If these certificates are not generated or are missing for some reason, the system will not attempt to reconnect to the VPN. This is a critical security measure, ensuring that connections are not established without the proper authentication and encryption safeguards.
Remote Access connection is stopped by default after 3 hours due to certificates expiration.
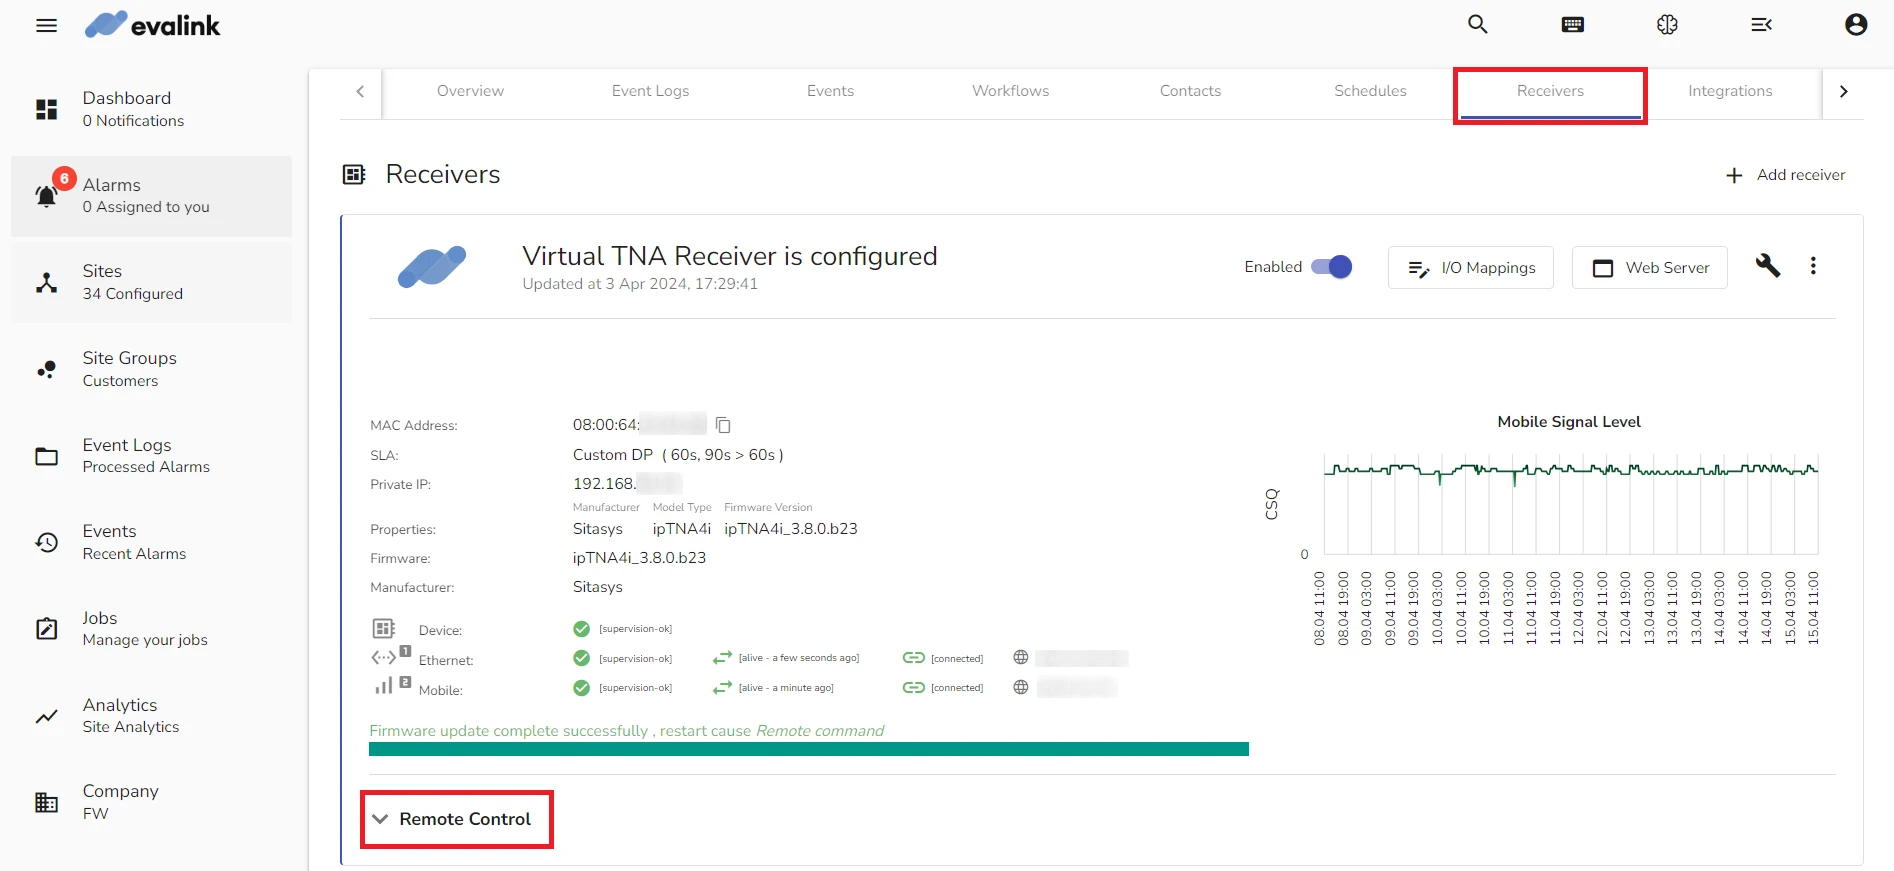
Start Remote Access
To start Remote Access, do the following:
-
Launch evalink talos driver
The driver is started in the background and can be accessed from the system tray at the bottom right corner next to the clock.
-
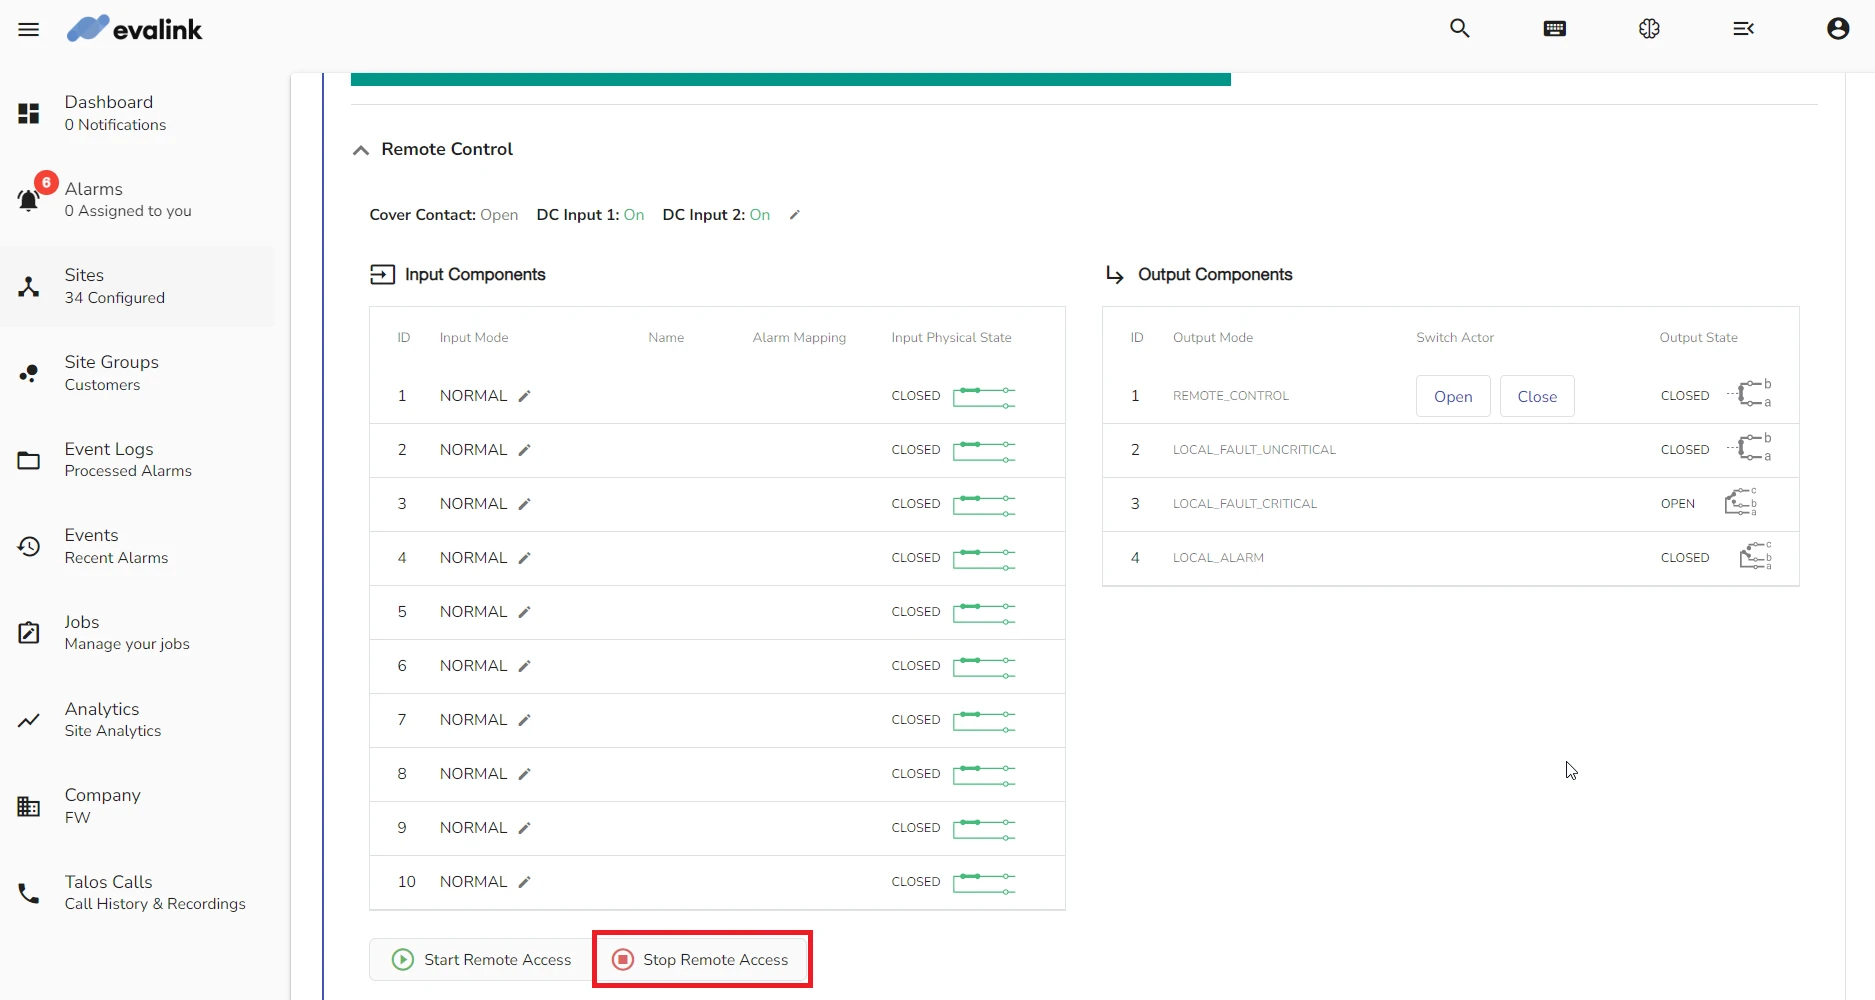
On your evalink talos account, go to Sites > [site] > Receivers > tab
-
Click on Remote Control at the bottom of the tab
-
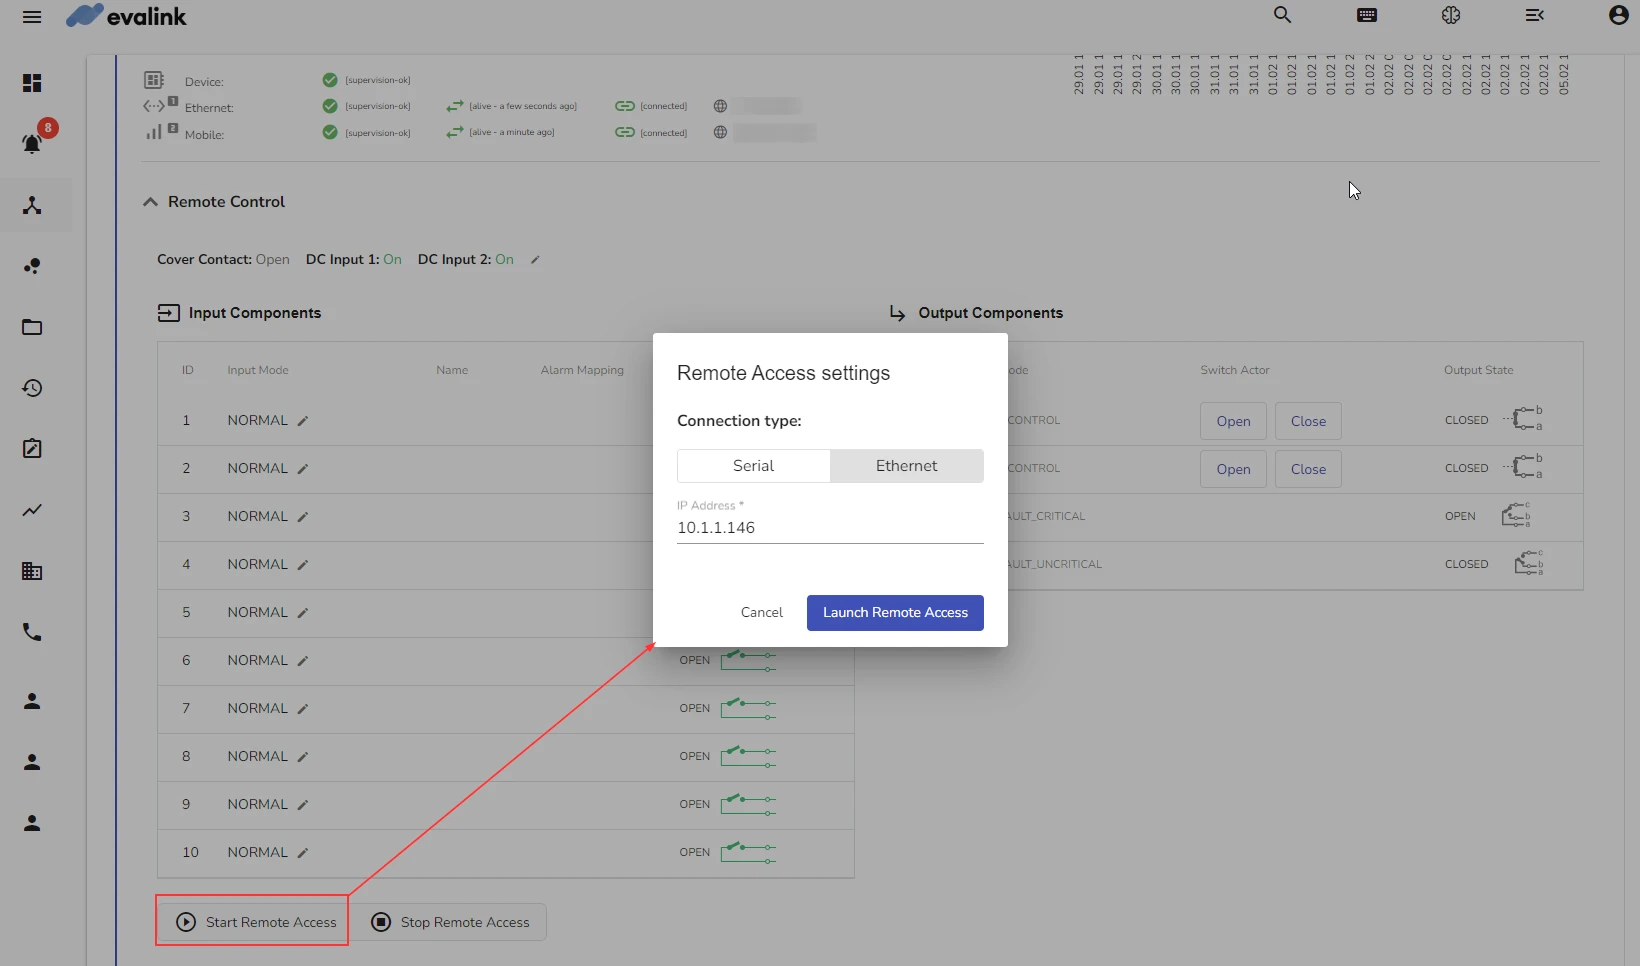
Click on Start Remote Access

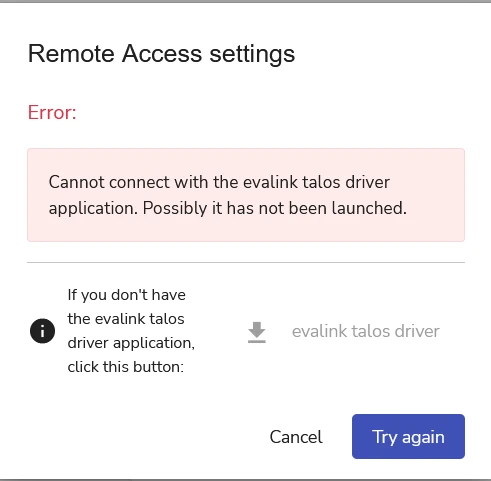
If evalink talos driver was not launched or not found, the figure below shows the dialog that prompts you to launch the driver or to download and install it if it was not done previously.
-
For Remote Access over Ethernet, click on Ethernet and enter the IP address of the connected device
The IP address should be in the subnet of Eth0 or Eth1 interfaces.
-
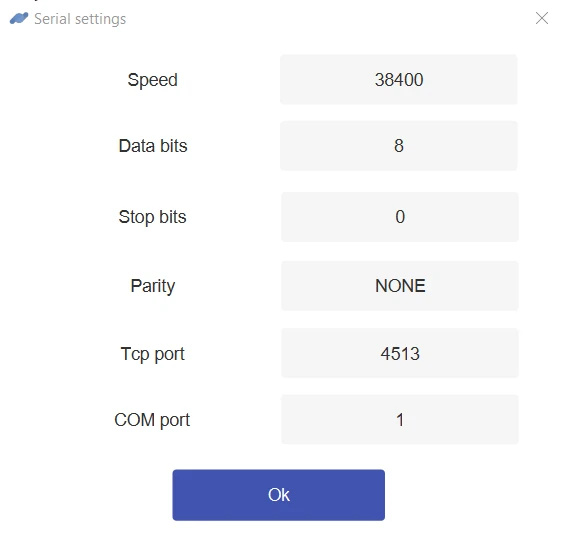
For Remote Access over Serial, click on Serial and configure the following parameters:
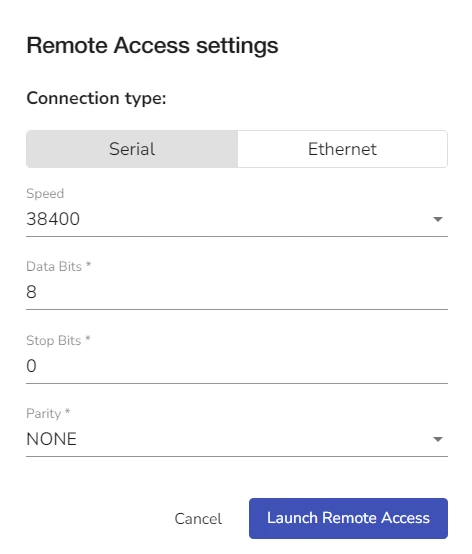
| Speed | The speed at which data bits are sent. Default value: 38400 |
| Data Bits | The Data Bits is the number of bits of data in each frame. Default value: 8 |
| Stop Bits | The Stop Bits is the number of bits used to mark the end of a frame. |
| Parity | The Parity bit can provide a simple form of error detection. Possible values are: None: no parity bit is added to the data. Even: the parity bit is set to space 0 if the total number of data bits in the mark 1 state is even. Odd: the parity bit is set to space 0 if the total number of data bits in the mark 1 state is odd. |
-
Click on Launch Remote Access
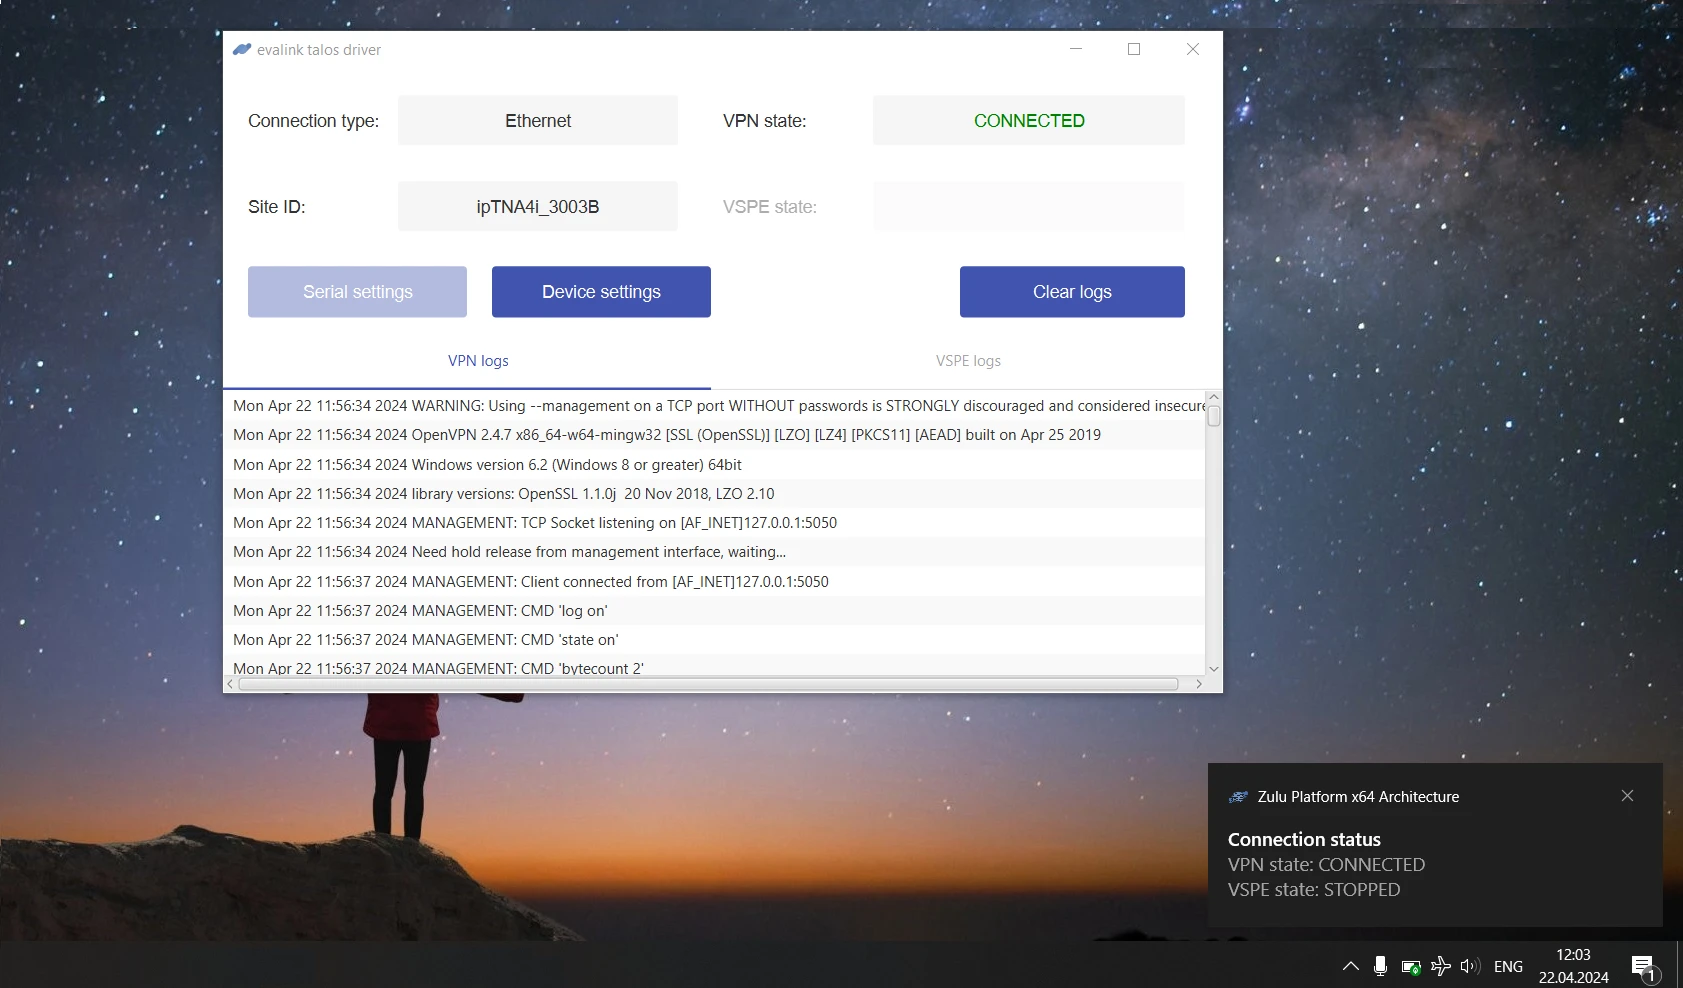
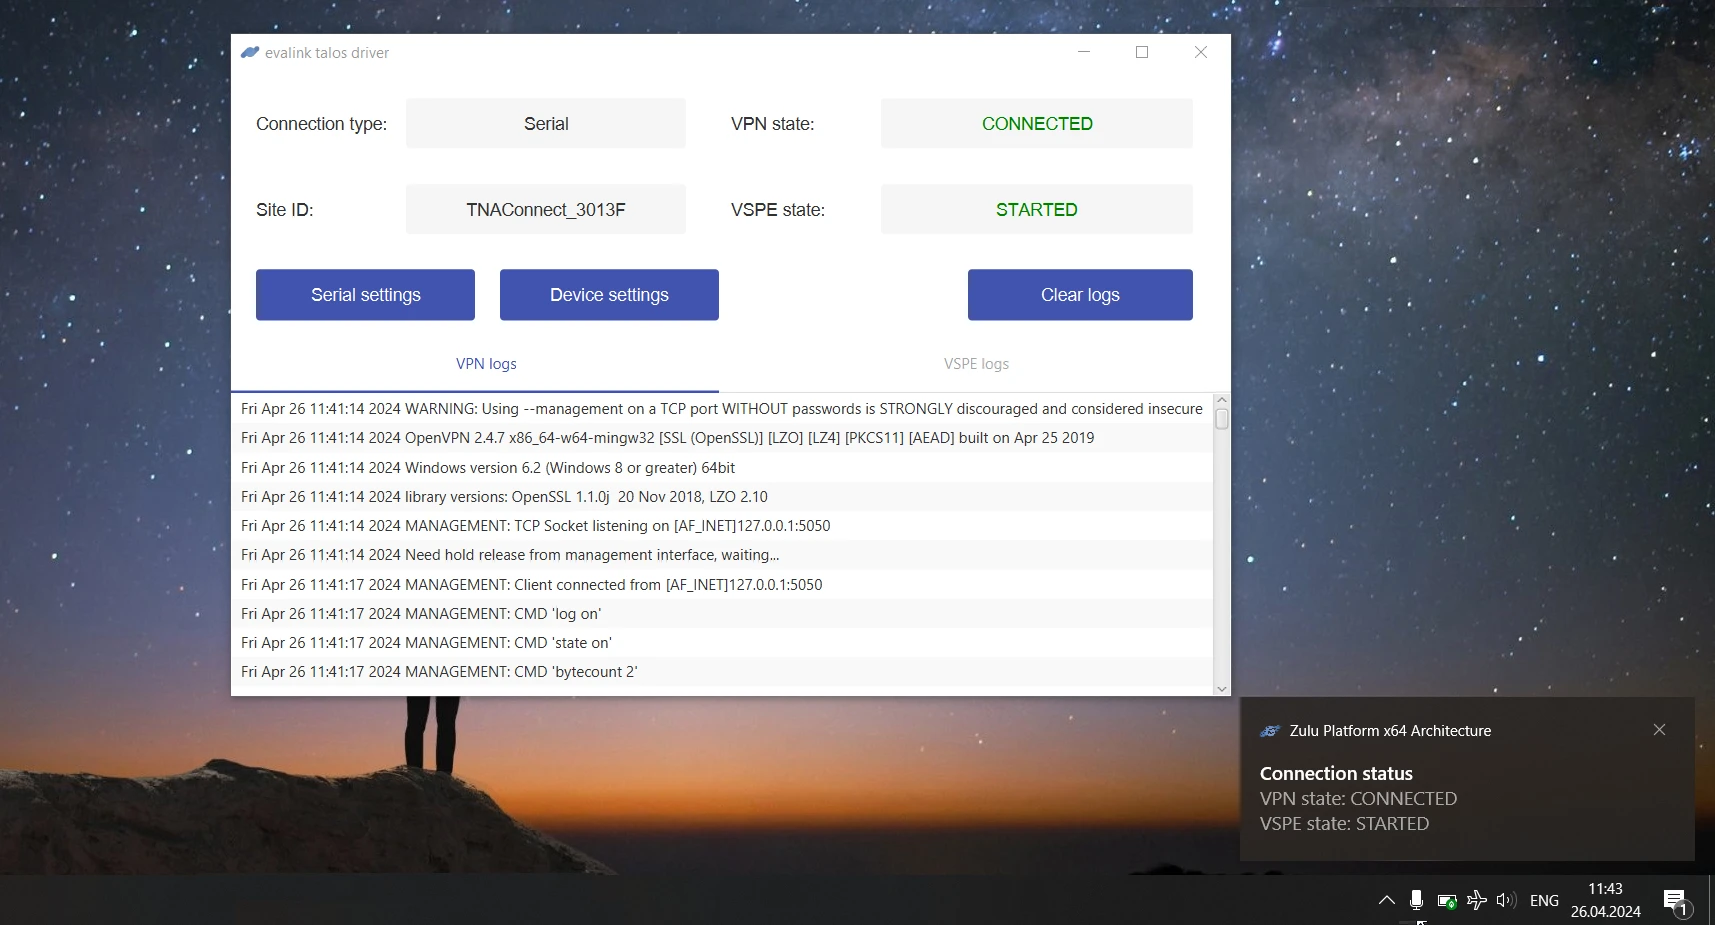
After a few seconds, the remote access is initialized and started. The Connection type, Site ID, as well as VSPE, VPN states, and their logs are displayed as shown in the images below.
-
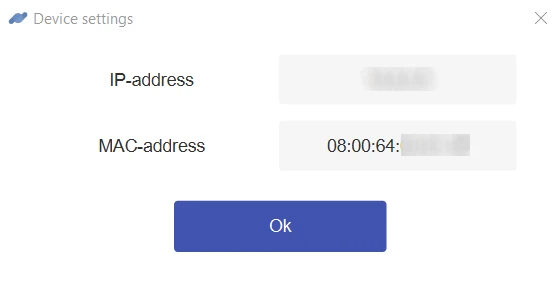
(Optional) Click on Device settings to view the IP address and the MAC address of your connected device
-
(Optional) Click on Serial settings to view the information about your connected serial device
-
(Optional) Click on Clear logs to clear the logs
-
To stop it, click on Stop Remote Access
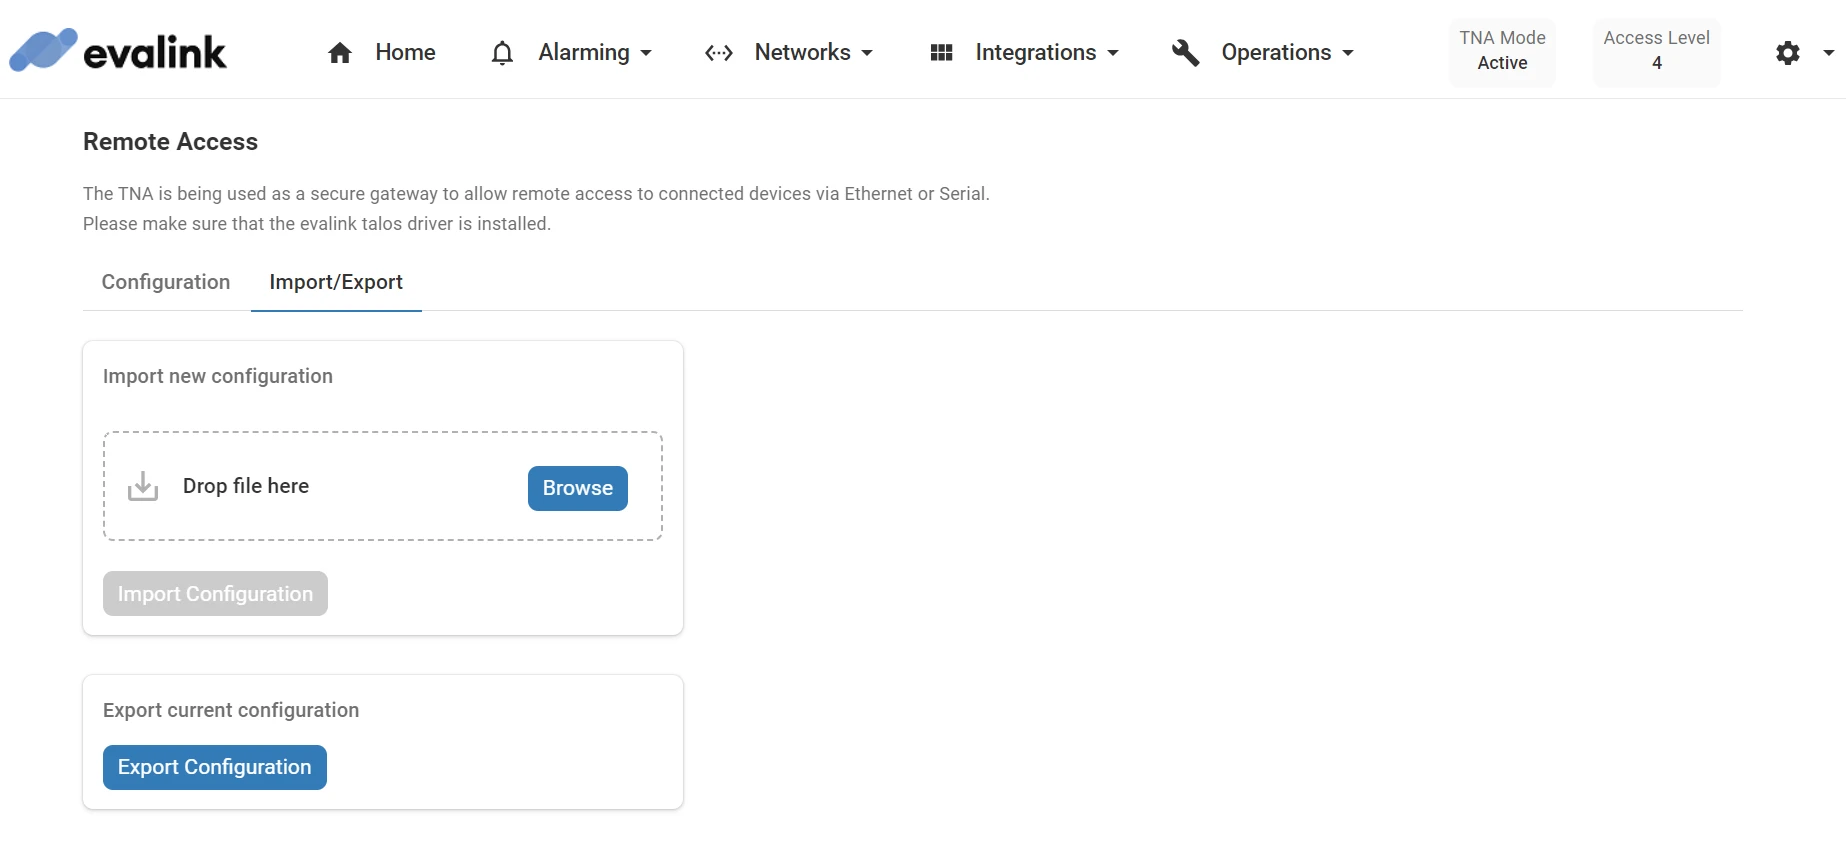
Import and Export Remote Access Configuration
Once Remote Access is configured, the TNA stores all related configurations internally. It is possible to export the current configuration and save it in a file and then import it to other TNAs.
To export the Remote Access configuration, do the following:
-
On the TNA Web Server, click on Integrations from the top navigation menu and choose
Remote Access -
Click on the Import/Export tab
-
Click on Export Configuration under Export current configuration
A configuration file will be downloaded to your local machine.
To import the Remote Access configuration, do the following:
-
On the TNA Web Server, click on Integrations from the top navigation menu and choose Remote Access
-
Click on the Import/Export tab
-
Click on Browse under Import new configuration
-
Select the configuration file and click on Open
-
Click on Import Configuration
The configuration file will be verified and applied if it is in the correct format. A message about the result is shown at the lower left corner of the page when the importing process is done.