Work with User Settings
Viewing User Settings
You can access user settings by navigating to Company > Settings > Users.
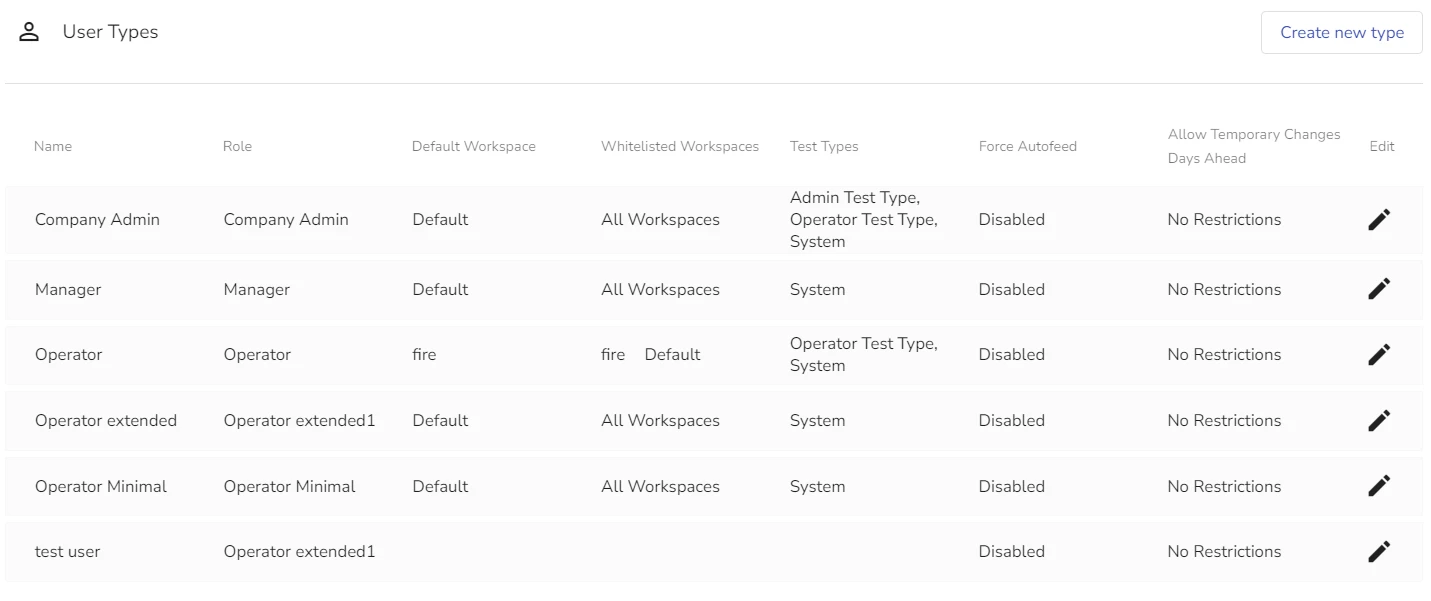
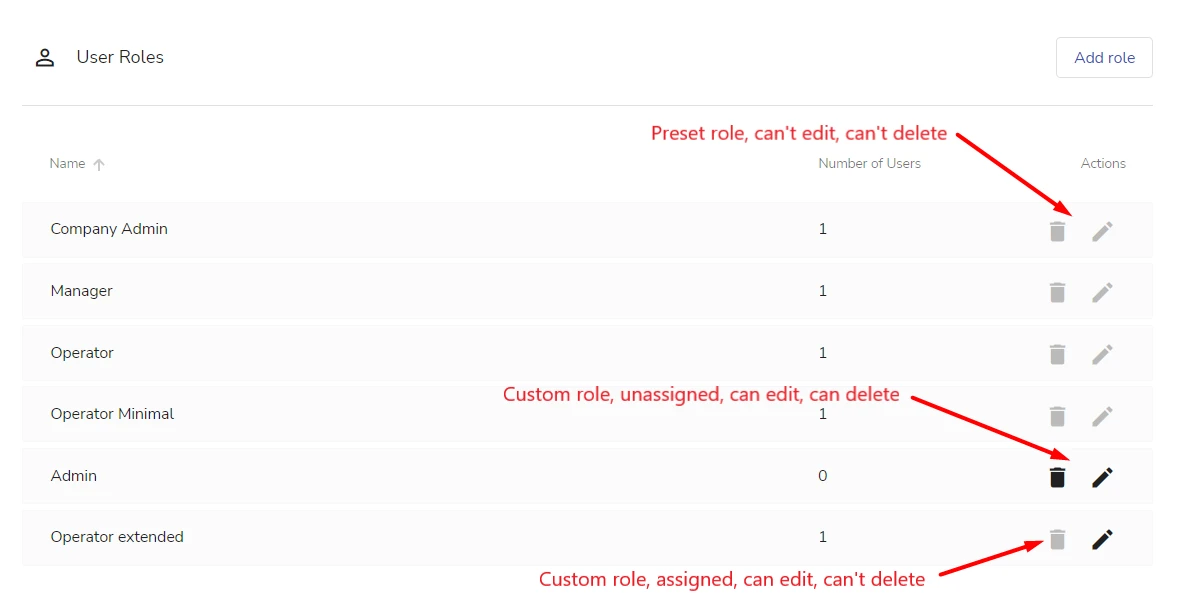
In this page, you can view the lists of User Roles and User Types available for your company.
Only users with Administrator permissions can add, edit or delete User Roles and User Types.
The figures below show the lists of available User Types and User Roles as seen on the Company > Settings > Users page.
For details on User Types and User Roles, see section Users Overview.
The figure below shows the Company > Settings > Users page:
Create a New User Type
You can create custom User Types by combining sets of permissions (User Roles), user working environments (Workspaces) and Test Modes. After creating a User Type, you can assign it to new and existing users. You can edit all User Types at any time, including preset User Types. You can delete custom User Types only if they aren't assigned to any existing user.
To create a User Type:
-
Navigate to Company > Settings > Users
-
Scroll to the User Types area and click Create new type
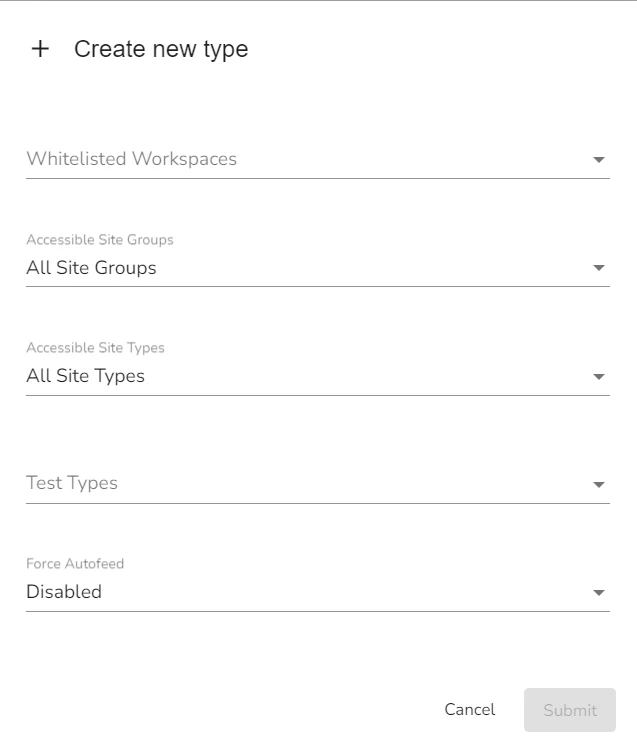
A User Type editing window opens:
-
Type the name of the new User Type
-
From the drop-down menu, select a User Role for the new User Type
-
(Optional) From the drop-down menu, select a default Workspace and whitelisted Workspaces
-
(Optional) From the drop-down menu, select one or several groups the new User Type will have access to
-
From the drop-down menu, check the Site Groups you want to make available to the new User Type
-
From the drop-down menu, select acsessible Test Types
-
From the drop-down menu, select the default Test Type
-
Enable or disable Force Autofeed
-
Click Submit
The new User Type record is added to the User Type list immediately.
If you haven't previously configured any Workspaces or Test types, the default Workspace called Default and the default Test Type called System will only be available.
For details on how to configure Workspaces and Test Types, see section Manage Alarm-Related User Settings.
Edit a User Type
To edit a User Type:
-
Click the edit icon for a particular User Type record
-
Edit the fields as desired
You can edit both preset and custom User Types, changing any values for them.
Delete a User Type
You can delete only custom User Types that are at the moment not assigned to any users.
To delete a User Type:
-
Click the edit icon for a particular User Type record
-
Click the Delete button and type the confirmation
-
Click Confirm delete
The User Type is permanently deleted from evalink talos.
Create a New User Role
To create a new User Role:
-
Navigate to Company > Settings > Users
-
Scroll to the User Roles area and click Add role
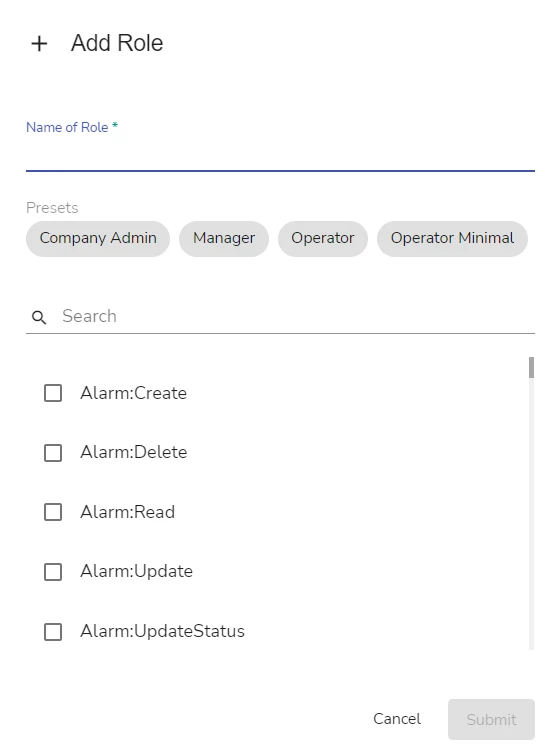
A User Role editing window opens:
-
Type the name of the new User Role
-
Select the set of permissions for the new role using the following options:
-
Select one of the preset User Roles and then add or deselect permissions
-
Manually select the necessary set of permissions
-
The role of Administrator includes all the permissions available.
You can use the Search bar to navigate for the necessary permissions.
- Click Submit
Setting Up Analytics Permissions
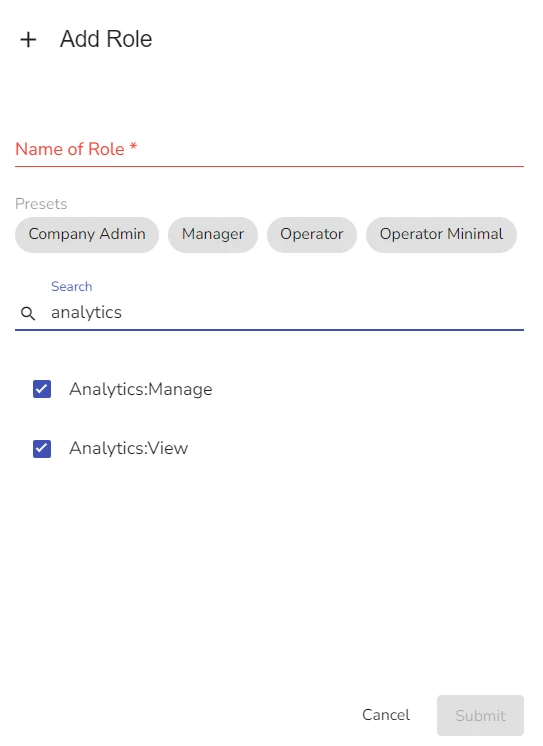
There are two permission options for access to analytics in evalink talos:
- Analytics:Manage
Allows to configure and perform various actions with evalink talos analytics tools
- Analytics:View
Allows to view evalink talos analytics
Both options are present in the complete permission list available for selection or deselection when creating or editing Custom User Roles.
 .
.
For default User Roles, the analytic permissions are assigned as follows:
- Company Admin: Analytics:Manage, Analytics:View
- Manager: Analytics:View
- Operator: None
- Operator Minimal: None
Edit a User Role
You can only edit custom User Roles that you have previously added.
To edit a User Role:
-
Click the edit icon for a particular custom User Role record
-
Select or deselect permissions as desired
-
Click Submit
Delete a User Role
You can delete only custom User Roles that are at the moment not assigned to any users.
To delete a User Role:
-
Click the delete icon for a particular custom User Role record
-
Type in the confirmation and click Confirm delete
The user Role is deleted from evalink talos.
 Link is copied