Link is copied
Configure MQTT
The MQTT integration consists of two functionalities:
- Publishing data to the TNA which will then be forwarded to evalink talos
- Sending data from evalink talos to the TNA which will then publish it on its MQTT broker
Access level 4 is required to enable or disable MQTT integration.
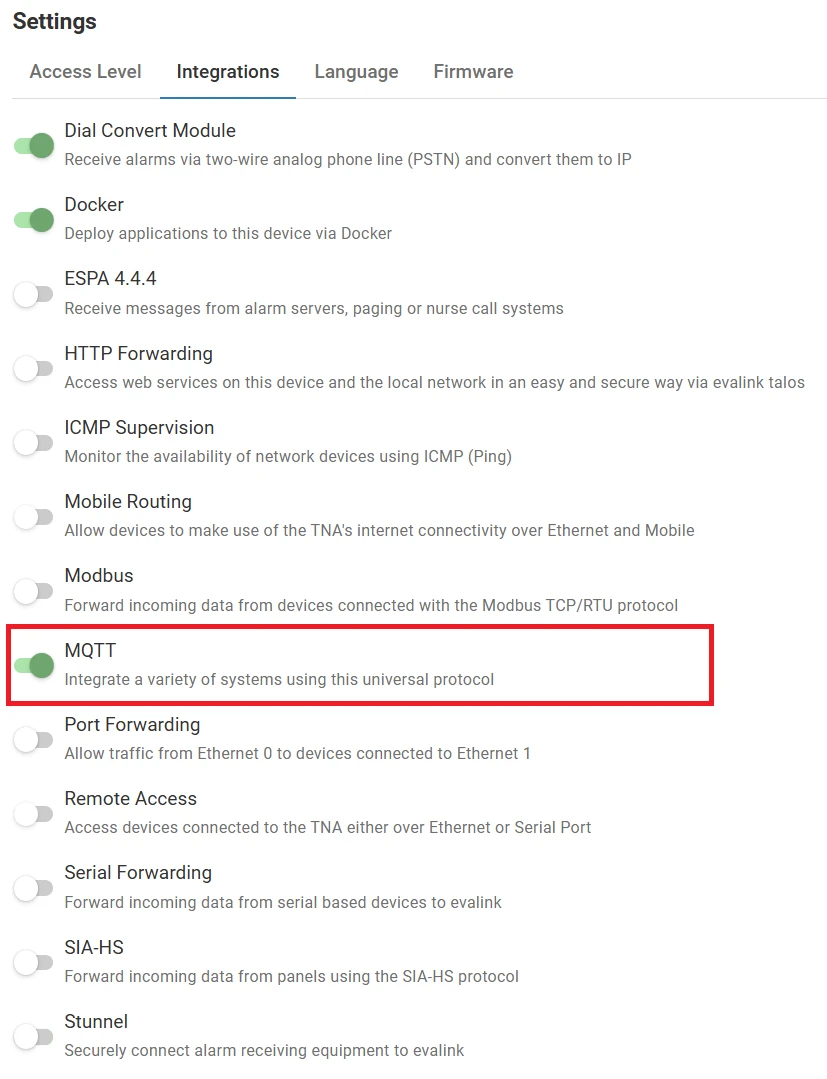
To enable MQTT integration, do the following:
-
On the TNA Web Server, navigate to Settings > Integrations from the top right corner of the page
-
Form the list of integrations, search for MQTT and toggle it
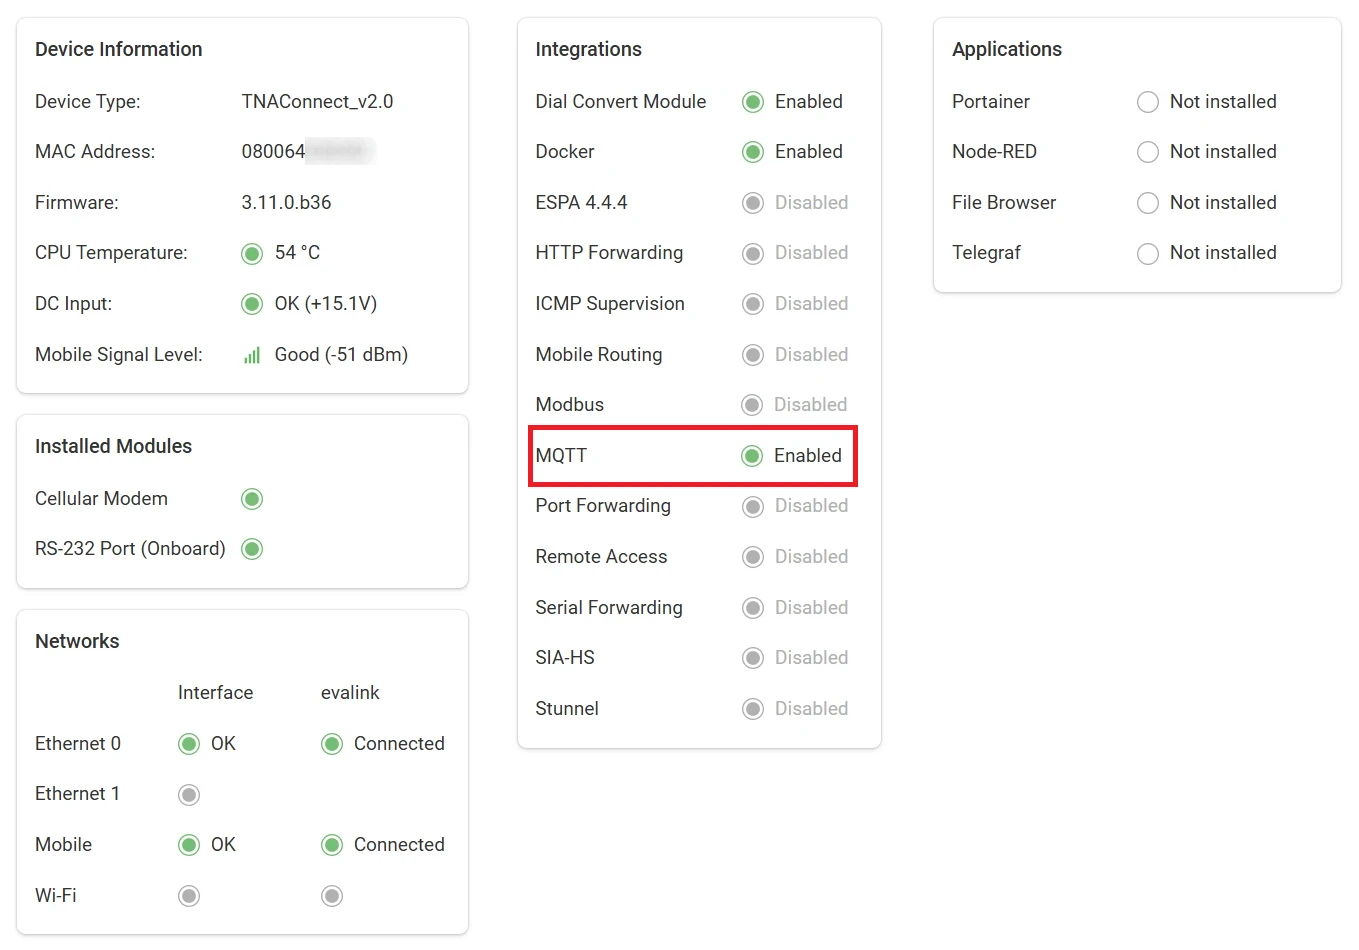
Once MQTT integration is enabled, you can find it under Integrations on the top navigation menu.
The status is also reflected on the Integrations section of the Home page.
Configuration
Access level 3 or above is required to configure MQTT.
To configure MQTT parameters, do the following:
-
On the TNA Web Server, click on Integrations from the top navigation menu and choose
 MQTT
MQTT -
On the configuration tab, configure the following settings:
| Username | The username that will be used to connect to the MQTT broker. |
| Password | The password that will be used to connect to the MQTT broker. |
| Port | The port number for MQTT broker. The values can range from 1024 to 32767. |
| Mode | The mode is responsible for the format of the transmitted message. Raw mode: Messages are forwarded like they arrive. An ID must be provided. Example: 1234[MQTT Test] will arrive as MQTT Test in the DATA format. Sitasys mode: Messages are formatted for Sur-Gard. An ID must be provided. Example: 1234[NBA01] will arrive as Burglary Alarm with Zone = 01 Default value: Raw mode |
| Receive Topic | The MQTT topic to receive messages from end-devices. Default value: sitasys/receive |
| Send Topic | The MQTT topic in which the TNA publishes the received messages from evalink talos. Default value: sitasys/send |
| State Topic | The MQTT topic used by the TNA to report states of received messages from end-devices. Default value: sitasys/state |
| Message Expiration Time | The message is aborted if it is not sent to evalink talos during expiration time. Default value: 12h |
| Generate Message ID | When enabled, the TNA will generate an ID for every incoming message if none is provided. If an ID is present, it will be used and the TNA will not generate one. Default value: disabled |
| Include message ID | When enabled, the message ID received from evalink talos will be added to the messages in the Send Topic. Default value: enabled |
| Allow actor control via MQTT | When enabled, the TNA allows controlling actors via MQTT. For this, the actor must be set to Remote Control. Example: publish the following message to sitasys/tna/outputs/3 to change the state of actor 3: To close: {"state": "closed"}To open: {"state": "open"} |
| Publish sensor states via MQTT | When enabled, the TNA publishes the sensor states via MQTT. Example: when sensor 7 changes its state to closed, the following message is published in sitasys/tna/inputs/7: {"input": "7", "alarmValue": "alarm", "physicalValue": "closed"} |
-
Click on Save
-
(Optional) Click on Undo changes to reset the parameters to their previous values
To improve security, it is highly recommended to configure SSL/TLS on the encryption tab.
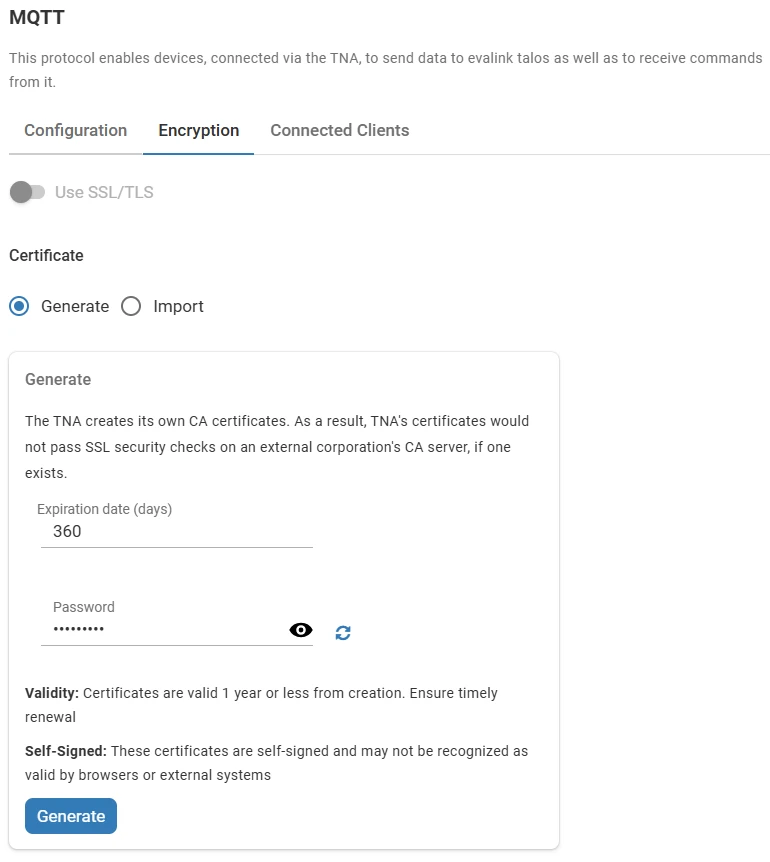
Encryption
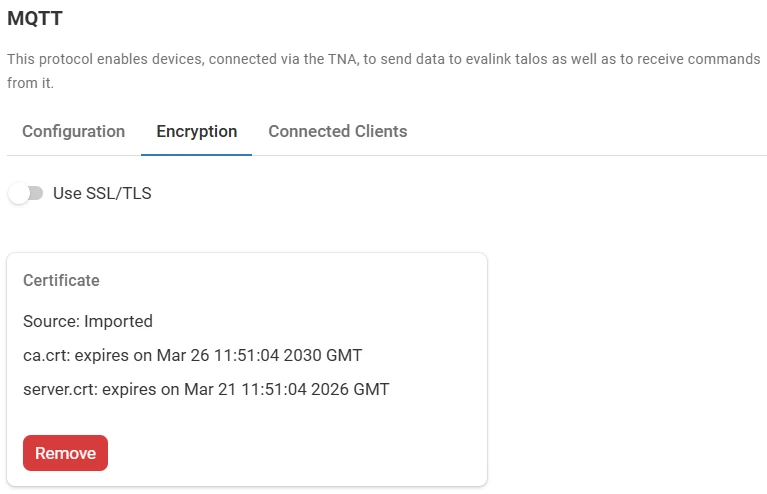
On the Encryption tab, you can generate self-signed certificates or import existing ones. These certificates are used for secure communication. Encryption settings can only be modified when encryption is disabled.
Generate Certificates
-
Navigate to the Encryption tab
-
Under Certificate, select Generate
-
In the Generate section, enter the certificates expiration period in days under Expiration date
-
The Password field is pre-filled with a random value. You can either:
- Click on to view it and use it
- Click on to generate a new password
- Enter your own password manually
- Leave the field empty to generate certificates without password protection
-
Click on Generate to create the certificates
The generated certificates are self-signed and may not be recognized as valid by browsers or external systems.
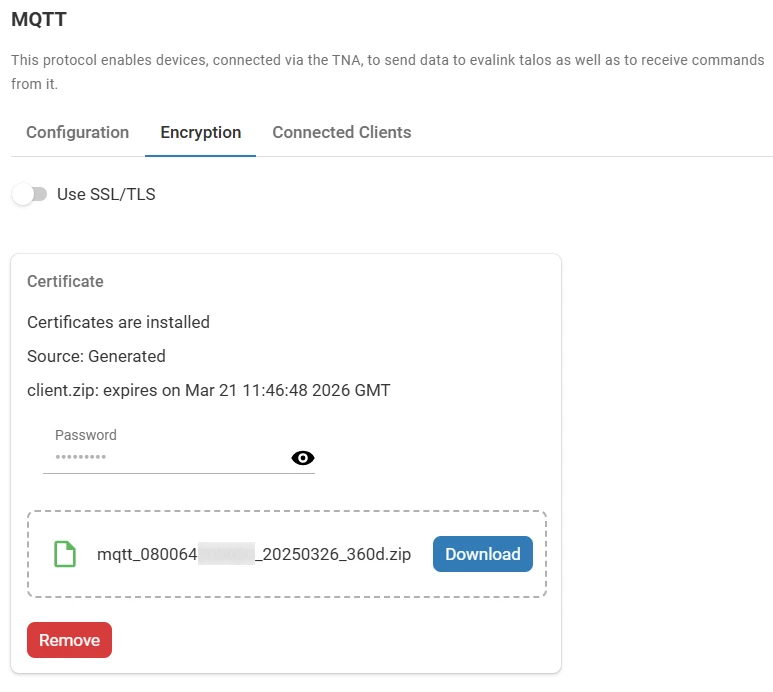
- (Optional) Toggle Use SSL/TLS to enable secure communications
The certificates can be downloaded or removed only when SSL/TLS is disabled.
Every time SSL/TLS is enabled or disabled, the MQTT server restarts.
-
(Optional) Click on Download to download the generated certificates in a zip file
-
(Optional) Click on Remove to delete the certificates
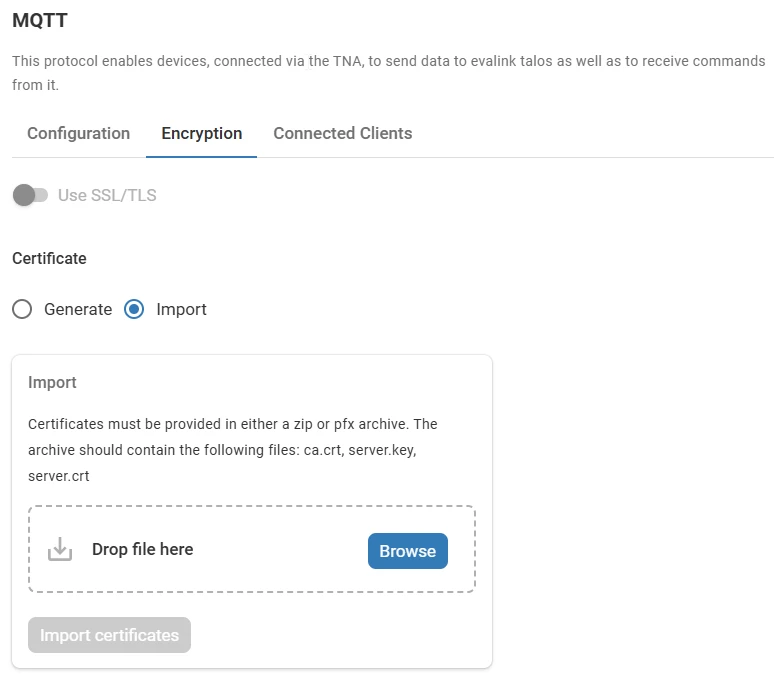
Import Certificates
Certificates must be provided in either a zip or pfx archive.
The archive should contain the following files: ca.crt, server.key, server.crt
-
Navigate to the Encryption tab
-
Under Certificate, select Import
-
Click on Browse or drag and drop a certificates archive (ZIP or PFX format) containing the necessary files
-
Click on Import certificates to upload the certificates
-
(Optional) Toggle Use SSL/TLS to enable secure communications
-
(Optional) Click on Remove to delete the certificates
The certificates can be removed only when SSL/TLS is disabled.
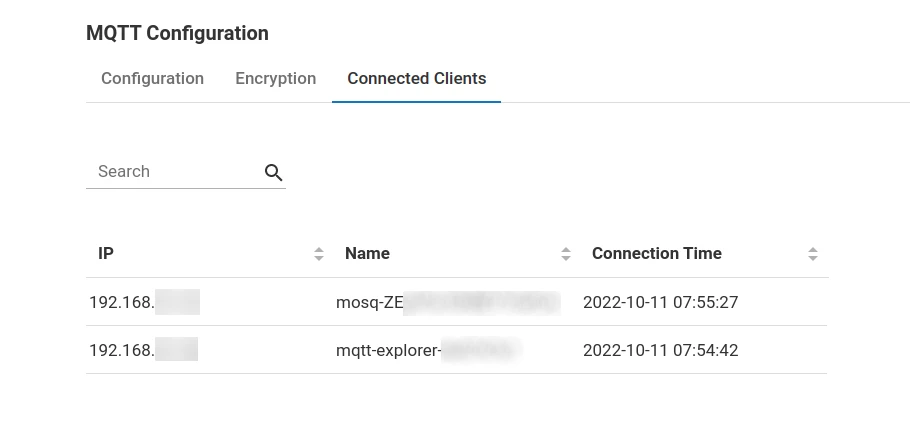
Connected Clients
On the connected clients tab, you can see a table with connected clients. You can search records by IP and Name fields.
The table supports sorting by columns. To sort, click on the arrows next to the corresponding column header.