Work with Virtual Receiver Logs and Version History
All procedures, described in this page, are generic for all Virtual Receivers connected to evalink talos and are done from any instance of a Virtual Receiver.
If there are any specifics of working with Virtual Receiver logs and version history for a particular receiver type, they will be mentioned in the documentation section that is dedicated to that receiver type.
You can access your connected Virtual Receiver records for a particular site by navigating to the Sites > [site] > Receivers tab.
All events for each instance of any Virtual Receiver are recorded into Virtual Receiver logs. For each instance of a Virtual Receiver configured on a site, you can view receiver logs for a set period of time and version history which reflects all the changes to the receiver instance configuration made by evalink talos users.
Logs and version history are maintained for each individual receiver instance. If you have several receiver types connected to your site or several receivers of the same type, each separate receiver instance will have its own logs and version history.
You can access Virtual Receiver logs and version history directly from the relevant Virtual Receiver record.
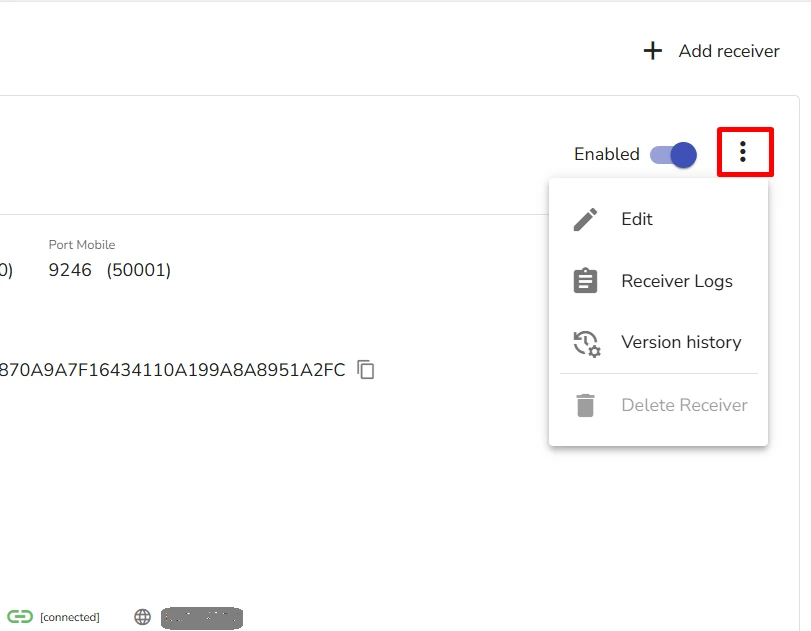
All alarms from Virtual Receivers are also logged into the evalink talos event logs. The log files accessed from a Virtual Receiver Instance contain additional event entries that are not shown in evalink talos alarm logs.
For details about how to work with evalink talos alarm reports and event log reports, see section Working with Reports.
View and Restore a Virtual Receiver Version History
To view receiver version history:
-
Go to Sites > [site] > Receivers > tab
-
Click the icon below the record of the receiver instance

-
In the dropdown list select Version History
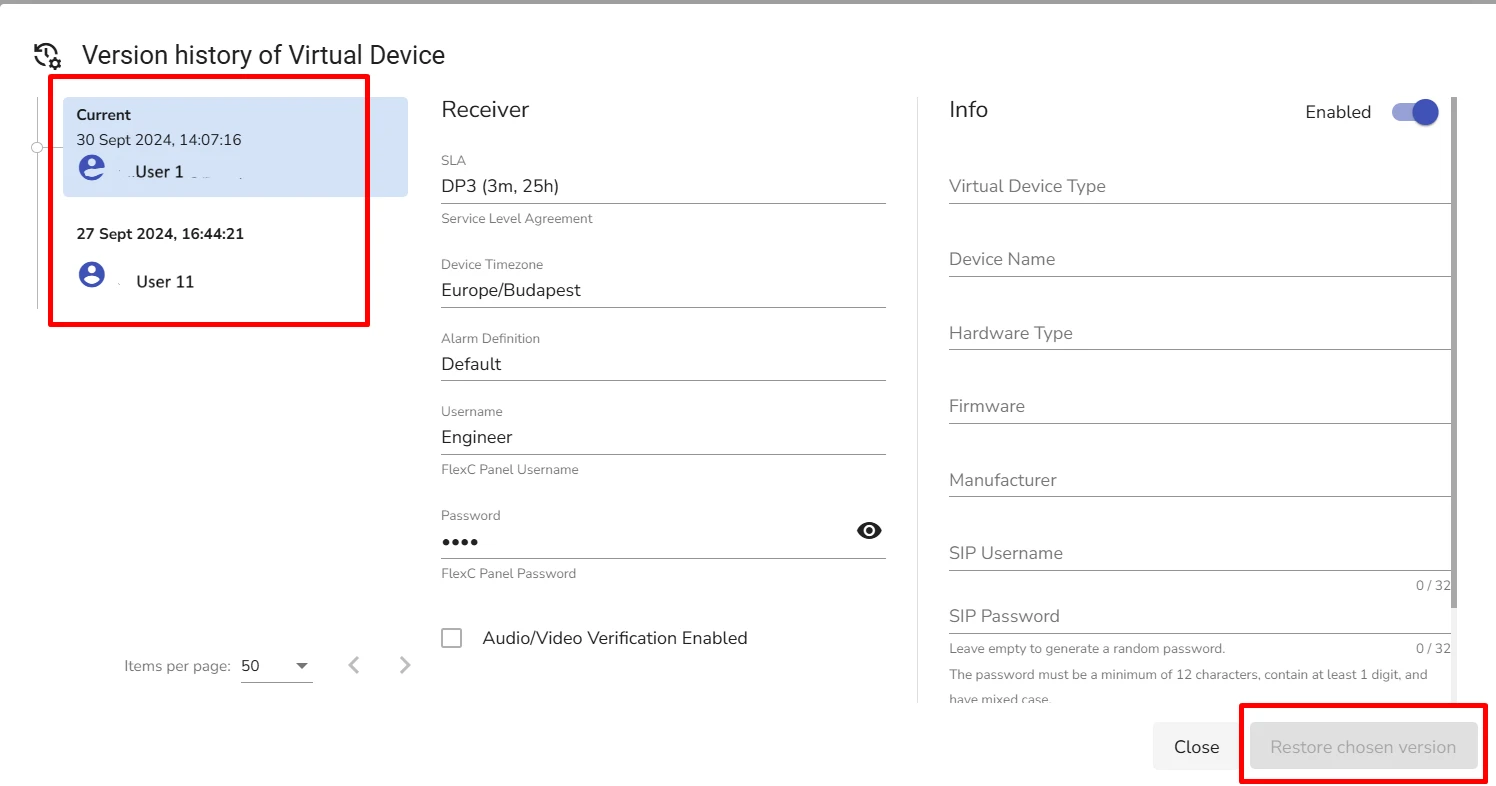
On the left, there is a list of saved versions of the receiver configuration with a date and a user name of the operator who edited the configuration.
-
(Optional) Select the receiver configuration version you want to revert your Virtual Receiver to and click Restore Chosen Version
-
Click Close when you are done.
You can also download receiver logs for a set period of time from the View Receiver Logs dialog windlow.
Virtual Receiver Logs Contents
When you click Receiver Logs button for a particular Virtual Receiver instance, you open a Virtual Receiver log dialog.
The figure below shows Virtual Receiver Logs dialog for a Virtual TNA Receiver:
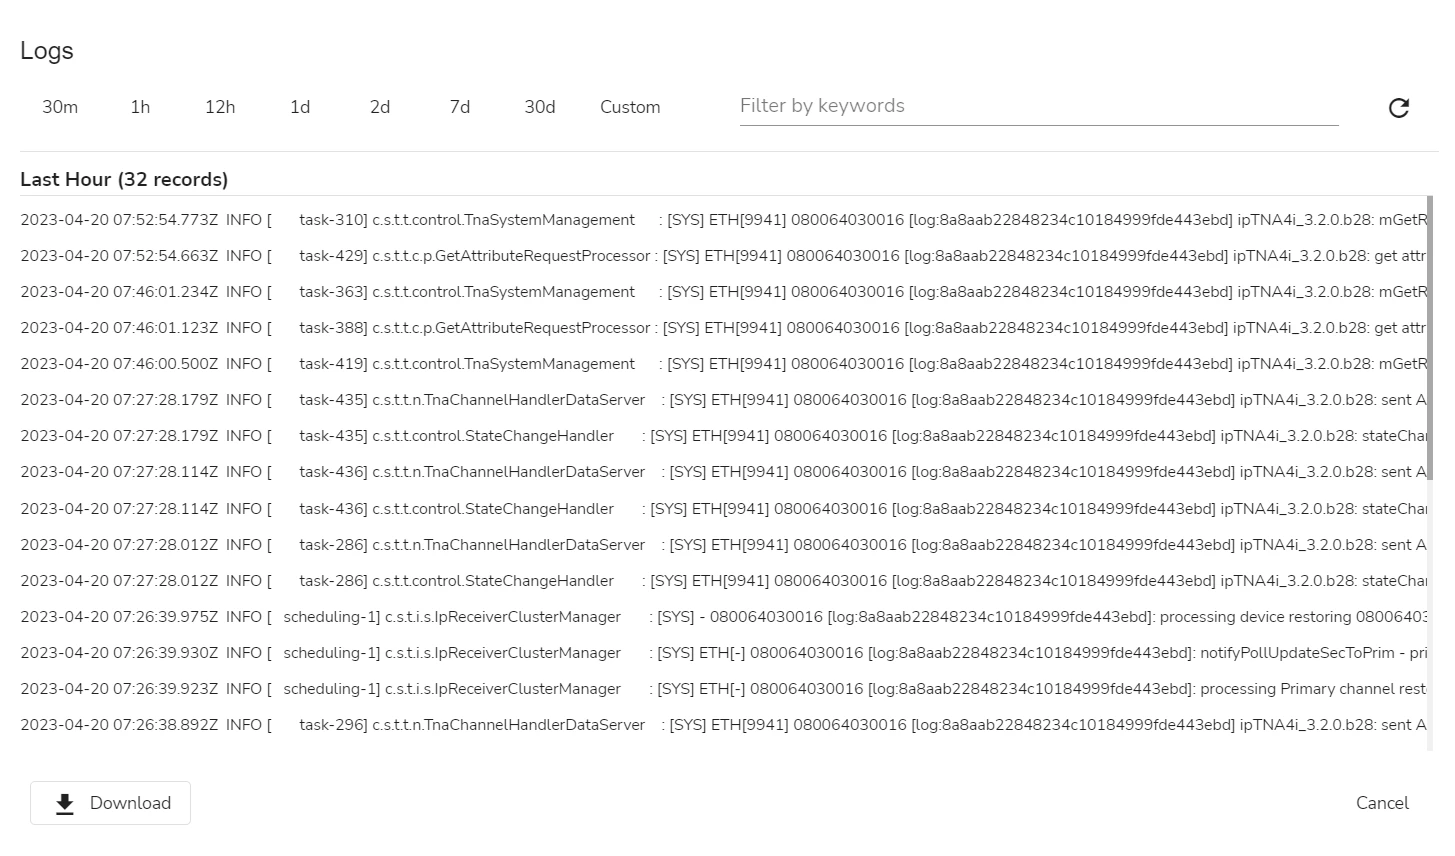
By default, this dialog displays all receiver events during the last hour.
You can select a different time period in the top menu of the Virtual Receiver Logs dialog or set up a custom period by clicking Custom. For details, see section View Virtual Receiver Logs for a Specified Time Period below.
You can also filter logs by keyword. To do so, use the Filter by keywords field. Separate keywords by commas.
If you want to work with a log file outside evalink talos user interface, you can download the logs as a text file. To do so, click the Download button at the bottom of the Virtual Receiver Logs dialog.
Keep in mind, that the downloaded file will contain the logs for the time period that you have configured. If you haven't done any configuration, by default, evalink talos includes events for the last hour into the downloaded log file.
The logs contain event entries from the Virtual Receiver instance as is, which means, they are not interpreted by evalink talos for better readability.
Time stamps for all log engties use GMT time.
View Virtual Receiver Logs for a Specified Time Period
To view receiver logs for a specified time period:
-
In the Virtual Receiver Logs dialog, click Custom
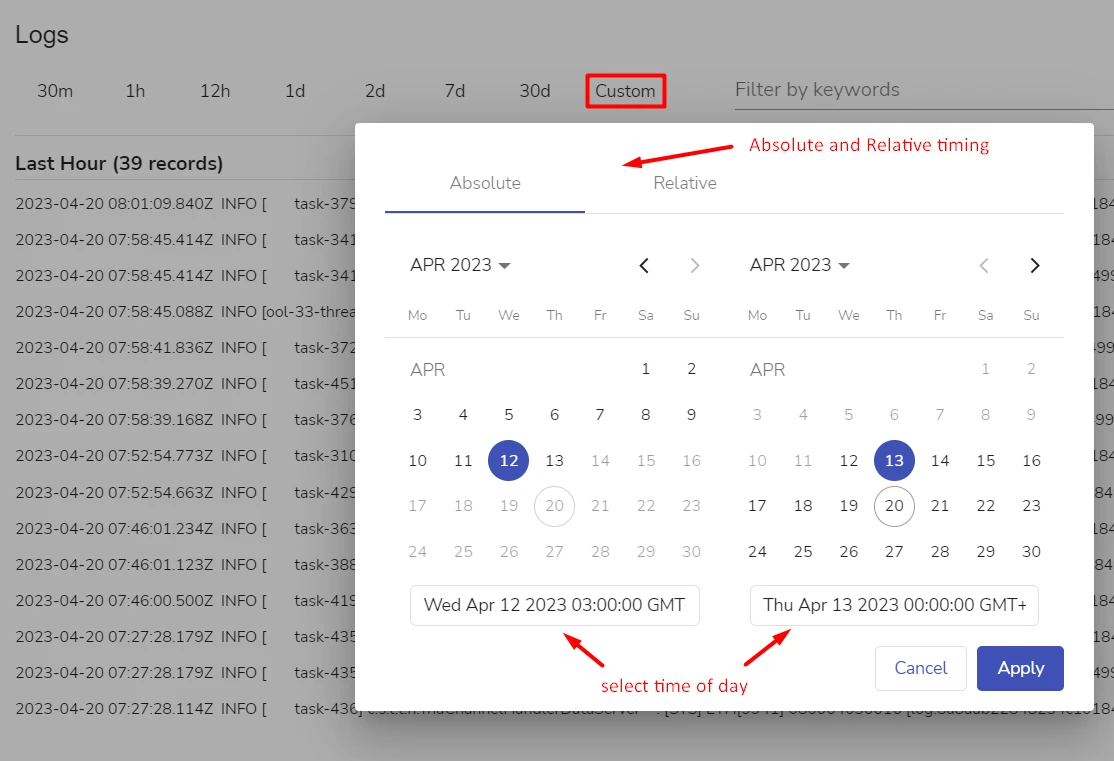
A custom log filter dialog opens:
-
Select one of the following timing tabs:
- Absolute - you can select time and date from the calendar view
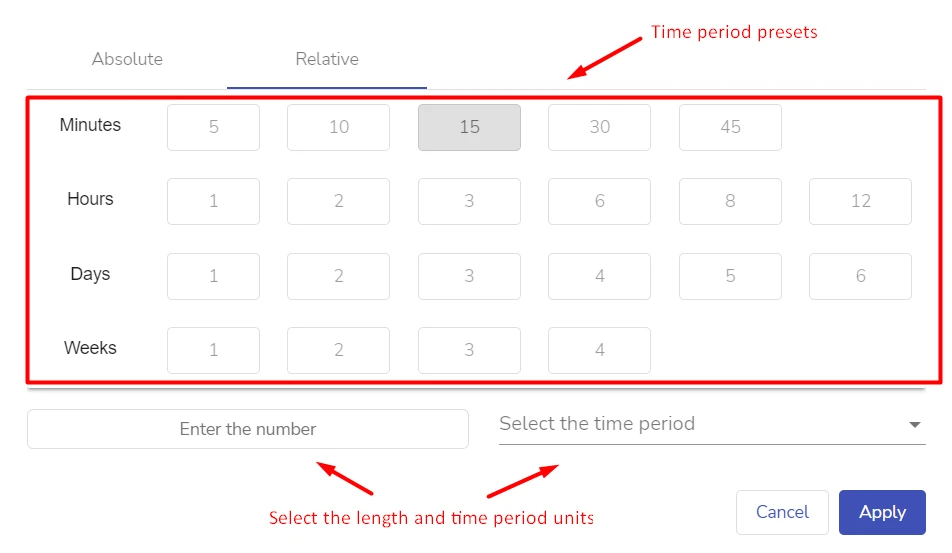
- Relative - you can select the period duration up till the current time
-
If you have selected Absolute view, set the start and end date and time of your time period from the calendar
-
If you have selected Relative view, set the duration and units of the time period or select one of the available presets:
-
Click Apply
When you select a time period that contains a large number of log entries, the loading can take time. If you don't want to wait and want to select a time period with fewer entries, click Stop Loading to abort the load process.

 Link is copied