Automated Decisions
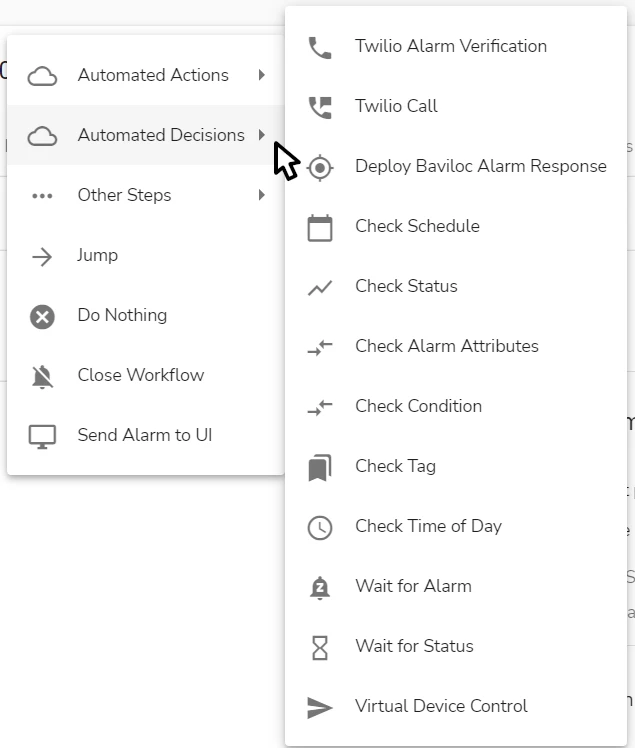
The steps available in the Automated Decisions category are displayed on the figures below:

The picture may not show the full scope of workflow steps available in this menu. Some steps become available only after the corresponding integration is configured in evalink talos.
Check Schedule
Using the Check Schedule step, it is possible to configure a workflow to react differently on the same alarm that arrives:
-
during the certain predefined timespan – for example, during the site business hours
OR
-
outside this timespan
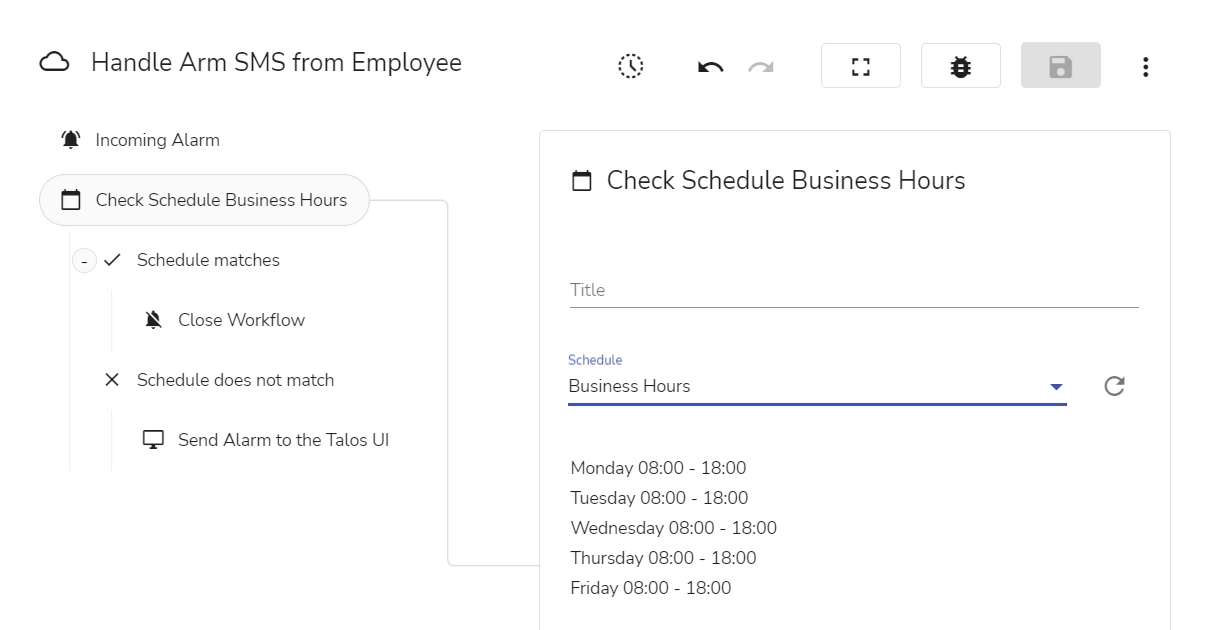
An example of a configured Check Schedule step in the workflow editor (see section Operations with a Workflow > Work with Workflow Steps > Workflow Editor) is shown on the figure below:

To configure the step, add it to the workflow and fill out the following fields in the step details:
-
(Optional) Specify the step title in the Title field
-
In the Schedule field, select one of the configured schedules from the list
The list contains the schedules configured for the current site, for the site group to which the site belongs, global schedules, and Schedule Roles.
When configuring a site-level workflow, select one of the regular schedules. When configuring a higher-level workflow (a site group or a global workflow), consider selecting a Schedule Role. The rationales for using Schedule Roles are described in section Advanced Features in evalink talos > Use of Roles.
warningMake sure to assign a Schedule Role on at least one level of hierarchy: on the site level, on the level of the site group that contains the site, or on the global level. If the role is not assigned, when the workflow runs, an execution error will occur. For details on how roles are used and resolved to particular entities, see section Advanced Feature in evalink talos > Use of Roles > Resolving of Roles.
-
In the left pane of the workflow editor, configure the subsequent steps for the Schedule matches and Schedule does not match conditional branches that appear
Check Status
The Check Status step can be used to configure conditional behavior depending on the state of a particular site status.
For example, a workflow checks the Arm status and:
- if the status state is Armed, perform no action
- if the status state differs from Armed, execute emergency steps
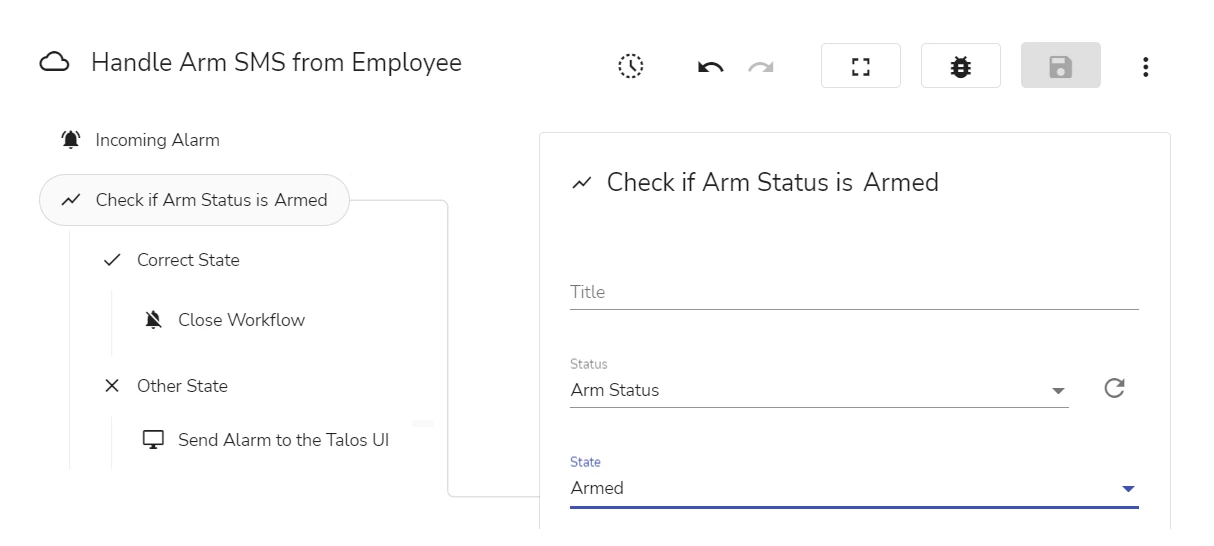
An example of a configured Check Status step in the workflow editor (see section Operations with a Workflow > Work with Workflow Steps > Workflow Editor) is shown on the figure below:

To configure the step, add it to the workflow and fill out these fields in the step details:
-
(Optional) In the Title field, specify the step title
-
In the Status field, select one of the configured site statuses from the list
The list displays the statuses configured for the current site and the Status Roles.
When configuring a site-level workflow, select a regular status. When configuring a higher-level workflow (a site group or a global workflow), consider selecting a Status Role. The rationales for using Status Roles are described in section Advanced Features in evalink talos > Use of Roles.
warningMake sure to assign a Status Role to a status on the site level. If the role is not assigned, when the workflow runs, an execution error will occur. For details on how roles are used and configured, see section Advanced Feature in evalink talos > Use of Roles > Using Roles in Workflows: Required Setup.
-
In the State field, select the state of the status that the workflow will check
The list displays the states configured for the status.
- In the right pane, configure the subsequent steps for the Correct State and Other State conditional branches
More workflow steps will be described in future documentation releases.
 Link is copied