Add a Workflow
In this section and its subsections, the term workflow may indicate a Standard Workflow or a workflow preset (a Workflow Template or a Managed Workflow, see section Workflows Overview > Workflow Types > Standard, Managed Workflows, and Workflow Templates).
The procedures of adding and managing a workflow and a workflow preset (a Workflow Template or a Managed Workflow) are basically similar, the main difference is the page on which the operation is performed (see section Work with Workflows > Workflows Pages and Types of Workflows Available).
The Add Workflow Button
The control button for adding a workflow is provided:
-
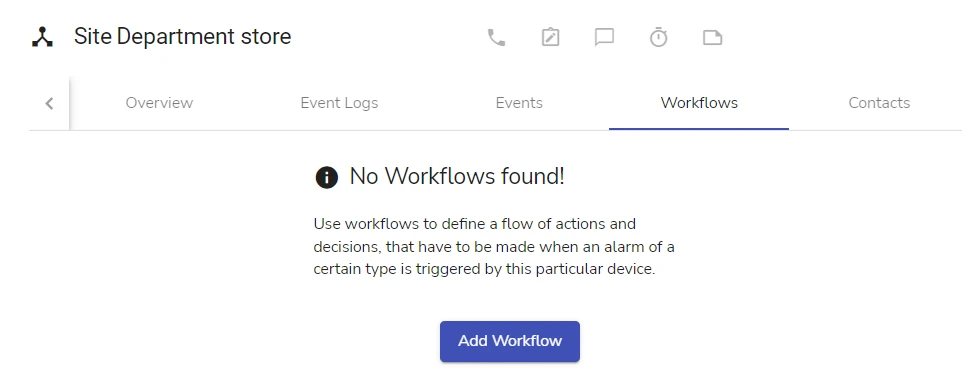
on an empty Workflows page – in the central part of the page. The figure below shows an empty Workflows page of a site as an example
-
on a non-empty Workflows page – to the right of the workflows list (see the figure below)

Start Creating a Workflow
The figure below shows the creation of a Standard Automated Workflow as an example:
More examples are provided in section Workflow Creation Examples.
To perform the initial workflow setup:
-
Go to the corresponding Workflows page (see section Work with Workflows > Workflows Pages and Types of Workflows Available)
-
Click the Add Workflow button (see section The Add Workflow Button)
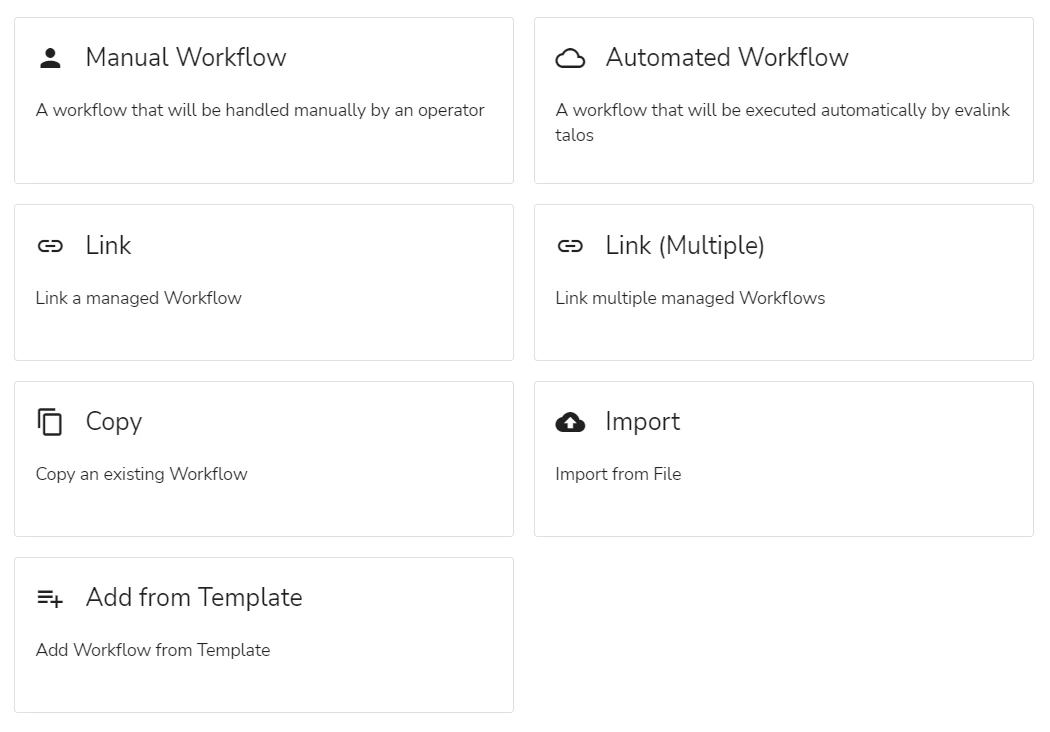
The workflow adding dialog opens. On different Workflows pages, the dialog offers different sets of options:
- on the site Workflows page (Sites > [site] Workflows)
- on Standard Workflows pages of higher levels (Site Groups > [site group] > Group Workflows and Company > Global Workflows)
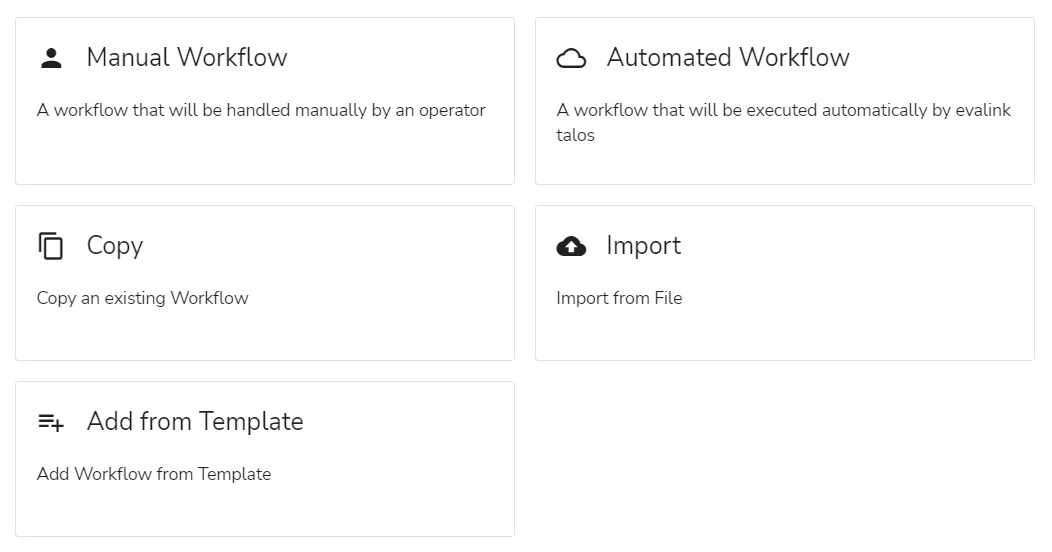
The Link and Link (Multiple) options (see above) are not displayed, since these options are available on site Workflows pages only.
- on Managed Workflows pages (Site Groups > [site group] > Managed Workflows, Company > Managed Workflows) and on the Workflow Templates page (Company > Workflow Templates)
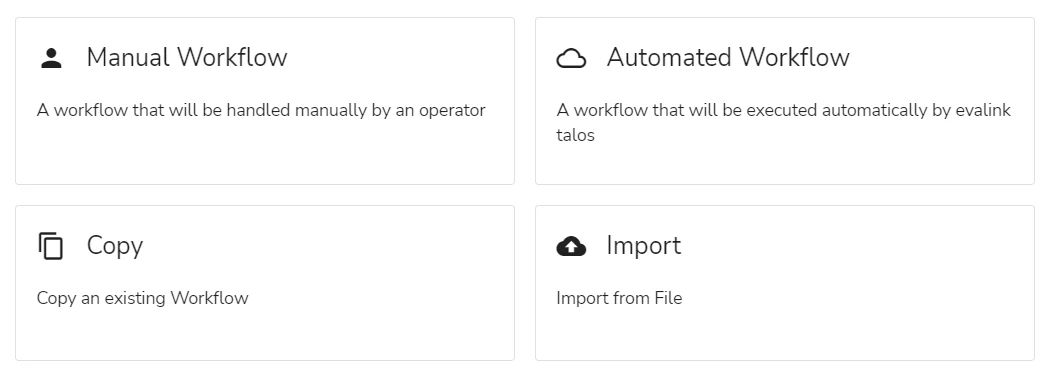
The Add from Template option (see above) is not displayed, since it is available for Standard Workflows creation only.
-
Select the workflow creation option (see the figures above)
-
(Optional, if Import, Copy, Link, Link (Multiple), or Add from Template option was selected) Select the workflow(s) from the list that opens
For tips on copying or importing workflows, see section Copied or Imported Workflows.
For tips on linking Managed Workflows via the Link and Link (Multiple) options, see section Understand which Workflows to Link.
If Link (Multiple) or Add from Template option was chosen, applying the selection finishes the initial workflow setup.
- (For all workflow creation options, except Add from Template and Link (Multiple)) In the dialog that opens:
a. Enter the Name for the workflow
The name must be unique on the current Workflows page. The name can be edited later.
b. (Optional) Set the workflow comment in the text field
For details on using the comment, see section Workflow Incoming Conditions and Workflow Comment > Workflow Comment.
This step can be skipped and performed later, after the workflow creation.
c. (Optional, for Manual Workflows only) Select if the workflow is a Default Workflow or not, by selecting or not selecting the Default tab
Note that a Default Workflow cannot later be converted to a regular workflow with incoming conditions.
For details about adding Default Workflows, see section The Default Property.
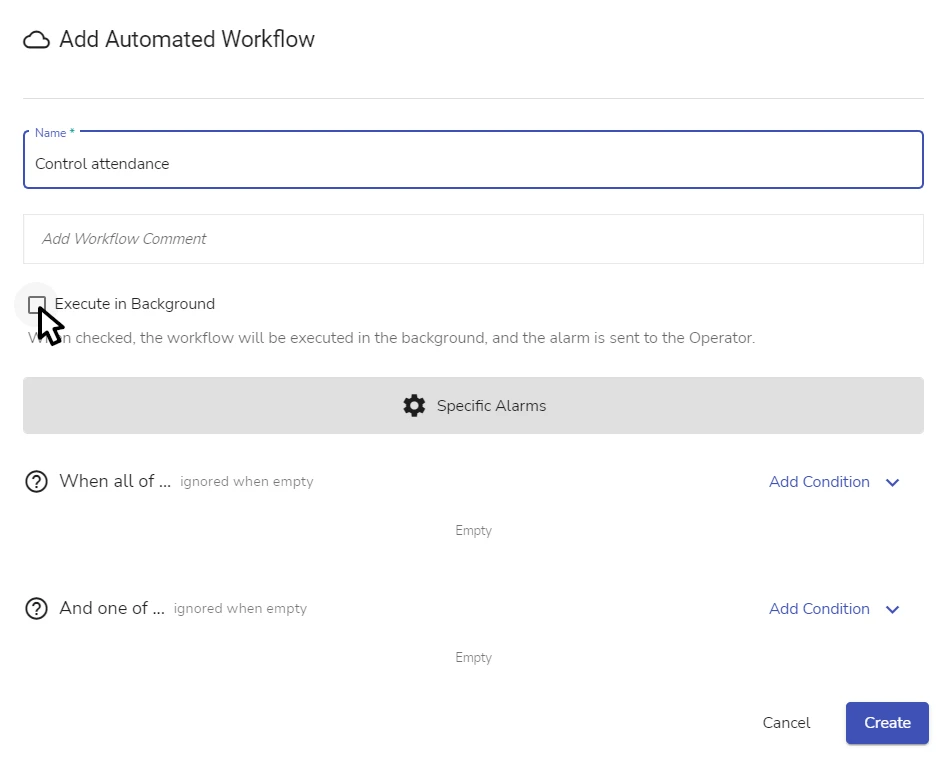
d. (Optional, for Standard Automated Workflows only) Set the workflow as a Foreground or a Background Workflow, by selecting or not selecting the Execute in Background checkbox
For Managed Automated Workflows, the value of the checkbox is read-only and is provided for informational purposes.
See more details about the setting, see section Execute in Background Checkbox.
This step can be skipped and performed later, after the workflow creation.
e. (Optional) Set the incoming conditions for the workflow
This step can also be performed later, after the workflow creation.
For Managed Workflows, this step is available only if the Specific Alarms option was selected. See section Override the Workflow Incoming Conditions or Not for details.
For Default Workflows (see section Workflows Overview > Workflow Types > Default Workflows), this step is skipped.
For details on setting the incoming conditions, see section Workflow Incoming Conditions and Workflow Comment > Workflow Incoming Conditions.
e. Click Create to complete the initial workflow setup
Section Workflow Creation Examples shows how workflows of different types are created.
Finish Creating a Workflow
After a workflow is added to a Workflows page, you can perform the following steps to finish the workflow setup:
- (Optional) Set (if not set) or edit the workflow incoming conditions
This operation is available for all types of workflows, except Default Workflows.
For instructions, see section Workflow Incoming Conditions and Workflow Comment > Set Incoming Conditions for a Workflow.
To edit the incoming conditions of a Managed Workflow linked to a site, you first need to select the Custom conditions checkbox in the Incoming Alarm step of the linked workflow (if not selected). See section Workflow Incoming Conditions and Workflow Comment > Override Incoming Conditions for a Managed Workflow Linked to a Site for details.
- (Optional) Set or edit the workflow Comment
For details on using the comment, see section Workflow Incoming Conditions and Workflow Comment > Workflow Comment.
- (Optional, for all workflows, except Managed Workflows linked to sites) Configure or edit the workflow settings
For details, see section Work with Workflow Settings.
- (Optional, for all workflows, except Managed Workflows linked to sites) Add or edit workflow steps and their settings
For details, see section Work with Workflow Steps.
Roles Use in Workflows
You can use roles (a Status Role, a Schedule Role, or a Contact Role) instead of constant values in certain workflow steps – for example, a Contact Role instead of a direct contact in an Automated Actions > Send Email (see the figure below):
Most typically, roles are used to apply site-specific details (statuses, schedules, or contacts) in the following types of workflows:
-
workflow presets
-
Managed Workflows linked to a site
-
Workflow Templates used for site-level workflows creation
-
-
Standard Workflows of higher level (site group or global) that run on sites
To make use of roles in such workflows, you need to assign each role to a respective entity (a status, a schedule, or a contact) on at least one level: of the respective site, of the containing site group / Organizational Unit, or on the global level.
For details on how roles are assigned, applied and resolved during the workflow operation, see section Advanced Features in evalink talos > Use of Roles.
Specifics of Adding Different Types of Workflows
The subsections below cover some specific cases that need to be described explicitly.
The Default Property
This setting is available in Manual Workflows only.
When creating a Manual Workflow, it is possible to set it as a Default Workflow (see section Workflows Overview > Workflow Types > Default Workflows).
To add a workflow as a Default Workflow, in the workflow adding dialog (see section Start Creating a Workflow), select the Default tab as shown on the figure below:
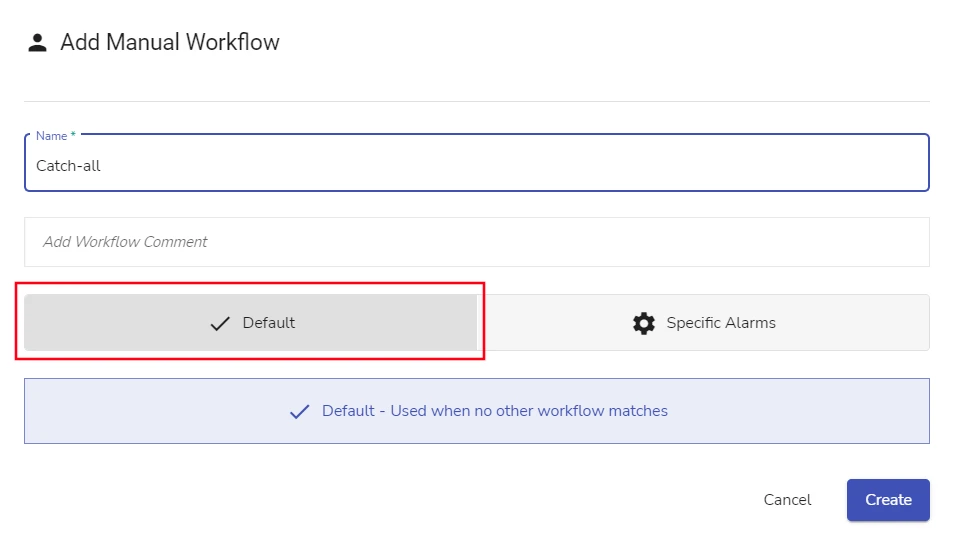
Some Workflows pages can have only one Default Workflow, see the details in section Default Workflows > Default Workflows on Workflows Pages in Workflows Overview > Workflow Types. If a workflow is created on one of such pages, which already has a Default Workflow, the Default tab in the workflow adding dialog is disabled.
It is possible to import, copy, or link a regular workflow, setting it as a Default Workflow. For details, see the note in section Copied or Imported Workflows.
A Workflow that is added to a Workflow page as a Default Workflow cannot later be transformed into a regular workflow with incoming conditions.
A regular workflow also cannot be transformed into a Default Workflow after its creation.
The only exception from these rules is when a Default Managed Workflow is linked to a site with the Specific Alarms (Managed) option selected (see the tip in section Link a Default Managed Workflow).
Execute in Background Сheckbox
This setting:
-
is displayed in Automated Workflows only
-
can be edited for Standard Automated Workflows only. For Managed Automated Workflows, the settings is read-only and is displayed in the workflow adding dialog for informational purposes
It is possible to create a Foreground or a Background Automated Workflow (section Manual and Automated Workflows > Automated Workflows Executed in Foreground and in Background in Workflows Overview > Workflow Types).
A copied or imported Foreground Workflow can be added as a Background Workflow, and vice versa.
This setting is defined by the value of the Execute in Background checkbox in the workflow adding dialog (see the figure below):
-
if the checkbox is not set (a default value when a workflow is created from scratch) – a Foreground Automated Workflow is created
-
if the checkbox is set – a Background Automated Workflow is created
A workflow can be converted from a Foreground to a Background one and vice versa after its creation, by editing the checkbox in the workflow settings area.
Managed Workflows Linking Specifics
Linking Managed Workflows is available on site Workflows pages only (Sites > [site] > Workflows only).
When a Managed Workflow is linked to a site, only the workflow name, the workflow comment, and the workflow incoming conditions can be edited. All other parameters of the linked Managed Workflows are read-only on the site level.
Linking Managed Workflow(s) without editing any settings is also possible, if the Managed Workflows name is unique on the current Workflows page.
Understand which Workflows to Link
Use the Link Option
When you link a single workflow using the Link option (see section Start Creating a Workflow), the Managed Workflows list only displays for each workflow if it is an Automated or a Manual Workflow (see the figure below).
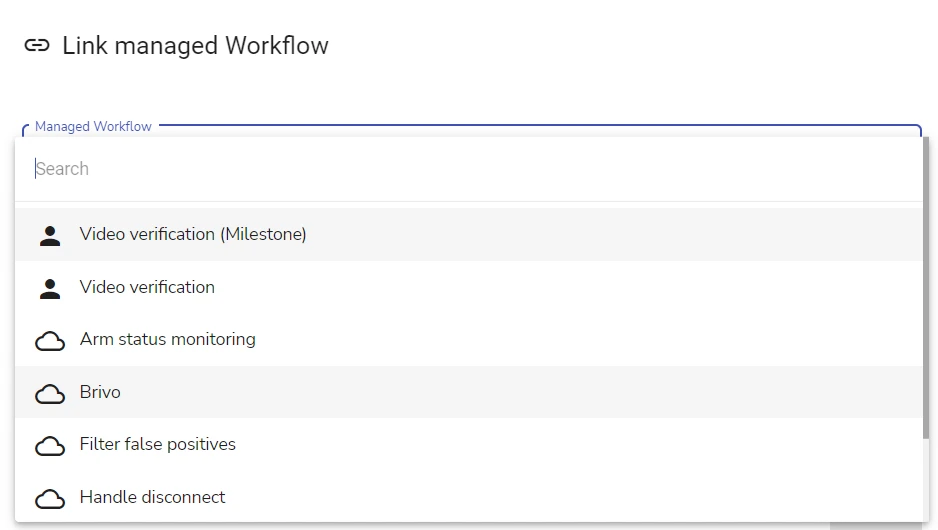
To select a Managed Workflow to be linked to the site, click on it.
Use the Link (Multiple) Option
When you link multiple workflows at once using the Link (Multiple) option (see section Start Creating a Workflow), the list provides the following indications for each workflow (see the figure below):
-
if it is an Automated or a Manual Workflow
-
the level of hierarchy on which a Managed Workflow is created
The Managed Workflows of the containing site group can be identified by the site group / Organization Unit name. Global Managed Workflows have no names displayed next to them.
-
if a Managed Workflow is already linked to the site (the toggle is blue) or not (the toggle is gray)
-
if a Managed Workflow has enabled or disabled status
A disabled Managed Workflow is marked with a strikethrough formatting.
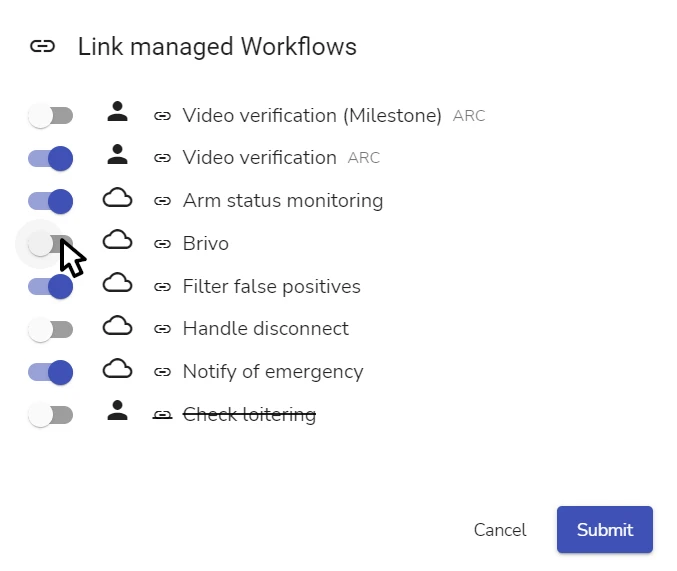
To select Managed Workflows to be linked to the site, move their toggles to active position and click Submit.
You can also unlink the previously linked Managed Workflows if necessary.
Override the Workflow Incoming Conditions or Not
For a Managed Workflow that is linked to a site, it is possible to override the workflow incoming conditions with custom ones.
This option is useful when Administrator or Manager needs, for example, to link the same Managed Workflow to one site several times and target it at different types of alarms.
The steps and settings of a Managed Workflow linked to a site cannot be edited on the site level.
To override the incoming conditions of a linked Managed Workflow:
-
if the Link option was selected in the workflow adding dialog – select the Specific Alarms tab (see the figure below)
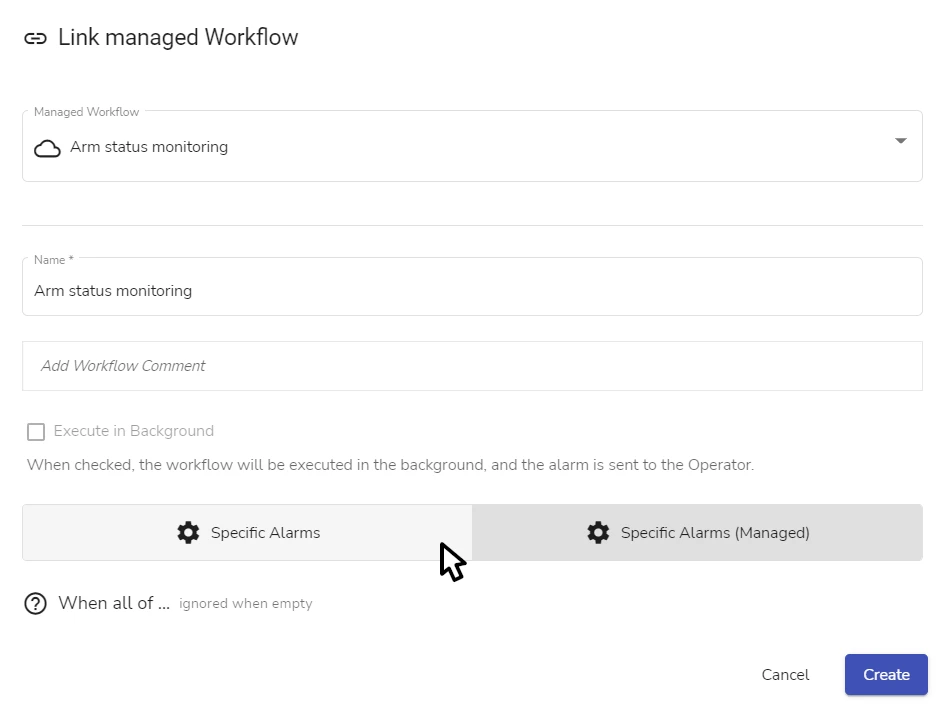
To link the workflow without overriding its incoming conditions, leave the Specific Alarms (Managed) tab selected.
-
if the Link (Multiple) option was selected in the workflow adding dialog – you can only modify the incoming conditions after the workflow creation (see below)
The incoming conditions can be modified on the site level after the workflow is linked.
To modify the incoming conditions of a linked Managed Workflow:
-
On the site level, go to the Incoming Alarm step of a linked workflow
-
Follow the instructions in section Workflow Incoming Conditions and Workflow Comment > Override Incoming Conditions for a Managed Workflow Linked to a Site
The original incoming conditions of a linked Managed Workflow can be restored at any time later.
Link a Default Managed Workflow
This section is applicable to Manual Managed Workflows only.
A Default Managed Workflow is a Default Workflow that was created on a Managed Workflows page (Site Groups > [site group] > Managed Workflows or Company > Managed Workflows). For a definition of a Default Workflow and some basic details, see section Workflows Overview > Workflow Types > Default Workflows and its subsections.
A Default Managed Workflow is a preset – in order to function as a Default Workflow, it needs to be linked to a site.
The general considerations when linking a Default Managed Workflow to a site are as follows:
-
in the most typical scenario, a Default Managed Workflow would be linked to a site as a Default Workflow
For details on adding a Default Workflow (regardless of the workflow creation method), see section The Default Property.
To link a workflow as a Default Workflow, select the Default option (see the figure below):
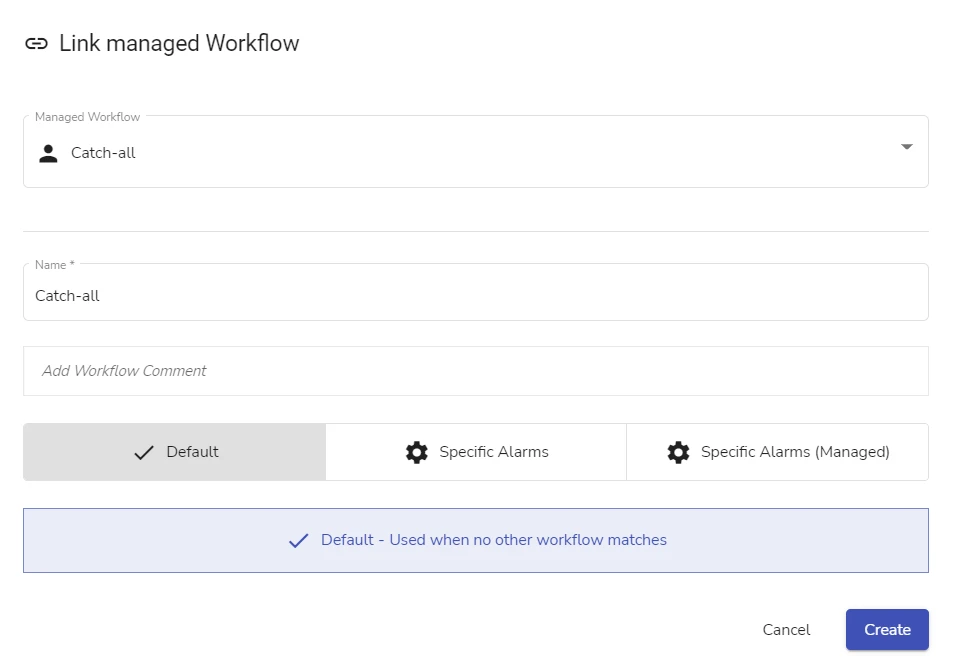
When any workflow is added with this option selected, the general Default property rule applies: the workflow cannot later be transformed into a regular workflow.
-
it is possible to link a Default Managed Workflow as a regular workflow with incoming conditions, overriding the Default property of the Managed Workflow on the site level
To link a Default Managed Workflow as a regular workflow, select the Specific Alarms option (see the figure above).
After selecting the Specific Alarms option, you can specify the incoming conditions for the workflow
-
in the current dialog
OR
-
after the workflow is linked (see section Workflow Incoming Conditions and Workflow Comment > Override Incoming Conditions for a Managed Workflow Linked to a Site)
-
If you select the Specific Alarms (Managed) option when linking a Default Managed Workflow, the linked workflow inherits the Default property.
However, in this case the linked workflow can later be transformed into a regular workflow by selecting the Custom conditions checkbox (see section Workflow Incoming Conditions and Workflow Comment > Override Incoming Conditions for a Managed Workflow Linked to a Site).
This is the only case when the Default property of a workflow can be overridden after a workflow is added to a Workflows page.
If the site Workflows page contains a Default Workflow already, only the Specific Alarms option can be used when linking a Default Managed Workflow.
Standard Workflows Adding Specifics
Copied or Imported Workflows
When a workflow is imported or copied, it inherits the Manual or Automated workflow type, the incoming conditions, the full scope of workflow settings, and the steps of the workflow together with the step parameters.
Some of the basic workflow settings and the workflow incoming conditions can be overridden by Administrator or Manager directly in the workflow adding dialog. These parameters appear in the dialog pre-selected with the values inherited from the source workflow.
These and other workflow parameters can be modified in the workflow editor afterwards.
It is possible to import or copy a regular Manual Workflow with incoming conditions and set it as a Default Workflow. This can be done only if there is no Default Workflow on the Workflows page where the workflow is created. For details on adding a workflow as a Default Workflow, see section The Default Property.
It is also possible to import or copy a Default Workflow, setting it as a regular workflow and specifying the incoming conditions for it.
Note that, after a workflow is copied or imported as a Default Workflow or as a regular workflow, its Default property cannot be changed:
-
a Default Workflow cannot be transformed into a regular workflow
-
a regular workflow cannot be transformed into a Default Workflow
Workflow Creation Examples
Add a Standard Manual Workflow
Add a Standard Automated Workflow
See the figure in section Start Creating a Workflow.
 Link is copied